Showing posts with label cookies. Show all posts

7.06.2011

S'more cookies-revisited

Brad's clinic loves hosting potlucks. The great thing about these potlucks is that everyone is invited, from not only the PTs, PTAs, other clinicians/office staff but the patients as well. Earlier this week, Brad's Clinic Director approached him about throwing us a "baby shower" of sorts which includes the ever popular potluck :o)

Brad asked me if I would be able to make some cookies and after considering what sounded good to me, I decided on s'more cookies. I have made s'more cookies before but I didn't have any Hershey bars here so I started to think about how else I could possibly put these together.

And then I came across a variation of cookie that looked perfect. The base was a chocolate chip cookie, then topped with marshmallow and melted chocolate. Now that I could do based on my pantry. However, what about the graham cracker component? So I opted to make the Chocolate Chip Cookie portion of the previous recipe I had tried since it contained Graham Crackers. However, I also noticed that this made a much softer dough...so I added an extra 1/4 cup of both flour and graham in hopes of thickening it up a bit. It worked somewhat but the cookies, even after baked were pretty soft. I think I'll still tweak it a bit in the future but for now, I'll share what I did.

The consensus was a rich yet delicious gooey treat that everyone loved. The few that I didn't take to the clinic, I have been attempting to restrain myself from eating them all in one sitting. That wouldn't really help with this pregnancy weight gain :op. So yes, a "must do". Just a word of warning...marshmallows are a sticky mess. So be sure to try to keep the marshmallow on the cookie and not overflow onto the sheet. Though my pizza stones were easy to clean (I made sure to wash them right away), it was a mess trying to get the cookies off the stone that had the marshmallow overflow and to try to get those off of the wax paper I put them on (thinking that would help..) was even worse. But still, oh. so. good.
sorry, it's the only picture I have!
S'more Cookies, revisited
adapted and mashed recipe from Baked Perfection and Dear Lillie

1 1/2 cups all purpose flour (I used an additional 1/4 cup)
1 cup graham cracker crumbs (I used an additional 1/4 cup)
1 teaspoon baking soda
1 teaspoon salt
1 dash of cinnamon
1 cup (2 sticks) butter, softened
3/4 cup sugar
3/4 cup brown sugar
1 teaspoon vanilla extract
2 eggs
2 cups miniature chocolate chips

Marshmallows
Chocolate chips

  • Preheat oven to 375 degrees.
  • In a medium bowl combine the flour, graham cracker crumbs, baking soda, salt, and dash of cinnamon. In a second larger bowl beat together the butter, sugar, brown sugar and vanilla extract until creamy. Add the eggs one at a time, beating well after each addition. 
  • Slowly beat in the flour mixture until smooth. Stir in the chocolate chips. Drop by rounded tablespoon onto ungreased cookie sheet.
  • Bake for 8 minutes, and remove from the oven. 
  • Cut marshmallows in half while cookies are in oven. When the cookies are done, place marshmallow halves on top, sticky side down, and return to oven for 2 minutes.
  • While cookies are back in, pour chocolate bits into a microwave-safe container and melt for thirty seconds and stir, then melt for 15 and stir and repeat until they are completely melted.
  • Remove cookies from oven, press the now-puffy marshmallows down with a finger or fork, and spoon or drizzle melted chocolate onto the tops.
  • Let cool, then remove to a cookie rack until completely cooled

1.07.2011

Chewy Sugar Cookies

Because of my love for cooking and my love for America's Test Kitchen, I signed up with ATK to be one of their home "test cooks". Some of the recipes that I get sent to try don't sound all too appealing so I pass them up, but every once in a while I get something that I can't wait to try. Rewind to March of this year.

I received an email from ATK asking me (and I'm sure hundreds of others of course) to try out a new recipe for Sugar Cookies. Their goal was to create "A simple, traditional sugar cookie with a balanced flavor, crisp edges, chewy center, and an attractively crackled top." Lucky for me, we were going to be heading over to a friend's for dinner within the testing range so I decided to whip up a batch.

And they were a hit, time after time, whenever I made them, compliments to the recipe/taste always ensued. And it was confirmed that Cook's Illustrated achieved their goal 100%. So why is it that it is taking me so long to share the wealth with you? Part of being a "test cook" is to agree to not publish the recipe online, in forums, any other types of media, or pass it along to others until the recipe has been finalized and essentially deemed worthy to obtain the Cooks Illustrated/ATK name. Well this past November, that time came and they published the final product in Cooks Illustrated magazine.
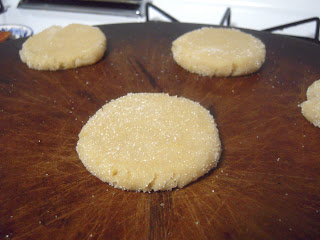
Quick pic of the cookies as we were rushing out the door! I can't seem to find my pics from before....
I was happy to see that the version of the recipe that was sent to me was exactly the same as the published recipe sans the amount of oil being lessened slightly. I think this greatly helps the one problem that I had with the original recipe, dough that was way to sticky. The final recipe still achieves the crisp edge, chewy center, and crackled top that has become such a hit among our friends and family.

Okay, okay, enough babbling already!


Chewy Sugar Cookies
Cook's Illustrated Nov 2010


Makes 2 dozen cookies
The final dough will be slightly softer than most cookie dough. For the best results, handle the dough as briefly and gently as possible when shaping the cookies. Overworking the dough will result in flatter cookies.

Ingredients
  • 2 1/4 cups (11 1/4 ounces) unbleached all-purpose flour
  • 1/2 teaspoon baking soda
  • 1 teaspoon baking powder
  • 1/2 teaspoon table salt
  • 1 1/2 cups (10 1/2 ounces) sugar , plus 1/3 cup for rolling
  • 2 ounces cream cheese , cut into 8 pieces
  • 6 tablespoons (3/4 stick) unsalted butter , melted and still warm
  • 1/3 cup vegetable oil
  • 1 large egg
  • 1 tablespoon milk
  • 2 teaspoons vanilla extract
Instructions
1. Adjust oven rack to middle position and heat oven to 350 degrees. Line 2 large rimmed baking sheets with parchment paper. Whisk flour, baking soda, baking powder, and salt together in medium bowl. Set aside.

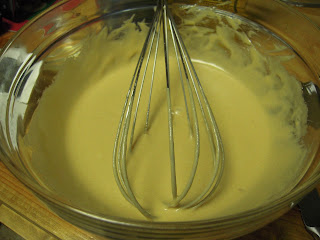
2. Place 1½ cups sugar and cream cheese in large bowl. Place remaining 1/3 cup sugar in shallow baking dish or pie plate and set aside. Pour warm butter over sugar and cream cheese and whisk to combine (some small lumps of cream cheese will remain but will smooth out later). Whisk in oil until incorporated.  
Add egg, milk, and vanilla; continue to whisk until smooth. Add flour mixture and mix with rubber spatula until soft homogeneous dough forms.

3. Divide dough into 24 equal pieces, about 2 tablespoons each (or use #40 portion scoop). Using hands, roll dough into balls. Working in batches, roll balls in reserved sugar to coat and evenly space on prepared baking sheet, 12 dough balls per sheet. Using bottom of drinking glass, flatten dough balls until 2 inches in diameter. Sprinkle tops evenly with 4 teaspoons of sugar remaining in shallow dish (2 teaspoons per tray), discarding any remaining sugar.
4. Bake, 1 tray at a time, until edges are set and just beginning to brown, 11 to 13 minutes, rotating tray after 7 minutes. Cool cookies on baking sheets 5 minutes. Using wide metal spatula, transfer cookies to wire rack and cool to room temperature.


10.26.2010

Perfect Chocolate Chip Cookies

A couple weeks ago, Brad and I started to watch a very yummilicious episode of America's Test Kitchen and how to make some delicious cookies. One that really caught our eye were the "Perfect Chocolate Chip Cookies" because they sounded oh so tasty while describing the baking process on t.v. and looked even better.
 
A moist, chewy cookie with toffee flavors and crisp edges? Yes, your mouth can start drooling now.

So I bought the Ghiradelli chips (they had done a taste test in the same episode and described the dark chocolate flavor with layers of chocolate rather than sporadic chips) but for this reason and that wasn't able to make a batch. That was until this past weekend. We were getting ready to go on a 6 hour road trip to Clare, MI for an old GLMers wedding  (Congrats again Wave and Ginger!)  and I knew we were going to need something to snack on. So, at 9 pm at night I began to construct the "perfect cookie".
Problems? Only one, I have having trouble getting my butter to that rich, warm, brown color however that may have something to do with the fact that I was using margarine rather than real butter. Though the dough offered toffee flavors, the end result only had a hint. One the other hand, So. Many. Compliments! Etch got addicted to them over the weekend and Jumpin' Jack continued to fixate on them for moments after eating one, thinking of how they would taste in a variety of different scenarios and situations. We all decided that these were very close to the best, if not, THE best chocolate chip cookie. Soft, chewy, thick, delicious...I can't wait until I make them again, and I know a large number of people who feel the exact same way.
 
As I mentioned, I did use the recommended chips, Ghiradelli 60% cacao as well as only baked one tray at a time. Perfection!


Perfect Chocolate Chip Cookies:
by America's Test Kitchen

Rich and buttery, with their soft cores and crispy edges, chocolate chip cookies are the American cookie-jar standard. We wanted to refine this recipe to create a moist and chewy chocolate chip cookie with crisp edges and deep notes of toffee and butterscotch to balance its sweetness—in short, a more sophisticated cookie than the standard bake sale offering.

Melting a generous amount of butter before combining it with other ingredients gave us the chewy texture we wanted. Since we were melting butter, we browned a portion of it to add nutty flavor. Using a bit more brown sugar than white sugar enhanced chewiness, while a combination of one egg and one egg yolk gave us supremely moist cookies. For the crisp edges and deep toffee flavor, we allowed the sugar to dissolve and rest in the melted butter. We baked the cookies until golden brown and just set, but still soft in the center. The resulting cookies were crisp and chewy and gooey with chocolate, and boasted a complex medley of sweet, buttery, caramel, and toffee flavors.


Makes 16 cookies

Avoid using a nonstick skillet to brown the butter; the dark color of the nonstick coating makes it difficult to gauge when the butter is browned. Use fresh, moist brown sugar instead of hardened brown sugar, which will make the cookies dry. This recipe works with light brown sugar, but the cookies will be less full-flavored. For our winning brand of chocolate chips, see related tasting.
Ingredients
  • 1 3/4 cups unbleached all-purpose flour (8 3/4 ounces)
  • 1/2 teaspoon baking soda
  • 14 tablespoons unsalted butter (1 3/4 sticks)
  • 1/2 cup granulated sugar (3 1/2 ounces)
  • 3/4 cups packed dark brown sugar (5 1/4 ounces) (see note)
  • 1 teaspoon table salt
  • 2 teaspoons vanilla extract
  • 1 large egg
  • 1 large egg yolk
  • 1 1/4 cups semisweet chocolate chips or chunks (see note)
  • 3/4 cup chopped pecans or walnuts, toasted (optional)
Instructions
1. Adjust oven rack to middle position and heat oven to 375 degrees. Line 2 large (18- by 12-inch) baking sheets with parchment paper. Whisk flour and baking soda together in medium bowl; set aside.
2. Heat 10 tablespoons butter in 10-inch skillet over medium-high heat until melted, about 2 minutes.
Continue cooking, swirling pan constantly until butter is dark golden brown and has nutty aroma, 1 to 3 minutes. Remove skillet from heat and, using heatproof spatula, transfer browned butter to large heatproof bowl. Stir remaining 4 tablespoons butter into hot butter until completely melted.

3. Add both sugars, salt, and vanilla to bowl with butter and whisk until fully incorporated. Add egg and yolk and whisk until mixture is smooth with no sugar lumps remaining, about 30 seconds. 
 
Let mixture stand 3 minutes, then whisk for 30 seconds. Repeat process of resting and whisking 2 more times until mixture is thick, smooth, and shiny.
 
Using rubber spatula or wooden spoon, stir in flour mixture until just combined, about 1 minute.
 
Stir in chocolate chips and nuts (if using), giving dough final stir to ensure no flour pockets remain.
4. Divide dough into 16 portions, each about 3 tablespoons (or use #24 cookie scoop). Arrange 2 inches apart on prepared baking sheets, 8 dough balls per sheet. (Smaller baking sheets can be used, but will require 3 batches.)
5. Bake cookies 1 tray at a time until cookies are golden brown and still puffy, and edges have begun to set but centers are still soft, 10 to 14 minutes, rotating baking sheet halfway through baking. Transfer baking sheet to wire rack; cool cookies completely before serving.
 

7.14.2010

Stargazer Pie

About a week or two ago, Brad and I had the opportunity to host our beloved small group at our apartment. Well little did we know that we would also have severe thunderstorms and tornado warnings that night. Anyway, when I had gotten home from work, I had plenty of time to throw together this little diddy...'bout Jack and Di-a-nne...just kidding ;o) Anyway, I had plenty of time to bake up a couple of goodies and set up the rest of the snacks before people started to show up. And everything was going so smoothly went the Severe Weather Alert came on the radio..and the we turned on the T.V. and saw Tom Skilling and my friend Mark Suppelsa along with his co-anchor (sorry I don't remember your name!) looking somewhat concerned and serious...and then the air raid sirens went off. So we grabbed our keys, flashlights and a couple of folding chairs and headed down to the basement with our weather radio.
(this is NOT my picture, but rather Scott Strazzante, Chicago Tribune / June 23, 2010. I just wanted to include this picture to show you some of the intense clouds since U.S. Cellular is literally blocks from our apartment)
 
Well fortunately nothing ever came of the storm in our neck of the woods..er, city...besides some pretty intense lightening, high winds, and flooding...however it did eat into my prep time. So by the time everything started to calm down, we only had a few moments before people started to show. Luckily, we have some pretty awesome people in our group that totally understood (and who braved the weather to make it out to our place!) and helped me finish setting up. But I am telling you all of this not only because it ended up being a crazy night but rather that in all of the commotion, corners were cut and a slight mistake was made. Okay, enough of the weather talk.

I'm not even sure when or how I came across this but my goodness am I sure glad I did (as are the others who got to taste this treat!). Dozen Flours, in a time crunch, came up with this fairly easy recipe for a delicious and delectable dessert, Stargazer Pie. What compromises did I have to make? Well the truffle layer wasn't able to set for the given time due to the whole tornado siren episode (nor did I cream the butter and cream cheese entirely...I had some tiny lumps). Also, in my running around trying to make sure everything was get for snacks, I did the unforgivable and stepped away from the mixer..while I was making whipped cream. So yeah, the peaks came and almost went before I realized my error. Whoops. So needless to say, the rest of the items that I was supposed to mix into the whipped cream didn't get mixed in when they were supposed to but hey, it still worked. How do I know this? Because everyone said they loved it! Yes, it was rich but oh so delicious. Just next time, I'm going to need to watch that mixer a little more closely. ;o) BTW. I have removed some of the detailed instructions just to pare down the reading but you can still have success without the added details.

Stargazer Pie
created by Dozen Flours

Crust
1 16.5 oz tube of refrigerated chocolate chip cookie dough, softened

Brownie Layer
1 box of Brownie Mix
1/2 cup of cocoa powder, sifted
3 tablespoons of lukewarm water
1/2 cup of vegetable oil
2 eggs, at room temperature
1 teaspoon of almond extract or vanilla

Cream Cheese Truffle Layer
1 cup of milk semisweet chips
4 oz of cream cheese, softened
1/2 stick of unsalted butter

Whipped Cream Layer
2 cups of whipping cream
1 teaspoon of vanilla extract
1/4 cup of powdered sugar, sifted
1/3 cup (give or take) of chocolate curls or other garnish, optional

  • Preheat oven to 350F. Grease a 9 or 9 1/2 inch springform pan with butter.
  • Spread the cookie dough into the bottom of the pan, making one big even cookie. It may be a little on the thin side. Stick it in the freezer.
  • Mix the brownie mix and the cocoa powder together in big bowl with a whisk or large fork. Add the water, oil, eggs, and extract and mix together just until the dry ingredients are absorbed. Be careful not to over mix! The batter will be somewhat lumpy. 
  • Remove the springform pan from the freezer and add the brownie batter right over the top. Bake for 34-38 minutes or until a toothpick inserted into the center of the brownie comes out *almost* clean. You basically want it to where it's not raw in the center and doesn't jiggle when you shake the pan a bit, a tad bit less baked than you would a normal brownie.
  • Remove it from the oven and promptly sprinkle about a 1/3 cup of chocolate chips (from the 1 cup of chips listed above) over the top. Let it sit for a minute or two and once the chocolate chips are soft, evenly spread them over the top of brownie's surface. Allow it to cool on the counter. 

forgive the bluriness of the photo..there was a lot going on that night as you can imagine and apparently I didn't take the time to pay attention as to whether or not I was actually getting "good" pictures 
  • While the pie is cooling, microwave the remaining chocolate chips on low power on 30 second intervals until the chips are melted, stirring well each time. Set aside. Cream the butter, and cream cheese together for 1 minute. Add the vanilla and stir again. Add the melted chocolate, one big teaspoonful at a time until it's incorporated into the cream cheese. Spread the cream cheese mixture over the top of the pie and store it uncovered in the refrigerator for an hour.

  • About an hour or two before you're ready to serve the pie, whisk the whipping cream on high speed until soft peaks form. Add the vanilla and the powdered sugar and mix again until combined. Spread evenly over the top of the pie. Grate chocolate directly over the top, sprinkle chocolate curls, or embellish with chocolate sprinkles. Cover and put it back in the refrigerator for at least 1/2 an hour.
  • When you're ready to serve, Gently remove the ring and serve let it come to room temperature at least a half an hour before serving.

2.25.2010

Valentine's Day Cookies

I found this recipe a couple years ago on An American Housewife. They are more of a crispy cookie, though I always try to roll them out a bit thicker for Brad since he prefers the softer types. Anyway, I have made this recipe a couple of times and I tend to like the results. Last year I used this recipe (with a flower cookie cutter), stuck in some skewers and had my kindergarteners use them to make edible bouquets after decorating them themselves. They then stuck them in a flower pot they had painted along with floral foam and "moss". The mothers loved them and I stuck the idea in the back of my mind to make a cookie bouquet myself at some other time down the road.
Well, since we were going to Michigan over Valentine's Day this year, I decided at the last minute to whip up some bouquets to give as gifts. In the whirlwind of activities, I forgot to take pictures of all of the different bouquets but I think they turned out alright. Though Royal Icing is nice to pipe with, I think perhaps next year I will try to make a softer frosting for the cookies that will still harden somewhat. I will have to say though, another plus about the Royal Icing was that in the car, the cookies could rub against each other and their designs were will intact.


An American Housewife's Sugar Cookies
by An American Housewife

  • 3/4 c sugar
  • 6 T butter
  • 1/3 c shortening
  • 1 large egg
  • 1 T milk
  • 1 t vanilla
  • 2 c flour
  • 1 1/2 t baking powder
  • Dash of salt
  1. Cream the sugar, butter and shortening. 
  2. Add the egg, milk and vanilla. 
  3. Add the flour, baking powder and salt then mix just to blend. 
  4. Chill dough for at least 2 hours. 
  5. Roll about 1/4 inch thick on a lightly floured surface and cut into shapes. 
  6. Bake on parchment lined cookie sheets for approximately 8 minutes at 370 degrees.
  7. Cool.
An American Housewife's Royal Icing

  • 4 c confectioners' sugar
  • 3 large egg whites
  • 1/2 t cream of tartar
  • 1/2 t vanilla
  • 1 T water

Beat 6 minutes on high
(add more or less water depending on stiff it is and how stiff you want it).

8.26.2009

Chocolate Peanut Butter goodness

So this week Brad and I had snack duty for our small group. For some people they may not think twice about this opportunity but for me, it gives me an excused to come up with something that I may not ordinarily make (since I am able to feed 8+ people instead of just 2). Anyway, I was trying to come up with something with some knock off Nutella that I bought (more about that later) and ended up coming up with the idea of stuffing a cookie somehow with this "Nutella". Perhaps even a chocolate cookie?

I started looking around the internet to see if I could come up with a basic stuffed cookie recipe and I came across this "Magic in the Middles" recipe from RecipeGirl. Now, to me, chocolate and peanut butter are always a winning combination but I had something even better in our pantry. I had Dark Chocolate Peanut Butter. That's right, chocolate flavored peanut butter. Needless to say, I decided to save my "Nutella" for something else and get to crackin' on making these cookies using my Dark Chocolate Peanut Butter because as much as I love that combination, this jar was just sitting on our shelves practically untouched.

Let me say, de-lish! Especially a couple minutes after coming out of the oven. They were soft with just the right balance of chocolate and peanut butter. I couldn't wait to take them to group. And guess what, they liked them! I know, I know. Big surprise ;o)

Alright, so do I have any side notes? The biggest thing I changed about this recipe was of course the type of peanut butter I used. Other than that, I pretty much stuck to what RecipeGirl had to say. Any other comments I can think of I'll post between some yellow parentheses as they come to me. Sound like a plan? Cool...Oh, and I apologize about the photos...My hands were sticky from the dough and I was in somewhat of a hurry.

Magic in the Middles
from RecipeGirl

DOUGH:
1½ cups (6¼ ounces) unbleached all-purpose flour
½ cup (1½ ounces) unsweetened cocoa powder
½ tsp baking soda
¼ tsp salt
½ cup (3½ ounces) granulated sugar (plus extra for dipping)
½ cup (4 ounces) brown sugar, packed
½ cup (4 ounces or 1 stick) unsalted butter
¼ cup (2 3/8 ounces) smooth peanut butter (I suggest you try Dark Chocolate Peanut Butter)
1 tsp vanilla extract
1 large egg

FILLING:
¾ cup (7 1/8 ounces) smooth peanut butter (again, Dark Chocolate Peanut Butter)
¾ cup (3 ounces) powdered sugar

1. Preheat oven to 375°F. Lightly grease (or line with parchment) two baking sheets.

2. Prepare dough: In a medium bowl, whisk together flour, cocoa, baking soda and salt. In another medium bowl, beat together sugars, butter, and peanut butter until light and fluffy. Add vanilla and egg, beating to combine, then stir in dry ingredients, blending well.

3. Prepare filling: In a small bowl, stir together peanut butter and powdered sugar until smooth. (I actually decided to do this with the Kitchen Aid because me trying to mix it together myself just wasn't cutting it. Not only was it fast but the sugar incorporated with the peanut butter much better) With floured hands, roll the filling into 26 one-inch balls (When making chocolate cake/cookies, mix a bit of cocoa powder into your flour so that it blends in well with your baked goods. You wouldn't want streaks of white to mess up your presentation would you?).

4. Shape cookies: Break off about 1 Tbsp. of the dough, make an indentation in the center with your finger (I just flattened it like a pancake almost), and press one of the peanut butter balls into the indentation. Bring the dough up and over the filling, pressing it closed; roll the cookie in the palms of your hand to smooth it out. Repeat with remaining dough and filling. (I did use my Tablespoon to measure the dough out and let me tell you, I had just enough dough for all 26 of my peanut butter balls. RecipeGirl was spot on!)

5. Dip the top of each cookie in granulated sugar and place on prepared baking sheets about 2 inches apart. Grease the bottom of a drinking glass and use it to flatten each cookie to about ½-inch-thick.

6. Bake cookies for 7 to 9 minutes, until they’re set (They will come out quite soft but they will set up once they are cooled. You want to be very careful when making chocolate cookies since it is harder to tell if they are burning or not). Remove them from the oven and cool on a rack.

Yield: About 26 cookies

6.25.2009

S'more Cookies!


The past week or so, I have been craving marshmallows like none other. Lucky for me, we have an entire bag of both regular and minis. Unfortunately for me, we all know that marshmallows are not the healthiest snack on the block and thus I have made myself not indulge on the craving. I think it all started when I was talking to my newly appointed partner to decide on what we would cook with our kids during our playshop (Now that the school year is over, I am a step-up supervisor for a summer day camp). We had both decided that we would make "ice cream in a bag" with a type of cookie or something to go with it. Maybe even a s'more bake of some sort? Well later that day I came home to my trusty laptop and began my research. Sure, there were s'more bars out there but they required marshmallow fluff...which we didn't have since we had already given our shopping list to our coordinators and they had bought us a bunch of marshmallows. (wait, can you make marshmallow fluff at home? hmm...I'm going to have to look into that...) Either way, I found this yummy looking recipe over at Cookie Madness for s'more cookies. And that is where the fun began...

You see, this past week, Chicago has been in the middle of a major heat wave with mid-90's temps and the heat index well above that. Mixed with the fact that our apt does not have air and that baking requires a hot stove...well, I'm sure you can get the picture, runny dough, melting chocolate, just to name a few. The dough was not as stiff as cookie dough normally is (which I'm thinking the extreme heat was a factor though I do intend to make another batch with a little extra flour and/or some baking powder), they turned out alright visually despite their odd shapes due to them not wanting to cool on the sheet because it was just that hot inside our kitchen and me trying to transfer them to a wire rack. I then took them to our small group meeting and everyone loved them.


S'more Cookies
by Cookie Madness


3/4 cup softened butter (1 1/2 sticks)
1/2 cup sugar
1/2 cup brown sugar, packed
1 egg
1 tsp vanilla extract
1 1/4 cups flour
1 cup graham crackers
1/2 tsp salt
1/2 tsp baking soda
1/2 cups semi-sweet chocolate chips (I used mini chips)
1 cup mini marshmallows (I used slightly more than a cup)
2 Hershey bars, chopped up

Preheat oven to 375ºF.

In a stand mixer, combine the butter and sugars until fluffy. Mix in egg and vanilla until combined. Add the flour, graham crackers, salt, and baking soda, and mix well. Stir in the chocolate chips.

Drop by rounded tablespoon onto cookie sheets (I didn't use parchment, and one tray of cookies stuck a bit to the sheet, but the other was fine, so you may want to use parchment just in case). Bake for 8 minutes, and remove from the oven. Push 3 to 4 marshmallows and a few pieces of hershey bar into each cookies. Return to the oven and bake an additional 3-4 minutes until fully cooked. Cool cookies on a wire rack.

Makes 3 dozen cookies.