10.18.2011

Apple Muffins

It's been a while...I know, I know. I have been baking and cooking I promise. Sometimes I remember to take pictures, and sometimes I don't...who would have thought that it would be so "difficult" to keep up a blog with a newborn :op

Anywho, the three of us went on our first vacation the other week to New York where we got to lounge around, explore western New York, visit Niagra and...go apple picking! Of course we got a ton of apples and I couldn't wait to get them home to bake something! Now, last year I had tried to make apple cinnamon muffins and they turned out pretty horrific. And this year, I vowed to try again.
So glad that I did because the recipe that I used this time is definitely a winner. LOVED it! I haven't been able to stop eating them and neither has Brad. I made them this past Saturday, and in the past 3-4 days, just the two of us have eaten 19. Yikes. Oh, and my brother ate 1 when he came over this morning.
The recipe was simple enough. I didn't do anything different except kept the peels on the apple only because 1) I didn't read that you were supposed to peel them until after I cut the first one and 2) You never know when the "Big Boy" is going to wake up so I was trying to be as fast as possible and peeling would have just created an extra step. Also, the recipe said it would make 18 but I ended up with the 20. Definitely didn't mind having the extra two! And two of our apples yielded 3 cups, but we picked pretty large apples. Oh, and 24 mins wasn't long enough for me but perhaps that was due to high moisture content of orchard apples? Not sure, just don't be alarmed.
Apple Muffins
found on The Girl Who Ate Everything (recipe by Marissa Pinon)

 
2 cups sugar 
2 eggs
1 cup oil
1 Tablespoon vanilla
3 cups flour
1 teaspoon salt
1 teaspoon baking soda
1 teaspoon cinnamon
3 cups peeled, cored, diced apples (around 3 apples)
Brown sugar for topping (around 1/2 cup)

Directions
  • Preheat oven to 350 degrees and line muffin pan with paper liners.
  • Cream together sugar, eggs, oil, and vanilla. 
  • Sift flour, baking soda, salt, and ground cinnamon.
  • Add dry ingredients to creamed mixture and mix until combined. The batter will be very thick. Add the diced apples.
  • Fill paper liners almost to the top, about 3/4 of the way full. Sprinkle with brown sugar.
  • Bake at 350 degrees for 20-24 minutes. Makes 18 muffins. 

9.26.2011

Flat Pasta with Creamy Corn

Every once in a while, I'll catch an episode of Rachael Ray. There are times when I think her "That's what is for dinner tonight" dishes are a little too crazy for me, that and they incorporate something that I'm not a fan of.

Well for whatever reason, this one caught my eye. And I knew I definitely wanted to make it.

I have made this a couple of times now...Each time perhaps a little different than the first. I have used both corn on the cob and frozen corn (when not in season), peas, edamame, or a combination of both. Also, the flat pasta is a bit too costly for my preference so I usually use something along the same lines. The night I took these pictures it was bowtie pasta but I have also used egg noodles. Oh, and I haven't been able to find a Fresno chili so I usually get Anaheim. I figure, "Hey, they are both California cities [that I've been to], so they work right?"

But no matter what I do, it has always been delicious! This is absolutely one of my favorite "quick" meals that I feel like I'm actually eating somewhat healthfully since it has so many veggies in it. Though perhaps with the bacon...and the butter... ;o)

Flat Pasta with Creamy Corn
by Rachael Ray

Ingredients

  • 6 ears corn on the cob, husked
  • 2 tablespoons extra virgin olive oil (EVOO)
  • 1/4 pound pancetta or lean, center-cut bacon, finely chopped
  • 1 Fresno chili pepper, seeded and finely chopped or 1/2 small sweet red bell pepper, finely chopped
  • 2 tablespoons thyme, chopped
  • 1 small red onion, very finely chopped
  • 3-4 cloves garlic, finely chopped
  • 1 cup shelled fava beans (when available – remove from pod, parboil 5 minutes in shell) or defrosted shelled edamame or lima beans
  • 1/2 cup dry white wine or chicken stock
  • 3 tablespoons butter
  • 1 pound egg tagliatelle, such as Del Verde brand, or other wide-cut pasta
  • 1/2 cup flat leaf parsley, finely chopped
  • Grated Parmigiano Reggiano or Pecorino Romano cheese, for topping

Preparation

Into a large bowl, scrape the corn off the cobs, as well as the cobs themselves, for their sweet, starchy juices.

Heat a large skillet over medium heat and bring a large pot of water to a boil for the pasta.

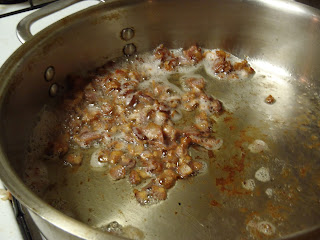
Add the EVOO to the hot skillet and add the pancetta or bacon. Cook to render the fat and crisp, 3-4 minutes.
Add the corn and juices and stir to combine. Season with salt and pepper and cook the corn for 3-4 minutes. Add the peppers, onions and garlic; stir for 5 minutes more. Add the fava beans, edamame or lima beans and deglaze the pan with wine or stock. Stir in the butter and reduce the heat to low.

Salt the boiling water and cook the pasta to al dente. Add 1 cup of the starchy cooking water to the creamy corn succotash. Drain the pasta, then toss with the corn and parsley and top with cheese.
 

8.26.2011

Round Tip Roast

Yesterday was my first day back in the kitchen since Jeremiah has been born. I had bought the Round Tip Roast because it was on sale the day before thinking that perhaps it was a tougher cut of meat and I would just throw it in the Crock-Pot..that should be easy enough.

Before when I have tried to make things, I have had one of my wonderful family members in the kitchen with me or at least near by to tend to the little one if he starts to fuss or is awake. And the times when I was alone and trying to do something as simple as a frozen pizza...something always happened where I couldn't actually do what I set out to do or the results were a little less than desirable. Hence the pot roast...or so I thought.

During one of this naps, I took the meat out of the fridge to get to room temp and then did a quick search online just to double check my ideas...except that I couldn't find anything for a Round Tip Roast. I continued to change my search terms, added and took away quotations, rearranged words and finally came across "The New Wife of an Elegant Eater" Apparently she had run into the same problems as I had and was unable to find a recipe for Round Tip Roast so what did she do? She called her mother-in-law of course.

The recipe she gave seemed simple enough...apparently I hadn't bought a pot roast after all. Knowing that Jeremiah's mood/needs can be inconsistent, I prepped the roast rather than doing it right before it went into the oven and set it on a cooling rack above a cutting board and covered loosely with saran wrap.

Once I figured it was time to put the roast in so that it would be ready when Brad got here, I took it out of the fridge and seared it in the dutch oven on the stove. I just love the crust searing normally gives and my dad always taught me how it "locks in the flavor/juices" so of course I was going to do it this time. I then stuck our thermometer in the meat and stuck it in the oven.

When it reached the temp I was looking for, I took it out, transferred it to a cutting board and tented it with foil to let it rest. It looked tasty and I was excited. But I have to admit, once I cut into it, I realized that I may have left it in the oven a little too long as it was a bit more on the "well done" scale than I had wanted (though as I was finishing carving it to put away the left overs, I found some pinker slicers.) Despite the lack of pink in the slices we did have, we both enjoyed it and it was pretty good. Makes me want to buy the Round Tip Roast more often.


Round Tip Roast
adapted from The New Wife of an Elegant Eater

1-3.5 to 4 lb. round tip roast
Olive Oil
2 tsp Kosher Salt
1 1/2 tsp Pepper
3 cloves chopped Garlic
  1. Mix Salt, Pepper, and garlic together and rub the mixture all around the roast. 
  2. Cover the roast and put it in the refrigerator. Heat the oven to 325. Leave the roast in the fridge until the oven is ready.
  3. Sear roast in a dutch oven with olive oil. 2-3 mins per side (meat should release itself and should obtain a nice crust)
  4. Transfer dutch oven, uncovered to the pre-heated oven. Cook for 15-20 minutes per lb. until you have reached your desired temperature (Think Medium Rare-Medium)
  5. Take out the roast and allow to rest on a cutting board for 15 mins, tenting with foil (Remember, as it rests, the roast will continue to cook)


7.07.2011

Strawberry Shortcakes

I think that I say this every year but it really is true. Strawberries are a definite sign of summer. Over Memorial Day Angela and I whipped up this strawberry shortcake. We thought we had perhaps done something wrong because the dough was not coming out correctly, and sure enough...we did. I misread the directions (i.e. didn't really read them before hand) and got a really sticky goey mess. I tried to fix it, which worked for the most part but because of the good, didn't take pictures because I didn't think it would turn out.
Boy was I wrong. They still did despite our mess up...okay, okay, my mess up. Of course, then I was slightly bummed that I didn't take the time to take pictures before they were gobbled up.
 
Soon enough though, Brad's clinic held a potluck and he asked if I could make the shortcakes again. I quickly jumped at the chance because 1) they were oh so tasty the first time and 2) we had an over abundance of strawberries from our garden; two and a half colanders to be exact.
So I went to work on night making the cakes, and then together Brad and I hulled, cut, and crushed the berries. This time, the dough came together much better and everyone at his work enjoyed them. Another "ace" for America's Test Kitchen.

Strawberry Shortcakes
by America's Test Kitchen

Preparing the fruit first gives it a chance to become truly juicy-just what you want on fresh-made biscuits. The recipe will yield six biscuits and the scraps can be gathered and patted out to yield another biscuit or to; these, though, will not be as tender as the first.

Fruit
2 qts strawberries, hulled
6 Tablespoons sugar

Shortcakes 
2 cups all-purpose flour, plus extra for the counter
5 tablespoons sugar
1 tablespoon baking powder
1/2 teaspoon salt
8 tablespoons (1 stick) unsalted butter, cut into 1/2-inch cubes and chilled
2/3 cup half-and-half
1 large egg, lightly beaten
1 large egg white, lightly beaten

  • For the fruit: Crush 3 cups of the strawberries with a potato masher. Slice the remaining 5 cups of berries and stir into the crushed berries along with the sugar. Let sit at room temperature until the sugar has dissolved and the berries are juicy, about 30 minutes.
  • For the shortcakes: While the berries macerate, adjust an oven rack to the lower-middle position and heat oven to 425 degrees.
  • Pulse together the flour, 3 tablespoons of the sugar, the baking powder and salt in a food processor until combined.  Scatter the butter pieces over the top and process until the mixture resembles coarse cornmeal, about 15 pulses. Transfer to a bowl.
  • Blend the half-and-half with the beaten egg and pour into the bowl with the flour mixture. Stir with a rubber spatula until large clumps form. Turn the mixture onto a lightly floured counter and knead lightly until the dough comes together.
  • Use your fingertips to pat the dough into a 9-by-6-inch rectangle about 1-inch thick. Cut out 6 dough rounds using a floured 2 3/4-inch biscuit cutter. Reform the remaining dough and cut 2 more rounds. Place the rounds 1 inch apart on a parchment-lined baking sheet, brush the tops with the beaten egg white, and sprinkle with remaining 2 tablespoons granulated sugar.
  • Bake the shortcakes until golden brown, about 12 to 14 minutes. Let the shortcakes cool on the baking sheet for at least 10 minutes.
  • To assemble, split each biscuit in half, laying the biscuit bottoms on individual plates.  Spoon a portion of the fruit over each bottom, then top with a dollop of the whipped cream. Cap with the biscuit tops.

7.06.2011

S'more cookies-revisited

Brad's clinic loves hosting potlucks. The great thing about these potlucks is that everyone is invited, from not only the PTs, PTAs, other clinicians/office staff but the patients as well. Earlier this week, Brad's Clinic Director approached him about throwing us a "baby shower" of sorts which includes the ever popular potluck :o)

Brad asked me if I would be able to make some cookies and after considering what sounded good to me, I decided on s'more cookies. I have made s'more cookies before but I didn't have any Hershey bars here so I started to think about how else I could possibly put these together.

And then I came across a variation of cookie that looked perfect. The base was a chocolate chip cookie, then topped with marshmallow and melted chocolate. Now that I could do based on my pantry. However, what about the graham cracker component? So I opted to make the Chocolate Chip Cookie portion of the previous recipe I had tried since it contained Graham Crackers. However, I also noticed that this made a much softer dough...so I added an extra 1/4 cup of both flour and graham in hopes of thickening it up a bit. It worked somewhat but the cookies, even after baked were pretty soft. I think I'll still tweak it a bit in the future but for now, I'll share what I did.

The consensus was a rich yet delicious gooey treat that everyone loved. The few that I didn't take to the clinic, I have been attempting to restrain myself from eating them all in one sitting. That wouldn't really help with this pregnancy weight gain :op. So yes, a "must do". Just a word of warning...marshmallows are a sticky mess. So be sure to try to keep the marshmallow on the cookie and not overflow onto the sheet. Though my pizza stones were easy to clean (I made sure to wash them right away), it was a mess trying to get the cookies off the stone that had the marshmallow overflow and to try to get those off of the wax paper I put them on (thinking that would help..) was even worse. But still, oh. so. good.
sorry, it's the only picture I have!
S'more Cookies, revisited
adapted and mashed recipe from Baked Perfection and Dear Lillie

1 1/2 cups all purpose flour (I used an additional 1/4 cup)
1 cup graham cracker crumbs (I used an additional 1/4 cup)
1 teaspoon baking soda
1 teaspoon salt
1 dash of cinnamon
1 cup (2 sticks) butter, softened
3/4 cup sugar
3/4 cup brown sugar
1 teaspoon vanilla extract
2 eggs
2 cups miniature chocolate chips

Marshmallows
Chocolate chips

  • Preheat oven to 375 degrees.
  • In a medium bowl combine the flour, graham cracker crumbs, baking soda, salt, and dash of cinnamon. In a second larger bowl beat together the butter, sugar, brown sugar and vanilla extract until creamy. Add the eggs one at a time, beating well after each addition. 
  • Slowly beat in the flour mixture until smooth. Stir in the chocolate chips. Drop by rounded tablespoon onto ungreased cookie sheet.
  • Bake for 8 minutes, and remove from the oven. 
  • Cut marshmallows in half while cookies are in oven. When the cookies are done, place marshmallow halves on top, sticky side down, and return to oven for 2 minutes.
  • While cookies are back in, pour chocolate bits into a microwave-safe container and melt for thirty seconds and stir, then melt for 15 and stir and repeat until they are completely melted.
  • Remove cookies from oven, press the now-puffy marshmallows down with a finger or fork, and spoon or drizzle melted chocolate onto the tops.
  • Let cool, then remove to a cookie rack until completely cooled

7.05.2011

Strawberry Chocolate Chip Banana Muffins

So what do you do when you have some bananas that are overly ripe and strawberries that are on their way out? Make Strawberry Chocolate Chip Banana muffins of course!

I don't even remember when and where I first saw this recipe, but I must have bookmarked it thinking that it looked intriguing. And then it was forgotten about in the depths of my internet bookmarks...until Jacob came over one day asking if I could take some black bananas off his hands. So I dove into the archives and rediscovered this recipe.  

I have to admit, I was slightly apprehensive about this concoction the more I thought about it. Strawberries and Chocolate? heavenly. Chocolate and Bananas? Excellent. Strawberry Banana? Perfect. But all three? together? at once? But I decided to take the plunge anyway, and I am oh so glad that I did.
 
Perhaps it is just a phase, but these are probably one of my favorite muffins right now. I've made them a couple of times since first trying out the recipe and they have never lasted more than a few days, even with just Brad and I! And the great thing is, is that others enjoy them as well, so I know it's not just me and my funky pregnancy hormones. :op Plus, it only makes 12 muffins, which is a perfect amount I would think.

Strawberry Chocolate Chip Banana Muffins
by For the Love of Cooking

  • ½ cup of butter, softened
  • ¾ cup of brown sugar
  • 2 eggs
  • 3 overripe bananas
  • 1 tsp vanilla
  • 2 cups of flour
  • 1 tsp baking soda
  • ½ tsp cinnamon
  • ¼ tsp salt
  • 10-12 fresh strawberries diced
  • 1/2 cup of chocolate chips
Preheat the oven to 350 degrees then coat a muffin pan with cooking spray. In a large bowl, beat together the butter and sugar until creamy.
Add the eggs, bananas, and vanilla then continue beating until well combined.
In a separate bowl, combine the flour, baking soda, cinnamon, and salt together, mix well. Add the flour mixture to the banana mixture and stir until just combined.
Add most of the diced strawberries and most of the chocolate chips then gently mix them into the batter.
Spoon the batter evenly into each muffin tin. Place the remaining strawberries and chocolate chips on top of each muffin. 
 
Place into the oven and bake 18-20 minutes or until a tester inserted into the center comes out clean.
 
 Let the muffins cool on a rack. Slather with butter and enjoy!

5.03.2011

Southern Fried Chicken

So last night I decided that I would make friend chicken because, well, it just sounded good :op I wanted something "quick" and easy without too much fuss and after quickly looking at some recipes, decided on Paula Deen's Southern Fried Chicken. I figured, if anyone had a good recipe for fried chicken, it would be Paula Deen.

The recipe looked easy enough, nothing too complicated nor were there too many spices involved. Of course, this queen of substitution didn't have everything in the recipe so I had to do a quick search about what to do in lieu of self-rising flour. Lucky for me, the JoyofBaking said I could substitute 1 cup Self-rising flour with 1 cup All-purpose flour, 1 1/2 tsp baking powder and 1/4 tsp salt. So I mixed this concoction up and then just measured out as much as I needed. According to some commentators, self rising flour helps the crispy "crust" rise a bit and puff up.

And the result? I cut the recipe in third because I had two large boneless, skinless chicken breasts instead of a whole chicken. Because of this, I wasn't sure how it would turn out but I was pleasantly surprised and Brad enjoyed it too. The chicken was pretty juicy still, not dried out and the exterior was both flaky and crispy. It had pretty good flavor but I feel it was lacking some "oomph" so the next time I think I might add some paprika, maybe a bit more black pepper as well as garlic/onion powder. We'll see what happens. Also, as the reviewers and Paula Deen said, the hot sauce in the eggs doesn't add heat really (and if it did, I didn't notice it, but again, I just eyed it rather than measured out a 1/3 cup because I didn't have a lot of hot sauce and Brad doesn't like his food too spicy so again, but I'll probably up that too in the future.

Southern Fried Chicken
by Paula Deen

  • 3 eggs
  • 1/3 cup water
  • About 1 cup hot red pepper sauce (recommended: Texas Pete)
  • 2 cups self-rising flour
  • 1 teaspoon pepper
  • House seasoning, recipe follows
  • 1 (1 to 2 1/2-pound) chicken, cut into pieces
  • Oil, for frying, preferably peanut oil (I just used my deep fryer)

Directions

  1. In a medium size bowl, beat the eggs with the water. Add enough hot sauce so the egg mixture is bright orange. In another bowl, combine the flour and pepper. Season the chicken with the house seasoning. 
  2. Dip the seasoned chicken in the egg, and then coat well in the flour mixture.
  3. Heat the oil to 350 degrees F in a deep pot. Do not fill the pot more than 1/2 full with oil.
  4. Fry the chicken in the oil until brown and crisp. Dark meat takes longer then white meat. It should take dark meat about 13 to 14 minutes, white meat around 8 to 10 minutes.
 

House Seasoning:

  • 1 cup salt
  • 1/4 cup black pepper
  • 1/4 cup garlic powder
Mix ingredients together and store in an airtight container for up to 6 months.

4.26.2011

Xoco- A restaurant by Rick Bayless

As you may know, I try to hit up as many new restaurants as I possibly can just so to experience what different chefs/places have to offer. Many times it can also give me ideas of new foods to make or variations of old favorites as well.
Peeking inside the "kitchen" while waiting to place our order
When my dad was visiting a couple of weeks ago, he, Barb, Brad and myself went to Xoco, a restaurant by Rick Bayless (for those who don't know who he is, he's a celebrity chef based in Chicago with his own cookbooks, tv shows, product line, etc..another claim to fame? He was invited by President Obama to cook at the White House when Mexico's president was visiting).
After the register is the prep space for your meal
According to Bayless, Xoco can be described as... "If Topolo pampers and Frontera dances, then XOCO rocks. Though the word is Mexican slang for “little sister” (from the ancient Aztec language), there’s nothing little about XOCO’s big, bold Mexican marketplace flavors. Open early, late and closed on Sundays and Mondays, this quick-service cafe from Rick and Deann Bayless proffers contemporary expressions of Mexico’s most beloved street food and snacks: hot-from-the-fryer churros and flaky empanadas; frothy Mexican hot chocolate (ground from Mexican cacao beans right in our front window!); warm, crusty tortas (Mexican submarine sandwiches); and made-to-order caldos (meal-in-a-bowl soups) that feature everything from roasted vegetables to seafood to pork belly."
The Woodburning Oven
Now unfortunately, we didn't try to churros because we were way to stuffed from the tortas so that is definitely on our "to do" list next time we are in that part of the loop. So anyway, there we were at Xoco. It's counter style service, where you go up and place your order (once given the "go ahead" by the server/hostess) and then wait to be seated by the hostess/server. Or, of course, if you are taking it to go, then there is no wait to order.
Placing their order at the counter
I have to admit, I was a bit nervous, being a "picky eater" and all but luckily for me, there on the "Today's Specials" menu was a Carne Asada torta. Granted, it came dressed with Chayote "coleslaw", blackbeans, and then a flavored crema...though I honestly can't remember what it was flavored with. I asked if I could get the crema on the side and hoped for the best!
Four flavors of Mexican "Aquas" to choose from if you so desire

As far as drinks go, all of us just ordered water though the had a vast selection of beers and Mexican favorites (i.e. Jamaica...). We also ordered a side of chips and salsa to help curb our appetites as well as get a chance to try some of their "homemade" salsas.
Quite tasty...though I preferred the green over the red
Once the food came, I decided to bite the bullet and just go for it, with the coleslaw on the sandwich though I was tempted to scrape it off and I am so glad that I did! I would have never tried it otherwise and it brought a new flavor to the torta. My only complaint was that because the bread was toasted so well, it roughed up the inside of my mouth a little, but not enough to make eating less enjoyable!
My Carne Asada torta with crema on the side and the Chayote slaw.
Overall I was pretty impressed with the place, and continued to be impressed and dream about my leftovers throughout the remainder of the day and then the next. My dad, on the other hand, thought it was okay but a couple hours after we left the restaurant, he began to reminisce about his lunch and how well developed the flavors were.
He's mentioned quite a few times to me now that he didn't realize how much he enjoyed his food until later on that day. Brad also liked it, but he doesn't appear to be dying to go back...that may have to do with the price though ;o)
Brad's order: Milanesa: Crispy Gunthorp chicken, black beans, artisan Jack cheese, pickled jalapenos, tomatillo-avocado salsa
Would I go back? Sure! Especially to get the churros and ice cream or even one of their specialty hot chocolates that I am dying to try. However, as I mentioned, it is a bit pricey so it's not somewhere I would frequent often. It did get me excited about trying some of the other Bayless restaurants that are right around the corner....
A view of the seating portion of the restaurant

4.15.2011

Cinnamon Streusal Pizza

Ah yes, another pizza post (Can you tell that I love pizza?)

The inspiration comes from an old childhood favorite, Godfather's Pizza. It used to be that we would frequent Godfather's often, especially for their pizza buffet. I would fill up with hot pepperoni pizza but made sure to always leave room for one of the best desserts of all...Cinnamon Streusal Pizza.

Godfather's Streusel Pizza from their website...Mmm Mmm

I don't remember when this memory popped into my head but I do know that I have made it quite a few times since then. I would say that it's definitely served best warm and is a great way to use up excess pizza dough. It's also super easy to make (to my surprise).

I used yet another pizza crust recipe but didn't bother taking photos since once you make a pizza crust, the process is all pretty much the same. I'm sure you could use any pizza crust though and it would work out great. (Well except for maybe deep dish..) The recipe I used for the crust, I will put at the very end of the post. Also, the directions say to put it in a pizza pan, I just used my pizza stone and once on a cookie sheet and it still turned out well.


Godfather's Streusel Dessert Pizza
from Savory Seasonings

Pizza Dough
1 TBSP butter, melted or 1 TBSP oil (I used butter...oil just didn't seem right to me)
Cinnamon

Streusel
(makes enough mix for 3 pizzas)
1/2 cup plus 1/3 cup bread flour (I used All Purpose Flour and it still turned out great)
1/3 cup white sugar
1/8 cup brown sugar
2 TBSP solid shortening
2 TBSP olive oil

Icing
1/2 - 3/4 cup powdered sugar
1 TBSP water
1/2 tsp. vanilla

  1. Mix together streusel ingredients then side aside.
  2. To make pizza, pat dough into a 12 inch pie pan that has been sprayed with oil, then brush with 1 TBSP melted butter. Sprinkle cinnamon all around buttered crust. 
  3. Top pizza crust with 1/2 - 3/4 cup streusel mix (freeze remaining streusel mix for another pizza). Bake at 450 F for 8 to 9 minutes depending on the thickness of the pizza. 
  4. Cover with aluminum foil halfway through to keep streusel from burning. 
  5. Mix icing ingredients until it is of a drizzle consistency. If it is too thick, then thin with a small amount of water until you have reached your desired thinness. 
  6. When finished baking, top with icing in a circular pinwheel pattern. (As the original poster points out, this can be done easily with the icing in a sandwich bag with the corner trimmed)
 
    *************************************************************************************************************
    Now a note about this recipe. This is the dough that Savory Seasonings used in her Cinnamon Steusal Pizza so I did as well. And because I rarely plan ahead, I usually don't get the opportunity to allow the dough to develop overnight. Sure, not ideal but hey, it still works for the most part!

    Little Caesars Pizza Dough
    from Savory Seasonings

    1 1/4 cups (9.7 oz) warm water (appox. 120° F)
    2 3/4 tsp. dry active yeast
    2 TBSP sugar
    1 TBSP Honey
    1 TBSP Olive Oil
    2 Tsp. Salt
    1 1/2 cups (8 oz.) bread flour or all purpose flour
    1 1/2 cups (8 oz.) whole wheat flour (optional, can use 100% bread flour or all purpose flour)

    • Mix water and yeast in mixing bowl and allow it to proof for 5 minutes. 
    • Mix in sugar, honey and oil. Then mix in 1 cup flour and the salt. Continue mixing in all the remaining flour until you get a nice, soft dough. Knead until dough is soft and smooth (approx. 10 minutes).
    • Finish kneading on a lightly floured surface and shape into a ball. 
    • Place in the refrigerator in a covered container coated with olive oil for overnight. For the perfect flavor, it is best to time making the dough 24 hours before baking the pizza's (for pizza Saturday at 5pm, make your dough Friday at 5pm). If you are short on time you can sacrifice some flavor and make this dough first thing in the morning and place it in the fridge until dinner that evening.

    3 hours before baking: Remove from fridge and either divide dough in half for two 12” pizzas or leave whole for one somewhat thicker 16” pizza. Work each piece of dough into balls. Allow the dough to come back to room temperature (this process generally takes 3 hours).

    45 minutes before baking: With your pizza stone on the bottom rack of your oven, preheat your oven to 475° F to allow the stone to get hot enough (this process generally takes 40-50 minutes).

    15 minutes before baking: Shape dough into desired pizza crust, sprinkle pizza peel, wooden cutting board or upside down cookie sheet with corn meal, flour or rice flour. Place pizza crust on top, then add toppings. Gently slide pizza onto the hot pizza stone and bake for 9-11 minutes.

    3.26.2011

    Calzones and Personal Pizzas

    So for the past week, the thought of Calzones has gone in and out of my head. Due to Dave not feeling well, I unexpectantly got a day off yesterday from watching Sofia. Since I had the extra time and some cheese, sauce, and pepperoni in the fridge, I figured there's no better time than the present and decided to do some research.

    I didn't want to use my CPK copy crust since I hadn't planned ahead and didn't have the time to let it rest properly. So my search began looking for a "quick" homemade pizza crust recipe. I came across a recipe on a blog that I follow from An American Housewife. Her pizza crust took about 2 hours which is some of the shortest times I have seen, plus she seems to really know her kitchen and food so I trust her recipes.
    My calzone which was Mmm...Mmm...good
    Anyway, I decided to give it a try, especially since she had a great idea....par cook the dough to create ready made pizza crusts for a quick and easy meal in the future. Oh my goodness, why didn't I ever think of that! And since Brad was gone for the night (and the following day), what a more perfect time to try it out!

    The pizza crust was pretty easy to put together. I didn't take any pictures of it because I've made pizza so many times that it all kind of looks the same. The only things I did differently is 1) Allow the yeast to activate longer than she directed due to the yeast jar telling me otherwise and 2) Not waiting the full rising time..mainly because I was hungry ;o) Instead I just let it rise enough for the oven to heat up and then plus any time that the crusts waited while the others were baking. 3) Also, I didn't make them as "mini" as she probably did. I went more for the personal size but I'm sure if I would have let it rise more, I would have been able to make more pizzas out of it. Oh well, I'm not complaining!

    As a side note: Brad has watched me upload these pictures and immediately got hungry and started asking "Why haven't you ever made me a calzone?!?!"

    Homemade Mini Pizza Crusts
    from An American Housewife

    Pizza Dough

    1 pkg. (2 1/4 t) dry active yeast
    1 T sugar
    1/2 t salt
    1/4 c dry powdered milk
    1 1/3 c warm water
    2 T olive oil
    4 c flour

    • Put yeast, sugar, salt, dry powdered milk, and warm water into the bowl of a mixer or mix by hand. Wait 2 minutes  (I waited 10 per directions on my jar of yeast).
    • Knead in olive oil and flour in a Kitchen Aid style (heavy duty) mixer 5 minutes or knead 10 minutes by hand. Let rest 10 minutes.
    • Depending on the thickness of the pizza you like - Use in 1, 2 or 3 greased, average 'home' sized large pizza pans Let raise about 1 1/2 hours and top with your choice. Bake at 400 approximately 16-25 minutes depending the size of your pan and how many toppings you have on it. Bake until golden brown.
    • To make the mini pizza's above - split the dough in half, then each in half again and continued dividing each piece in half again until I had 8 balls for a 1/2 inch thick crust. You could do up to 16 if you like very thin, crispy pizzas.
    • Form each ball into a circle on a pizza stone and then baked at about 410 degree's for 10 minutes to pre-bake the thicker crusts - less if you make thin. Bake just until the bottom barely begins to get golden. You will finish baking when the pizzas are used in the future. Let cool and package for refrigeration or freezer. 
    waiting to be packaged up
    • To use, spread pizza sauce, toppings, cheese and bake at 410 until the top is melted and beinging to turn golden brown. (I baked mine at 350 in the toaster oven..)

    And now for the Calzone...

    I took the same dough that I used above, rolled it out and rolled a portion of it out into a rectangular shape. I then placed the sauce, cheese and pepperoni down the middle in a strip.
    Using my bench scraper, I cut diagonal strips into the dough, thinking that I wanted to fancy my dinner up and criss cross the dough.
    Now this is where I kind of "wung" it. I didn't really know what to do with the ends to I folded those in first and then did the criss crossing.
    I kept the temp at 400 degrees and baked it for about 20 mins when it looked done and the top of the dough sounded a bit "hollow".