Showing posts with label chocolate. Show all posts

9.23.2012

Frosty S'more Cups

Thanks to us hosting Small Group again, I have a reason to bake! Although, I have to admit that my baking and cooking adventures have continued despite my lacking of posts here. Because of that, I may change my format here a bit. You see, like I said, I've been baking and cooking plenty. But taking pictures...not so much. And updating blogs. Ugh, Don't even remind me.

But back to the S'more cups..delicious. Though billed as a "summer treat" with the crazy weather we have been having, it still feels like it's summer around here despite that we are almost into October. So these were still the perfect, frosty treat that makes the memories of summer linger, just a little bit longer. One note: I didn't have a mini cheesecake pan so I opted to use muffin cups/wrappers instead. It still worked out great though for the next time, I may just look for a specialized tin, just for the sake of it :o)


Frosty S'more Cups
by EasyBaked

INGREDIENTS:
  • 18 graham cracker squares (9 sheets or about 1 1/2 cups)
  • 1/3 c. butter
  • 1/2 c. milk chocolate chips
  • 1/4 c. whipping cream
  • 2 c. mini marshmallows
  • 1 1/2 c. cold milk
  • 1 box (4 servings, 3.9 oz)instant chocolate pudding
  • 1 (8 oz) container of Cool Whip (thawed in fridge)
  • 1/4 c. mini chocolate chips (as topping)
DIRECTIONS
  • Crush graham crackers into fine crumbs.
  • Melt butter and add to graham crackers, mixing until well combined to make crust.
  • Prepare pan by placing disks into the bottom of each cup.
  • Evenly divide crust mixture into all 12 cups, saving about 1/4 cup to use as topping later. (I used a Mini Tart Shaper to press crumbs firmly into the bottom of each cup).
  • Place milk chocolate chips and whipping cream into a small bowl and microwave in 30 second increments, stirring in between, until melted and smooth.
  • Spoon chocolate into a zip top bag, cut a tip off and evenly pipe chocolate into the center of each cup, on top of the crust.
  • Divide Marshmallows among cups.
    Mix cold milk with pudding on medium speed for 2 minutes. Fold in 1/2 of the Cool Whip container (the rest will be used as topping). 
  • Spoon filling into a large zip top bag (and ZIP it or you might have a mess!)  Clip a corner off and pipe pudding into each cup evenly.  Try to pipe it in between the marshmallows so that the whole cup is filled.  I did have a little left over (which was really tasty straight out of the bag!) 
  • Use a knife to smooth the tops level with the top of the pan. 
  • Freeze for at least a couple of hours. 
  • Allow the pan to warm just a bit before popping each dessert cup out.  Poke a finger up through the hole in the bottom of the pan and grab that s’mores cup by its crust.  Remove the disk from the bottom and you are ready to add topping.  
  • For topping, I just piped a little bit of the left over Cool Whip on each dessert using a decorating tip.  Then I sprinkled the remaining crust and mini chocolate chips on top. 
  • Serve cold right away– or put them in a sealed container and freeze until you are ready to serve.
     

5.21.2012

Chocolate PB Cake

This past Sunday was Jacob's birthday, but since he wasn't going to be in town, we decided to "celebrate" a little early.
I made a chocolate cake with peanut butter filling and crumb coat, chocolate frosting then a chocolate ganache poured over the top. Followed by some chocolate chips for the bottom border and pb balls nested in piped ganache. So rich, so decadent, so good...Too bad I didn't take more time to take pictures in better lighting.

1.29.2012

Snickers Caarmel Corn

So one of my new favorite sites to frequent is Pinterest. There are so many great ideas out there and Pinterest makes it easy to find such ideas and even bookmark them for future use. So when I came across this delicious looking snack, I knew I had to "Pin It" for sometime down the road.
Enthused about popcorn! Don't mind Tony,
he's trying to get something he dropped
Then came the day that Angela and Tony came to hang out at our place loaded with popcorn kernals. We were all craving something sweet when I decided to go to one of my boards and take a gander and see if I could find something that we could whip up. And there it was. Something that would use her kernals and satisfy our sweet tooth. And even luckier for us, we had some snickers in our pantry :o)
Shakin' it with all she's got!
So Angela and I set off to try our hand at this chocolatey caramel goodness. Since she's known for her amazing stovetop popcorn, I let her do her thing while I put together the ingredients for the caramel. It eventually lead to a group effort when Tony got involved to do the shaking to coat the popcorn.
And the result? Deeeeliciousness. Man on man I wish I had some right now. The only qualm is that we didn't sort through the popcorn before coating it so every now and then you would have the misfortune of crunching down on a hard kernal. Which was probably good since it made you slow down and not inhale the entire batch ;o) Definitely keeping this one in our files!


Snickers Caramel Corn
pinned from Six Sisters Stuff (Adapted from Cookies and Cups)

4 quarts popped corn (about 1 cup kernels)
1 cup salted butter
2 cups light brown sugar, packed
1 tsp salt
1/2 cup light corn syrup
1 tsp baking soda
1 cup salted peanuts
30 fun size Snickers bars chopped up
3 oz melted choc chips

  • Preheat oven to 200 degrees.
  • Pop your popcorn and put popcorn and peanuts in a big brown paper grocery bag.
  • Over medium heat boil butter, brown sugar, salt and corn syrup for 5 minutes (stirring constantly). Remove from heat and stir in baking soda. 
  • Pour over popcorn in the brown paper bag, roll closed and shake well. ( It blends so much easier than trying to fit it in a big bowl and stir.) After the popcorn is coated well, spread onto a cookie sheet. 
  • Spread chopped Snickers over top of popcorn and put in oven for 5 minutes. Remove from oven and drizzle melted chocolate over top of popcorn. YUM!
*If not eaten immediately...can be stored in an airtight container.

10.26.2010

Perfect Chocolate Chip Cookies

A couple weeks ago, Brad and I started to watch a very yummilicious episode of America's Test Kitchen and how to make some delicious cookies. One that really caught our eye were the "Perfect Chocolate Chip Cookies" because they sounded oh so tasty while describing the baking process on t.v. and looked even better.
 
A moist, chewy cookie with toffee flavors and crisp edges? Yes, your mouth can start drooling now.

So I bought the Ghiradelli chips (they had done a taste test in the same episode and described the dark chocolate flavor with layers of chocolate rather than sporadic chips) but for this reason and that wasn't able to make a batch. That was until this past weekend. We were getting ready to go on a 6 hour road trip to Clare, MI for an old GLMers wedding  (Congrats again Wave and Ginger!)  and I knew we were going to need something to snack on. So, at 9 pm at night I began to construct the "perfect cookie".
Problems? Only one, I have having trouble getting my butter to that rich, warm, brown color however that may have something to do with the fact that I was using margarine rather than real butter. Though the dough offered toffee flavors, the end result only had a hint. One the other hand, So. Many. Compliments! Etch got addicted to them over the weekend and Jumpin' Jack continued to fixate on them for moments after eating one, thinking of how they would taste in a variety of different scenarios and situations. We all decided that these were very close to the best, if not, THE best chocolate chip cookie. Soft, chewy, thick, delicious...I can't wait until I make them again, and I know a large number of people who feel the exact same way.
 
As I mentioned, I did use the recommended chips, Ghiradelli 60% cacao as well as only baked one tray at a time. Perfection!


Perfect Chocolate Chip Cookies:
by America's Test Kitchen

Rich and buttery, with their soft cores and crispy edges, chocolate chip cookies are the American cookie-jar standard. We wanted to refine this recipe to create a moist and chewy chocolate chip cookie with crisp edges and deep notes of toffee and butterscotch to balance its sweetness—in short, a more sophisticated cookie than the standard bake sale offering.

Melting a generous amount of butter before combining it with other ingredients gave us the chewy texture we wanted. Since we were melting butter, we browned a portion of it to add nutty flavor. Using a bit more brown sugar than white sugar enhanced chewiness, while a combination of one egg and one egg yolk gave us supremely moist cookies. For the crisp edges and deep toffee flavor, we allowed the sugar to dissolve and rest in the melted butter. We baked the cookies until golden brown and just set, but still soft in the center. The resulting cookies were crisp and chewy and gooey with chocolate, and boasted a complex medley of sweet, buttery, caramel, and toffee flavors.


Makes 16 cookies

Avoid using a nonstick skillet to brown the butter; the dark color of the nonstick coating makes it difficult to gauge when the butter is browned. Use fresh, moist brown sugar instead of hardened brown sugar, which will make the cookies dry. This recipe works with light brown sugar, but the cookies will be less full-flavored. For our winning brand of chocolate chips, see related tasting.
Ingredients
  • 1 3/4 cups unbleached all-purpose flour (8 3/4 ounces)
  • 1/2 teaspoon baking soda
  • 14 tablespoons unsalted butter (1 3/4 sticks)
  • 1/2 cup granulated sugar (3 1/2 ounces)
  • 3/4 cups packed dark brown sugar (5 1/4 ounces) (see note)
  • 1 teaspoon table salt
  • 2 teaspoons vanilla extract
  • 1 large egg
  • 1 large egg yolk
  • 1 1/4 cups semisweet chocolate chips or chunks (see note)
  • 3/4 cup chopped pecans or walnuts, toasted (optional)
Instructions
1. Adjust oven rack to middle position and heat oven to 375 degrees. Line 2 large (18- by 12-inch) baking sheets with parchment paper. Whisk flour and baking soda together in medium bowl; set aside.
2. Heat 10 tablespoons butter in 10-inch skillet over medium-high heat until melted, about 2 minutes.
Continue cooking, swirling pan constantly until butter is dark golden brown and has nutty aroma, 1 to 3 minutes. Remove skillet from heat and, using heatproof spatula, transfer browned butter to large heatproof bowl. Stir remaining 4 tablespoons butter into hot butter until completely melted.

3. Add both sugars, salt, and vanilla to bowl with butter and whisk until fully incorporated. Add egg and yolk and whisk until mixture is smooth with no sugar lumps remaining, about 30 seconds. 
 
Let mixture stand 3 minutes, then whisk for 30 seconds. Repeat process of resting and whisking 2 more times until mixture is thick, smooth, and shiny.
 
Using rubber spatula or wooden spoon, stir in flour mixture until just combined, about 1 minute.
 
Stir in chocolate chips and nuts (if using), giving dough final stir to ensure no flour pockets remain.
4. Divide dough into 16 portions, each about 3 tablespoons (or use #24 cookie scoop). Arrange 2 inches apart on prepared baking sheets, 8 dough balls per sheet. (Smaller baking sheets can be used, but will require 3 batches.)
5. Bake cookies 1 tray at a time until cookies are golden brown and still puffy, and edges have begun to set but centers are still soft, 10 to 14 minutes, rotating baking sheet halfway through baking. Transfer baking sheet to wire rack; cool cookies completely before serving.
 

7.14.2010

Stargazer Pie

About a week or two ago, Brad and I had the opportunity to host our beloved small group at our apartment. Well little did we know that we would also have severe thunderstorms and tornado warnings that night. Anyway, when I had gotten home from work, I had plenty of time to throw together this little diddy...'bout Jack and Di-a-nne...just kidding ;o) Anyway, I had plenty of time to bake up a couple of goodies and set up the rest of the snacks before people started to show up. And everything was going so smoothly went the Severe Weather Alert came on the radio..and the we turned on the T.V. and saw Tom Skilling and my friend Mark Suppelsa along with his co-anchor (sorry I don't remember your name!) looking somewhat concerned and serious...and then the air raid sirens went off. So we grabbed our keys, flashlights and a couple of folding chairs and headed down to the basement with our weather radio.
(this is NOT my picture, but rather Scott Strazzante, Chicago Tribune / June 23, 2010. I just wanted to include this picture to show you some of the intense clouds since U.S. Cellular is literally blocks from our apartment)
 
Well fortunately nothing ever came of the storm in our neck of the woods..er, city...besides some pretty intense lightening, high winds, and flooding...however it did eat into my prep time. So by the time everything started to calm down, we only had a few moments before people started to show. Luckily, we have some pretty awesome people in our group that totally understood (and who braved the weather to make it out to our place!) and helped me finish setting up. But I am telling you all of this not only because it ended up being a crazy night but rather that in all of the commotion, corners were cut and a slight mistake was made. Okay, enough of the weather talk.

I'm not even sure when or how I came across this but my goodness am I sure glad I did (as are the others who got to taste this treat!). Dozen Flours, in a time crunch, came up with this fairly easy recipe for a delicious and delectable dessert, Stargazer Pie. What compromises did I have to make? Well the truffle layer wasn't able to set for the given time due to the whole tornado siren episode (nor did I cream the butter and cream cheese entirely...I had some tiny lumps). Also, in my running around trying to make sure everything was get for snacks, I did the unforgivable and stepped away from the mixer..while I was making whipped cream. So yeah, the peaks came and almost went before I realized my error. Whoops. So needless to say, the rest of the items that I was supposed to mix into the whipped cream didn't get mixed in when they were supposed to but hey, it still worked. How do I know this? Because everyone said they loved it! Yes, it was rich but oh so delicious. Just next time, I'm going to need to watch that mixer a little more closely. ;o) BTW. I have removed some of the detailed instructions just to pare down the reading but you can still have success without the added details.

Stargazer Pie
created by Dozen Flours

Crust
1 16.5 oz tube of refrigerated chocolate chip cookie dough, softened

Brownie Layer
1 box of Brownie Mix
1/2 cup of cocoa powder, sifted
3 tablespoons of lukewarm water
1/2 cup of vegetable oil
2 eggs, at room temperature
1 teaspoon of almond extract or vanilla

Cream Cheese Truffle Layer
1 cup of milk semisweet chips
4 oz of cream cheese, softened
1/2 stick of unsalted butter

Whipped Cream Layer
2 cups of whipping cream
1 teaspoon of vanilla extract
1/4 cup of powdered sugar, sifted
1/3 cup (give or take) of chocolate curls or other garnish, optional

  • Preheat oven to 350F. Grease a 9 or 9 1/2 inch springform pan with butter.
  • Spread the cookie dough into the bottom of the pan, making one big even cookie. It may be a little on the thin side. Stick it in the freezer.
  • Mix the brownie mix and the cocoa powder together in big bowl with a whisk or large fork. Add the water, oil, eggs, and extract and mix together just until the dry ingredients are absorbed. Be careful not to over mix! The batter will be somewhat lumpy. 
  • Remove the springform pan from the freezer and add the brownie batter right over the top. Bake for 34-38 minutes or until a toothpick inserted into the center of the brownie comes out *almost* clean. You basically want it to where it's not raw in the center and doesn't jiggle when you shake the pan a bit, a tad bit less baked than you would a normal brownie.
  • Remove it from the oven and promptly sprinkle about a 1/3 cup of chocolate chips (from the 1 cup of chips listed above) over the top. Let it sit for a minute or two and once the chocolate chips are soft, evenly spread them over the top of brownie's surface. Allow it to cool on the counter. 

forgive the bluriness of the photo..there was a lot going on that night as you can imagine and apparently I didn't take the time to pay attention as to whether or not I was actually getting "good" pictures 
  • While the pie is cooling, microwave the remaining chocolate chips on low power on 30 second intervals until the chips are melted, stirring well each time. Set aside. Cream the butter, and cream cheese together for 1 minute. Add the vanilla and stir again. Add the melted chocolate, one big teaspoonful at a time until it's incorporated into the cream cheese. Spread the cream cheese mixture over the top of the pie and store it uncovered in the refrigerator for an hour.

  • About an hour or two before you're ready to serve the pie, whisk the whipping cream on high speed until soft peaks form. Add the vanilla and the powdered sugar and mix again until combined. Spread evenly over the top of the pie. Grate chocolate directly over the top, sprinkle chocolate curls, or embellish with chocolate sprinkles. Cover and put it back in the refrigerator for at least 1/2 an hour.
  • When you're ready to serve, Gently remove the ring and serve let it come to room temperature at least a half an hour before serving.

7.12.2010

Peanut Butter Marshmallow Krispie Topped Brownies

So I have started this thing about making treats for my coworkers periodically and for their birthdays. Hannah's birthday was coming up and she mentioned that she had once saw a brownie topped with a rice krispie treat and that she would LOVE it if I could make them for her birthday.

Well I went searching on the internet but couldn't really find what she was looking for. I know, I know, brownie topped with rice krispie treat, you need a recipe for that? It wasn't that I was needing a recipe necessarily but rather wanted to know if there was any special technique or variation that someone had come up with. More particularly, how do the two concoctions stick together?

After a bit I finally found something that looked promising. Cookie Madness had posted a recipe two years ago for "Peanut Butter Marshmallow Krispie Topped Brownie". I asked Hannah for the go ahead since it was a Chocolate Peanut Butter Rice Krispie mixture and then the plan was set in motion.

So the last shift we worked together for her birthday I brought the brownies/rice krispies. The kids and the staff all sang happy birthday and candles were blown out. And what did Hannah say after the first bite "Oh my Goodness...No words can describe this awesomeness". As far as the kids response, not a single crumb went in the trash though on boy said that there was a little too much peanut butter. I thought they were pretty tasty too with that rich chocolately peanut butter marshmellowey taste. Plus, there were pretty easy to put together as well. Definitely something you could make for a family reunion, party, or whatever

Peanut Butter Marshmallow Krispie Topped Brownies
Cookie Madness


1 box (18.3 to 21 oz) brownie mix plus eggs & oil (or whatever box calls for)
4 cups marshmallows (small ones)
1 1/3 cup semi-sweet chocolate chips
1 cup creamy peanut butter – regular type
3 tablespoons butter
2 cups crispy rice cereal

  • Preheat oven to temperature directed on brownie package (mine said 350 degrees F.).
  • Line the pan with non-stick foil (I use “Release” foil). Parchment should work too.
  • Prepare brownies using amount of oil, eggs, water called for on box. Two minutes before they are supposed to be done, pull brownies from the oven and sprinkle marshmallows across top. Return to oven for 2 minutes to soften marshmallows. Remove from oven and spread soft marshmallows over top of brownies. Let cool completely on a wire rack.
  • Prepare topping. In a microwave-safe bowl, combine chocolate chips, peanut butter and butter. Heat on high for 30 seconds. Stir and repeat until chocolate is melted and mixtue is smooth.
    Add cereal and stir to coat. 
    Drop spoonfuls of chocolate mixture over marshmallow layer, spreading as evenly as possible. Things will look gooey at this point, so don’t even think about cutting. Put the brownies in the refrigerator for a few hours to chill.

  • Lift from pan and score into squares (about 16 or 20).

6.22.2010

S'mores Stuffed Brownies

First of all, brownies AND s'mores? Can you get much better than that? Also, can I mention that while I am writing this blog post, Brad is just inches away from me doing one armed side crunches and other crazy gymnast workouts while I am drooling over these brownies? Yeah, I'm feeling a bit guilty, but not enough to keep from sharing this with you!

There are few food blogs out there that I am subscribed too and every so often, one of these creations catches my eye. A couple weeks ago I came across this beauty over at Picky Palate. S'mores. Stuffed. Brownies. The name in itself intrigued me and then her pictures tempted me even further. I just had to try it!


Let me take you back to June 9th. It was our 3 year anniversary and just happened to be Game 6 of the Stanley Cup. We had had the pleasure of watching a few of the games over at our friend's condo and the last time Nicki had graced us with warm chocolate chip cookies and ice cream (a heavenly combination). So when they invited us over to watch the game, I just had to make these goodies. I brought over the ingredients and got baking shortly after we arrived.


I didn't have any chocolate bars so I used chocolate chips instead..no biggie as far as substitutions go. We also only had a 9x9 pan. Therefore I didn't necessarily follow the exact measurements for the graham, chocolate, etc.  Additionally, I was a bit unsure of when to consider it done since distinguishing between gooey brownie and melted chocolate was somewhat difficult. I believe they ended up being in the oven longer than the recipe called for and therefore some of the marshmallows got a little caramelized but nothing damaging.

Oh yeah, and that whole "cool completely" part? We didn't do that...In fact, these brownies were quite rich (perhaps that is attributed by our lack of self control). At first I thought they were a little too rich for me but everyone else disagreed. However my hesitations certainly didn't stop me from getting another! I also noticed that the following day, they lost some of that initial richness since we actually allowed them to cool. Still very delicious and more easily able to eat a whole brownie. One difference I did notice between my brownies and Picky Palate's is that I am a little unsure how she got her marshmallows so flat. Not that it made any difference, in fact, I kind of liked them still puffy but in case you were wondering, so am I ;o)

S'mores Stuffed Brownies
Picky Palate


Batch Prepared in 8×8 inch baking pan; (adjust as needed for your pan)

1 box of your favorite brownie mix
4 1/2 full Graham Crackers
3 1/2 Full size Hershey’s Bars
16 large marshmallows

  • Preheat oven to 350 degrees F.  Prepare brownie mix according to package directions.  
  • Line foil into an 8×8 inch baking pan and spray generously with cooking spray.  
  • Pour half the brownie batter into lined pan.


    (don't mind the orange tint...the blackhawks were on! 
    i couldn't take the time to mess with lighting)
    Layer with Graham Crackers 
     following Hershey Bars (or chocolate chips) 
     and marshmallows. 
  • Pour remaining brownie batter over marshmallows.  
  • Bake for 40-45 minutes or until toothpick comes mostly clean from center.  
  • Remove from oven and let cool completely.  
  • Carefully remove foil and brownies from pan.  Peel any foil from away from edges and cut into squares. 12 brownies

By the way..in case you haven't heard...the Blackhawks won!

4.08.2010

German Chocolate Cake


About a month ago I was watching America's Test Kitchen (surprise, surprise) and they decided to deconstruct the German Chocolate Cake. Let me tell you, I was hooked. The chocolate, the frosting, the coconut...I knew immediately that I had to make it for my dad's birthday, though I wasn't sure how since we weren't planning on going to Michigan at the time. Anyway, lucky for me (and my dad), my father decided to come up for the day on the weekend before his birthday so I got to planning.

Hah, planning...right. So just when I thought I had figured everything out (i.e. when to bake it with my crazy work schedule, how I would surprise my dad with it, etc) I come to realize while putting the batter together at 9 o'clock at night that I didn't have everything. And not just little things that I could easily substitute but rather things like sour cream, Eggs, Evaporated Milk, PECANS, COCONUT! All things necessary to make German Chocolate Cake..and all things I apparently thought I had. Grr...so off to the store I went.  I was determined to make this cake, not only for my dad but also for Brad to take for his last day of clinicals (Graduation here we come!). So about an hour later I was back and ready to get started.

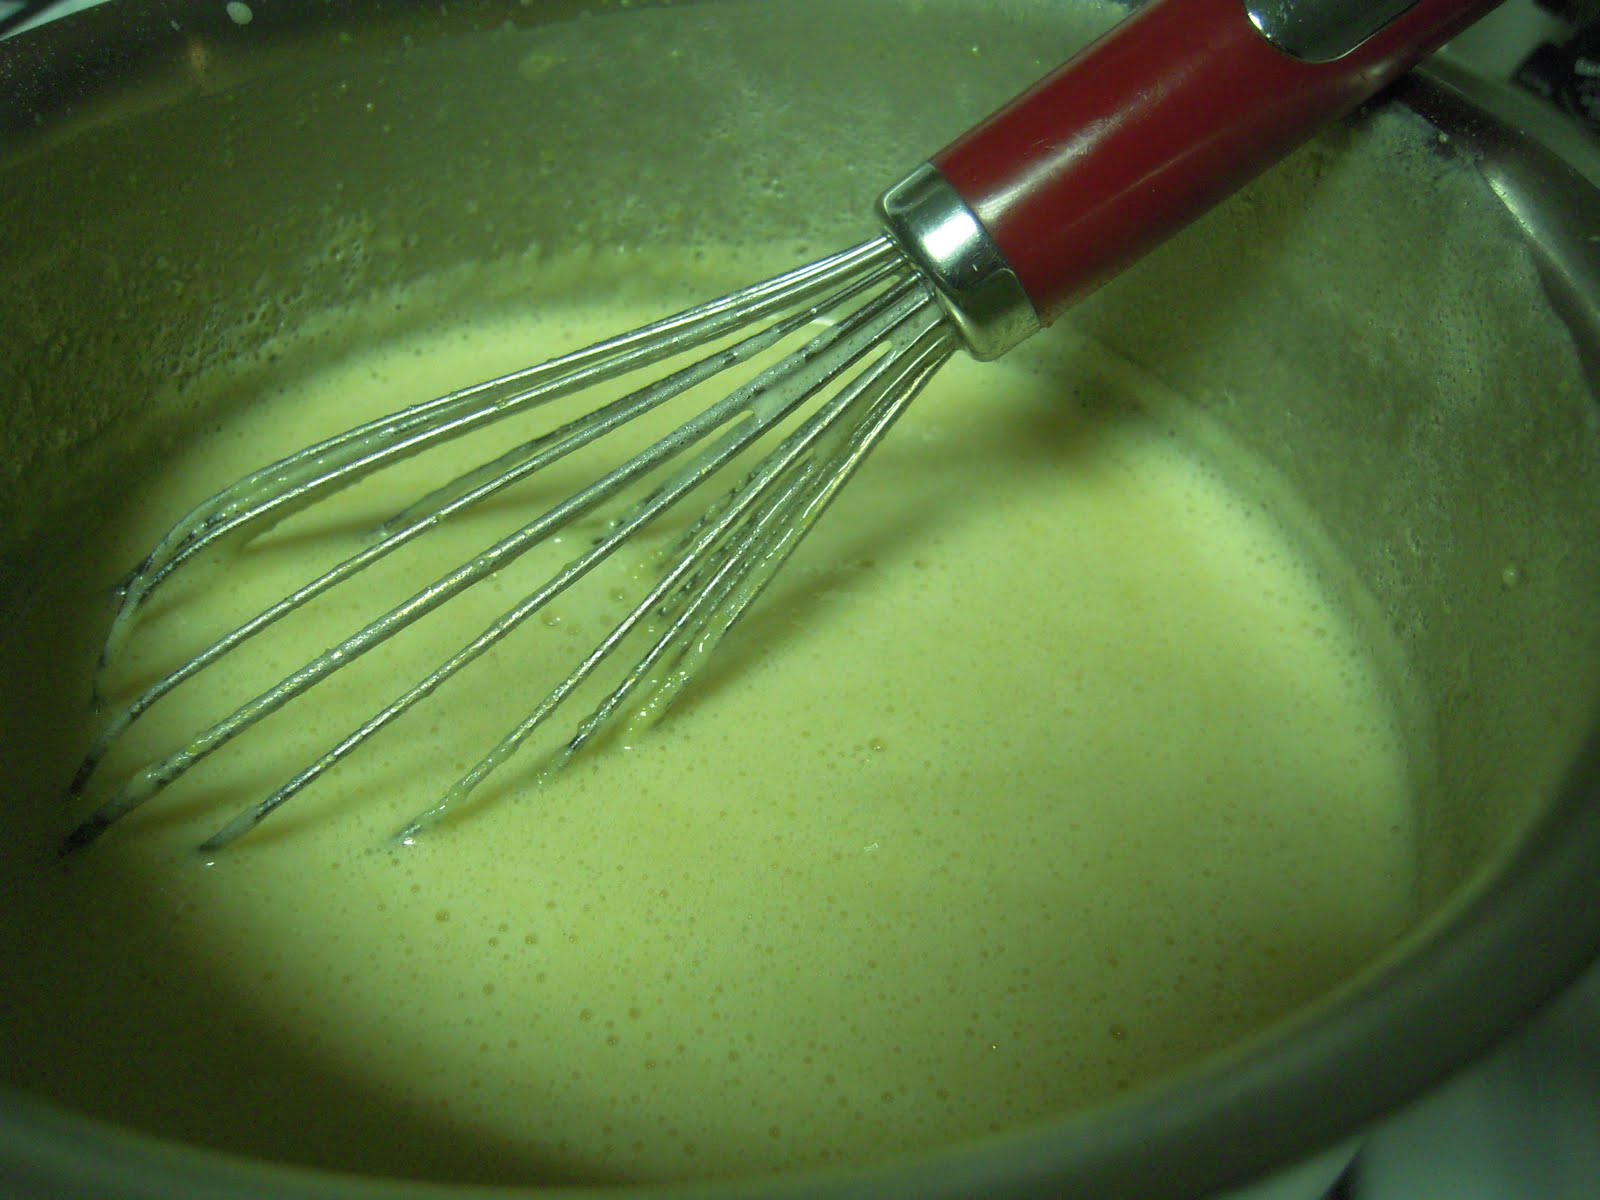
Anyway, despite my roadblocks, I had a lot of fun putting this cake together. I thought it was quite easy to make even with needing to cook the frosting. I know, the directions look intense but I honestly never got the feeling of being "overwhelmed". And the batter, just look at the batter
It looks almost like a mousse doesn't it? So light and airy..and delicious...But what about the end product? Everyone loved it. I loved it and look forward to making it again...but without that whole 9:30pm trip to the grocery store ;o)

German Chocolate Cake with Coconut Pecan Frosting
from America's Test Kitchen

When you assemble the cake, the filling should be cool or cold. To be time-efficient, first make the filling, then use the refrigeration time to prepare, bake, and cool the cakes. Toast the pecans on a baking sheet in a 350°F (175°C) oven until fragrant and browned, about 8 minutes.—the Editors of Cook’s Illustrated

For the filling
4 large egg yolks
One 12-ounce can evaporated milk
1 cup granulated sugar
1/4 cup packed light brown sugar
6 tablespoons unsalted butter, cut into 6 pieces
1/8 teaspoon salt
2 teaspoons vanilla extract
2 1/3 cups sweetened shredded coconut
1 1/2 cups finely chopped pecans, toasted
For the cake
4 ounces semisweet or bittersweet chocolate, chopped fine
1/4 cup Dutch-processed cocoa, sifted
1/2 cup boiling water
2 cups unbleached all-purpose flour plus more for dusting the pans
3/4 teaspoon baking soda
12 tablespoons unsalted butter, softened but still cool
1 cup granulated sugar
2/3 cup packed light brown sugar
3/4 teaspoon table salt
4 large eggs, room temperature
1 teaspoon vanilla extract
3/4 cup sour cream, at room temperature

Method
Make the filling
1. Whisk the yolks in a medium saucepan; gradually whisk in the evaporated milk. Add the sugars, butter, and salt and cook over medium-high heat, whisking constantly, until the mixture is boiling, frothy, and slightly thickened, about 6 minutes.
2. Transfer the mixture to a bowl, whisk in the vanilla, then stir in the coconut. Cool until just warm, cover with plastic wrap, and refrigerate until cool or cold, at least 2 hours or up to 3 days. (The pecans are stirred in just before cake assembly.) (Or in my case forgotten about completely forgotten about until the last minute despite having gone to the store to buy some and therefore just sprinkling them on top)


Make the cake
1. Adjust an oven rack to the lower-middle position; heat the oven to 350°F (175°C). Combine the chocolate and cocoa in a small bowl; pour the boiling water over and let stand to melt the chocolate, about 2 minutes. Whisk until smooth; set aside until cooled to room temperature.
2. Meanwhile, spray two 9-inch-round by 2-inch-high straight-sided cake pans with nonstick cooking spray; line the bottoms with parchment or waxed paper rounds. Spray the paper rounds, dust the pans with flour, and knock out the excess. Sift the flour and baking soda into a medium bowl or onto a sheet of parchment or waxed paper.
3. In the bowl of a standing mixer, beat the butter, sugars, and salt at medium-low speed until the sugar is moistened, about 30 seconds. Increase the speed to medium-high and beat until the mixture is light and fluffy, about 4 minutes, scraping down the bowl with a rubber spatula halfway through. With the mixer running at medium speed, add the eggs one at a time, beating well after each addition and scraping down the bowl halfway through. Beat in the vanilla; increase the speed to medium-high and beat until light and fluffy, about 45 seconds.
With the mixer running at low speed, add the chocolate, then increase the speed to medium and beat until combined, about 30 seconds, scraping down the bowl once (the batter may appear broken). With the mixer running at low speed, add the dry ingredients in 3 additions, alternating with the sour cream (in 2 additions), beginning and ending with the dry ingredients, and beating in each addition until barely combined. After the final flour addition, beat on low until just combined, then stir the batter by hand with a rubber spatula, scraping the bottom and sides of the bowl, to ensure that the batter is homogenous (the batter will be thick).
Divide the batter evenly between the prepared cake pans; spread the batter to the edges of the pans with the rubber spatula and smooth the surfaces.
4. Bake the cakes until a toothpick inserted into the center of the cakes comes out clean, about 30 minutes. Cool in the pans 10 minutes, then invert the cakes onto a greased wire rack; peel off and discard the paper rounds. Cool the cakes to room temperature before filling, about 1 hour. (The cooled cakes can be wrapped in plastic wrap and stored at room temperature for up to 1 day.)

To assemble
1. Stir the toasted pecans into the chilled filling. Set one cake on a serving platter or cardboard round cut slightly smaller than the cake, and the second cake on a work surface (or leave it on the wire rack). With a serrated knife held so that the blade is parallel with the work surface, use a sawing motion to cut each cake into two even layers. Starting with the first cake, carefully lift off the top layer and set aside.
2. Using an icing spatula, distribute about 1 cup filling evenly on the cake, spreading the filling to the very edge of the cake and leveling the surface. Carefully place the upper cake layer on top of the filling; repeat using the remaining filling and cake layers. If necessary, dust the crumbs off the platter; serve.

Note: The cake may be refrigerated, covered loosely with foil, up to 4 hours (if refrigerated longer than 2 hours, let the cake stand at room temperature 15 to 20 minutes before serving).

2.11.2010

Chocolate Graham Cracker Cupcakes with Toasted Marshmallow Frosting


I don't even remember how I came across this recipe a couple weeks ago but I have been admiring it ever since. It was created by Jennifer Shea, owner of Trophy Cupcakes out in Seattle. Martha Stewart apparently had Jennifer on her show back in 2008, sharing this recipe with the world. And here I am, almost two years later just finding out about this glorious treat. And today I finally got the opportunity to try it out!
 
making graham cracker crumbs with my food processor ^_^

By the way, you should take a look at both Trophy's website and also Martha Stewart's and just look at Jennifer's creations because there is no way that I am at that level of perfection (though I hope to someday make it up there). When Brad and I finally make it out to Washington, this bakery is a must stop for me. I am dying to try their Chocolate Hazelnut (Nutella Buttercream....Yummmm), Chocolate Chip Mint, Chocolate Peanut Butter, Triple Coconut, Snowball, Chocolate Macaroon...must...go...to...Seattle...now!

Anyway, these turned out fantastic! It is of course reminiscent of a S'More and therefore uberdelicious. Plus it gave me a reason to go out and buy a hand held torch ;o).  The only "problem" I found was once we started eating the cupcakes. The bottom graham cracker crust on a couple of the cupcakes tended to stick to the bottom of the liner and thus separate from the cake. My friend Erin suggested that next time to try spraying the inside of the liners with cooking spray and that should allow the crumb crust to release much easier. So simple, yet so brilliant. Thanks Erin! So yes, needless to say, these cupcakes were a hit to everywhere I took them. Oh, and I know that the recipe said it makes 24 cupcakes...but I ended up making 24 cupcakes and a small 9 inch cake. Just as a heads up. Commence daydreaming....now.

Chocolate Graham Cracker Cupcakes
by Jennifer Shea of Trophy Cupcakes, originally posted at Martha Stewart

  • 2 1/4 cups plus 2 tablespoons sugar
  • 1 3/4 cups all-purpose flour
  • 3/4 cup plus 1 tablespoon cocoa powder (not Dutch-processed)
  • 1 1/2 teaspoons baking powder
  • 1 1/2 teaspoons baking soda
  • 1 teaspoon salt
  • 2 large eggs
  • 1 cup whole milk
  • 1/2 cup vegetable oil
  • 2 teaspoons pure vanilla extract
  • 1 cup boiling water
  • 1 1/2 cups graham cracker crumbs (from about 20 squares)
  • 1/3 cup unsalted butter, melted
  • 9 ounces bittersweet chocolate, finely chopped
  • Marshmallow Frosting
Directions:
  • Preheat oven to 350 degrees. Line 2 standard muffin tins with cupcake liners; set aside.
  • Sift 2 cups plus 2 tablespoons sugar, flour, cocoa powder, baking powder, baking soda, and salt together into the bowl of an electric mixer. Using the paddle attachment, mix ingredients together on low speed.
    • In a large bowl, mix together eggs, milk, oil, and vanilla. Add to flour mixture and beat on medium speed for 30 seconds. Scrape down sides of bowl and continue mixing on medium speed for 2 minutes. Add boiling water and stir to combine; set cake batter aside.
     
    • Place graham cracker crumbs, remaining 1/4 cup sugar, and melted butter in a large bowl; stir until well combined.
      • Place 1 tablespoon graham cracker mixture into the bottom of each prepared muffin cup. Use the bottom of a small glass to pack crumbs into the bottom of each cupcake liner. Reserve remaining graham cracker mixture for topping. 
       
      • Place 2 teaspoons chocolate in each muffin cup. 
       
      • Transfer muffin tins to oven and bake until the edges of the graham cracker mixture is golden, about 5 minutes. Remove from oven and fill each muffin cup three-quarters full with cake batter. Sprinkle each with remaining chocolate and graham cracker mixture. Return to oven and bake, rotating pans halfway through baking, until tops are firm and a cake tester inserted in the center comes out clean, 18 to 20 minutes. Transfer muffin tins to a wire rack and let cupcakes cool in pan for 10 minutes. Remove cupcakes from pan and let cool completely. 
       
      • Transfer frosting to a large pastry bag fitted with a large plain round or French tip (such as Ateco #867 or Ateco #809). Pipe frosting in a spiral motion on each cupcake. 
       
      • Transfer cupcakes to a baking sheet. Using a kitchen torch, lightly brown the frosting, taking care not to burn the cupcake liners. Serve immediately or store in an airtight container, up to 2 days. 
        

        Marshmallow Frosting
        most likely developed by Jennifer Shea, originally posted at MarthaStewart.com

        • 8 large egg whites
        • 2 cups sugar
        • 1/2 teaspoon cream of tartar
        • 2 teaspoons pure vanilla extract
        Directions:
        1. Place egg whites, sugar, and cream of tartar in the heatproof bowl of an electric mixer. Set over a saucepan with simmering water. Whisk constantly until sugar is dissolved and whites are warm to the touch, 3 to 4 minutes.
        2. Transfer bowl to electric mixer fitted with the whisk attachment, and beat, starting on low speed, gradually increasing to high, until stiff, glossy peaks form, 5 to 7 minutes. Add vanilla, and mix until combined. Use immediately.