2.25.2010

Valentine's Day Cookies

I found this recipe a couple years ago on An American Housewife. They are more of a crispy cookie, though I always try to roll them out a bit thicker for Brad since he prefers the softer types. Anyway, I have made this recipe a couple of times and I tend to like the results. Last year I used this recipe (with a flower cookie cutter), stuck in some skewers and had my kindergarteners use them to make edible bouquets after decorating them themselves. They then stuck them in a flower pot they had painted along with floral foam and "moss". The mothers loved them and I stuck the idea in the back of my mind to make a cookie bouquet myself at some other time down the road.
Well, since we were going to Michigan over Valentine's Day this year, I decided at the last minute to whip up some bouquets to give as gifts. In the whirlwind of activities, I forgot to take pictures of all of the different bouquets but I think they turned out alright. Though Royal Icing is nice to pipe with, I think perhaps next year I will try to make a softer frosting for the cookies that will still harden somewhat. I will have to say though, another plus about the Royal Icing was that in the car, the cookies could rub against each other and their designs were will intact.


An American Housewife's Sugar Cookies
by An American Housewife

  • 3/4 c sugar
  • 6 T butter
  • 1/3 c shortening
  • 1 large egg
  • 1 T milk
  • 1 t vanilla
  • 2 c flour
  • 1 1/2 t baking powder
  • Dash of salt
  1. Cream the sugar, butter and shortening. 
  2. Add the egg, milk and vanilla. 
  3. Add the flour, baking powder and salt then mix just to blend. 
  4. Chill dough for at least 2 hours. 
  5. Roll about 1/4 inch thick on a lightly floured surface and cut into shapes. 
  6. Bake on parchment lined cookie sheets for approximately 8 minutes at 370 degrees.
  7. Cool.
An American Housewife's Royal Icing

  • 4 c confectioners' sugar
  • 3 large egg whites
  • 1/2 t cream of tartar
  • 1/2 t vanilla
  • 1 T water

Beat 6 minutes on high
(add more or less water depending on stiff it is and how stiff you want it).

2.11.2010

Chocolate Graham Cracker Cupcakes with Toasted Marshmallow Frosting


I don't even remember how I came across this recipe a couple weeks ago but I have been admiring it ever since. It was created by Jennifer Shea, owner of Trophy Cupcakes out in Seattle. Martha Stewart apparently had Jennifer on her show back in 2008, sharing this recipe with the world. And here I am, almost two years later just finding out about this glorious treat. And today I finally got the opportunity to try it out!
 
making graham cracker crumbs with my food processor ^_^

By the way, you should take a look at both Trophy's website and also Martha Stewart's and just look at Jennifer's creations because there is no way that I am at that level of perfection (though I hope to someday make it up there). When Brad and I finally make it out to Washington, this bakery is a must stop for me. I am dying to try their Chocolate Hazelnut (Nutella Buttercream....Yummmm), Chocolate Chip Mint, Chocolate Peanut Butter, Triple Coconut, Snowball, Chocolate Macaroon...must...go...to...Seattle...now!

Anyway, these turned out fantastic! It is of course reminiscent of a S'More and therefore uberdelicious. Plus it gave me a reason to go out and buy a hand held torch ;o).  The only "problem" I found was once we started eating the cupcakes. The bottom graham cracker crust on a couple of the cupcakes tended to stick to the bottom of the liner and thus separate from the cake. My friend Erin suggested that next time to try spraying the inside of the liners with cooking spray and that should allow the crumb crust to release much easier. So simple, yet so brilliant. Thanks Erin! So yes, needless to say, these cupcakes were a hit to everywhere I took them. Oh, and I know that the recipe said it makes 24 cupcakes...but I ended up making 24 cupcakes and a small 9 inch cake. Just as a heads up. Commence daydreaming....now.

Chocolate Graham Cracker Cupcakes
by Jennifer Shea of Trophy Cupcakes, originally posted at Martha Stewart

  • 2 1/4 cups plus 2 tablespoons sugar
  • 1 3/4 cups all-purpose flour
  • 3/4 cup plus 1 tablespoon cocoa powder (not Dutch-processed)
  • 1 1/2 teaspoons baking powder
  • 1 1/2 teaspoons baking soda
  • 1 teaspoon salt
  • 2 large eggs
  • 1 cup whole milk
  • 1/2 cup vegetable oil
  • 2 teaspoons pure vanilla extract
  • 1 cup boiling water
  • 1 1/2 cups graham cracker crumbs (from about 20 squares)
  • 1/3 cup unsalted butter, melted
  • 9 ounces bittersweet chocolate, finely chopped
  • Marshmallow Frosting
Directions:
  • Preheat oven to 350 degrees. Line 2 standard muffin tins with cupcake liners; set aside.
  • Sift 2 cups plus 2 tablespoons sugar, flour, cocoa powder, baking powder, baking soda, and salt together into the bowl of an electric mixer. Using the paddle attachment, mix ingredients together on low speed.
    • In a large bowl, mix together eggs, milk, oil, and vanilla. Add to flour mixture and beat on medium speed for 30 seconds. Scrape down sides of bowl and continue mixing on medium speed for 2 minutes. Add boiling water and stir to combine; set cake batter aside.
     
    • Place graham cracker crumbs, remaining 1/4 cup sugar, and melted butter in a large bowl; stir until well combined.
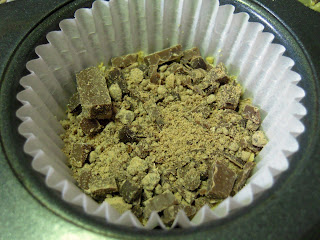
      • Place 1 tablespoon graham cracker mixture into the bottom of each prepared muffin cup. Use the bottom of a small glass to pack crumbs into the bottom of each cupcake liner. Reserve remaining graham cracker mixture for topping. 
       
      • Place 2 teaspoons chocolate in each muffin cup. 
       
      • Transfer muffin tins to oven and bake until the edges of the graham cracker mixture is golden, about 5 minutes. Remove from oven and fill each muffin cup three-quarters full with cake batter. Sprinkle each with remaining chocolate and graham cracker mixture. Return to oven and bake, rotating pans halfway through baking, until tops are firm and a cake tester inserted in the center comes out clean, 18 to 20 minutes. Transfer muffin tins to a wire rack and let cupcakes cool in pan for 10 minutes. Remove cupcakes from pan and let cool completely. 
       
      • Transfer frosting to a large pastry bag fitted with a large plain round or French tip (such as Ateco #867 or Ateco #809). Pipe frosting in a spiral motion on each cupcake. 
       
      • Transfer cupcakes to a baking sheet. Using a kitchen torch, lightly brown the frosting, taking care not to burn the cupcake liners. Serve immediately or store in an airtight container, up to 2 days. 
        

        Marshmallow Frosting
        most likely developed by Jennifer Shea, originally posted at MarthaStewart.com

        • 8 large egg whites
        • 2 cups sugar
        • 1/2 teaspoon cream of tartar
        • 2 teaspoons pure vanilla extract
        Directions:
        1. Place egg whites, sugar, and cream of tartar in the heatproof bowl of an electric mixer. Set over a saucepan with simmering water. Whisk constantly until sugar is dissolved and whites are warm to the touch, 3 to 4 minutes.
        2. Transfer bowl to electric mixer fitted with the whisk attachment, and beat, starting on low speed, gradually increasing to high, until stiff, glossy peaks form, 5 to 7 minutes. Add vanilla, and mix until combined. Use immediately.  
         

        2.08.2010

        Great Grandma Carl's Carrot Cake


        I may get in "trouble" for posting this but how can I not share "the best carrot cake I have ever tasted!" which has been said by many a people. Whenever you go over to my Great Grandma's house for any sort of occasion, Holidays, Family Reunions, or if you are just plain lucky, you will always find a freshly made carrot cake. This is the carrot cake I grew up on and this is the carrot cake that I compare all others to. When Brad and I got married, my Great Grandma handed down the recipe to me so that I can continue to make it for my family. I hadn't gotten around to making it until a couple weeks ago for a friend's baby shower (as you may or may not know).
        (I used the carrot cake as the top tier, which I now realize I should have made the bottom carrot, and top chocolate since the chocolate cake didn't turn out so well which I'm blaming on a particular brand of chocolate that I used and won't be buying again...but that's a different story)
        When I actually looked at the recipe closely, I had to call my Great Grandma to make sure I read it correct. "1 1/3 cup vegetable oil? Is that right?" yep, that was right. Vegetable oil, no butter, and 4 eggs...yeah...So I crossed my fingers hoping that my cake would turn out at least somewhat like my Great Grandma's and...it did! The girls seemed to thoroughly enjoyed it, so much so that there wasn't any left to bring home to Brad! Oh well, tough luck for him ;o) No, I'm kidding. He got to eat the crown of the cake that I had cut off.

        Great Grandma Carl's Carrot Cake
        family recipe passed down to me by Pauline Carl

        2 cups sugar
        1 1/3 cup oil
        4 eggs
        2 cups flour
        2 teaspoons baking soda
        1 teaspoon salt
        2 teaspoons cinnamon
        3 cups grated carrots

        • Grate carrots in a food processor (or blender like my Great Grandma, who adds a bit of water to the mix to help with the process). Drain any water that has been extracted.
        • Mix together sugar, oil, and eggs (one at a time)
        • Sift together flour, baking soda, salt, and cinnamon then add to wet ingredients
        • Beat in 3 cups of grated carrots
        (I'm sorry, but isn't this just dying to be licked?)
        • Bake at 350 degrees. 40 mins for 2 10" pans, 35 mins for 3 9" pans or 50 mins for a 9x13" cake.
        • Frost and enjoy!


        Great Grandma's Cream Cheese Frosting
        1 lb Powdered Sugar
        1 stick Butter
        8oz of Cream Cheese
        1/4 teaspoon vanilla
        • Allow cream cheese and butter to come to room temperature.
        • Beat ingredients together.
        • Frost cake and add nuts on top.
         
        (That's my Great Grandma's Recipe in the background)

        2.06.2010

        A Little Taste of Summer aka Strawberry Shortcake


        One of my kiddos at work was celebrating a birthday last weekend and requested a strawberry shortcake that he saw in the book Cook-a-doodle-do! It's a cute little story about a relative of the Little Red Hen who is looking to bake a strawberry shortcake. The Rooster has a crowd of animals attempting to help him, including an Iguana, a Turtle, and a Potbelly Pig. The Iguana attempts to cut the butter with scissors while Pig tries to eat everything in site. Throughout the story, there are little explanations of cooking terms for kids, a great book to introduce the art of baking to younger children. At the end of the book, there is a recipe for the Roosters Strawberry Shortcake. I was going to make that specific recipe but then another version caught my eye over at Chocolate Shavings.

        The birthday boy requested that his cake be in the shape of a heart and his eyes lit up when he saw his cake! It was pretty warm in the kitchen and dining room at work so we had to put the cake in the freezer to get the whipped cream to set up a bit. This affected the texture of the cake a bit but it was still fabulous! The shortbread was slightly more moist than an average biscuit but still pretty dense but sweet. The kids seemed to really like it as well though I think some were hoping for an actual cake. Either way, I plan on making this recipe again once summer comes around..rich right now I'm wondering if that will ever happen :op


        Strawberry Shortcake
        adapted by Chocolate Shavings

        1/2 cup (1 stick) unsalted butter at room temperature, plus more for pan
        1 1/2 cups all-purpose flour (spooned and leveled), plus more for pan
        2 teaspoons baking powder
        1/2 teaspoon salt
        1 cup sugar
        2 large eggs plus 2 large egg yolks
        1/2 teaspoon pure vanilla extract
        1/2 cup whole milk
        1 pound strawberries, hulled and thinly sliced
        1 1/2 cups heavy cream

        Directions:
        • Preheat oven to 350 degrees. Butter bottom of an 8-inch round cake pan, and line with parchment paper. Butter and flour paper and sides. 
        • In a medium bowl, whisk together flour, baking powder, and salt; set aside.
          Using an electric mixer on high speed, beat butter and 1/2 cup sugar in a large bowl until light and fluffy. Add eggs and yolks, one at a time, beating well after each addition. Beat in vanilla. 
        • With mixer on low, alternately add flour mixture in 3 parts and milk in 2, beginning and ending with flour mixture; mix just until combined. Spread batter in prepared pan. (This part I found a bit tricky because the batter was so thick)

        • Bake until a toothpick inserted in center of cake comes out clean, 30 to 35 minutes. Cool in pan 10 minutes; invert onto a wire rack to cool completely. 
         
        • Using a serrated knife, split cake in half horizontally; place bottom half, cut side up, on a serving plate.
        • Make topping: In a large bowl, combine strawberries and 1/4 cup sugar; set aside. 
         (Have you ever seen a strawberry with two hulls?)
        • Using an electric mixer, beat cream and remaining 1/4 cup sugar in a large bowl until very soft peaks form.
        • Arrange half of strawberries over bottom cake layer; top with half of whipped cream, leaving a 1-inch border. Cover with top half of cake, cut side down. 
        • Top cake with remaining whipped cream, leaving a 1-inch border. 
        • Refrigerate cake and remaining strawberries separately, at least 1 hour (or up to 1 day). 
        • Just before serving, spoon strawberries over cake. 
         

        2.05.2010

        California Pizza Kitchen Pizza Dough Recipe

        Years ago I was introduced to California Pizza Kitchen on a shopping trip with my mother during a Chicago shopping trip that was put together by Upjohn for their employees. I loved it and was pleasantly reacquainted with it while at Biola in California. The crust and the sauce was just so sweet and just different than the other pizzas that I had grown up with. While at Biola, I came across the recipe for CPK's pizza crust on their website. Unfortunately it has been taken down since then and published in their Family Cookbook.

        Tonight was the first time I have actually tried this dough after years of putting it off for one reason or another. Many of times the reason being is that it really is a dough you need to plan ahead with. You see, for it to get its full CPK flavor, it needs to set overnight and often times I am exhausted from work or get out too late to create the dough. Well today I had a day off so I decided to make it right when I woke up thinking the extra couple of hours would at least produce some of the developing flavor.

        I have to say, it was a pretty great recipe. I was a little uneasy about it at first, because it didn't look like the pizza doughs I have made in the past but honestly that could be because I neglected to use the paddle as instructed. The dough was pretty easy to form and cooked up pretty quickly. I chose to have a crust on my pizza, which turned out nicely where as Brad decided to go for more of the thin crust variety. We were both quite impressed and will definitely make this again. Oh, and also there is a Honey wheat variation that I never really copied it down, but I did find it on a pizza making blog. It seems legit since their traditional CPK recipe was pretty much spot on from what was on CPK's website in years past. Though I have not tried it yet, I will copy it down on the bottom of this post for anyone who wants to try it out...aka my father ;o)


        California Pizza Kitchen Traditional Dough
        from the California Pizza Kitchen Family Cookbook

        Ingredients
        • 1 teaspoon active dry yeast 
        • 1/2 cup plus 1 tablespoon warm water (110-115 degrees F)
        • 1 1/2 cups bread or all purpose flour 
        • 2 teaspoons sugar 
        • 1 teaspoon kosher salt
        • 1 Tablespoon + 1 teaspoon olive oil 
         Directions
        • In a small bowl, dissolve the yeast in the water (Make sure the water is not too hot as this will kill the yeast and prevent the dough from rising) 
        • If using an upright electric mixer, use the mixing paddle attachment because the dough hook will not mix this size of batch effectively. In the mixing bowl, combine the flour, sugar, salt, and 1 Tablespoon olive oil and stir by hand just to distribute. Add the disolved yeast and place the bowl and paddle on the mixer. Start mixing on the lowest speed. Increase the speed slightly and mix 2 to 3 minutes, until the dough is smooth and elastic. Do not mix too muxh as this will build up too much gluten and make it difficult to shape. 
        •  If using a food processor, make sure to use the plastic blade, the metal knife will cut through the        gluten strands and keep the dough from developing any body. Proceed as for the stand mixer, make sure to stop kneading as soon as the dough forms a ball. Over kneading could overheat the dough as the mixing bowl is directly above the motor.
        • If mixing by hand, place the dry ingredients in a 4 to 6 quart mixing bowl, and stir to combine. Make a well in the center and pour the liquids, reserving 1 teaspoon of olive oil. Use a wooden spoon to combine the ingredients. Once all the flour is mixed in, turn the dough onto a lightly floured work surface and, with lightly oiled hands, knead the dough for five minutes. It should be smooth and elastic, but it will still be slightly sticky.
        • Place the remaining teaspoon of oil in a 4 quart mixing bowl and spread it with your fingertips. Place the dough ball in the bowl, move it around the oil, then turn it over so the oil side is facing upward. Cover the bowl with plastic wrap and allow to rise until double in bulk, around 1.5 to 2 hours.
        • You can use the dough at this point, but if possible- and this does requires some planning- punch the dough down, reshape it into a ball, and cover with plastic wrap. Refrigerator overnight, this will create a more flavorful dough with a chewier consistency. 
        • About 2 hours before you are ready to assemble your pizza, remove the dough from the refrigerator. If making individual pizzas, use a sharp knife to divide the dough into two or four equal. 
        • Roll each portions into a round ball on a smooth clean surface, making sure to seal any holes by pinching or rolling.
        • Place the newly formed dough balls in a glass baking dish, spaced far enough apart to allow for each to double in size. Seal the top of the dish with plastic wrap.Set aside at room temperature until dough has doubled in size, about 2 hours. They should be smooth and puffy. Dress according to the recipe. 

        **********************************************************************************
        I put together the following instructions after scouring the internet for how long/how high. As far as I know, this is not CPK's directions.


        • Heat your pizza stone in a 500 degrees F for at least 30 minutes. Roll out and shape your dough balls, transfer the dough to a pizza peel, and dress them. Slide the dough into the oven using a cornmeal-dusted pizza peel (or anything smooth and thin enough to maneuver, like a cutting board or flat cookie sheet).


          (How much do you love that pizza peel? Because I know I do! 
          What makes it even better is that my father in law made it)

        • The pizzas will cook somewhat quickly so it is always better to watch them rather than rely on a timer. Brad and my pizzas were in the oven for 8-10 minutes.

         **********************************************************************************

        Honey Wheat Pizza Dough

        • 1 teaspoon yeast
        • ½ cup plus 1 teaspoon warm water (105-110 degrees F)
        • 1 cup bread flour
        • ½ cup whole wheat flour
        • 1 Tablespoon + 1 teaspoon clover honey
        • 1 teaspoon salt
        • 1 Tablespoon + 1 teaspoon extra virgin olive oil
        Follow directions for Traditional Pizza Dough

        2.03.2010

        Yum...Cinnamon Rolls...

        The past couple of weeks, I have been crazing Cinnamon Rolls off and on. So one day I decided that I was just going to dive in and make them. But then I went to our pantry and realized that it was down to bare bones because of all the baking I have done lately so instead I went to grocery shopping. The following day I was working until 5 but then after making dinner, running a couple errands, and before I knew it, it was 10 o'clock and I was not about to put baking cinnamon rolls off for another day.

        This recipe was super easy.. Though the original recipe has it titled as "Cinnabon Cinnamon Rolls" I have to be honest and tell you that I haven't had too many Cinnabons so I have no idea how closely these resemble the popular chain but what I can tell you is that it is taking every ounce of my self control to not eat more than one right now ;o). As far as the recipe goes, I made a cinnamon and granulated sugar mixture and then sprinkled a little brown sugar on top of that.
        I also decided to let the rolls rise a second time after placing them in the pan so that they turned out a bit larger and got that support they needed from their neighbors. Finally, I prefer a powder sugar and heavy cream/milk icing only because that I what I grew up on. But I will include the cream cheese icing just for reference.

        Cinnabon Cinnamon Rolls

         by Lightly (from Toasted Todd Wilbur's MORE TOP SECRET RECIPES

          Ingredients

        • 1 (1/4 ounce) package dry yeast 
        • 1 cup warm milk 
        • 1/2 cup granulated sugar 
        • 1/3 cup margarine 
        • 1 teaspoon salt
        • 2 eggs 
        • 4 cups flour

        FILLING

        • 1 cup packed brown sugar 
        • 2 1/2 tablespoons cinnamon 
        • 1/3 cup margarine, softened (or melted in my case)

        Directions

        1. For the rolls, dissolve the yeast in the warm milk in a large bowl.
        2. Add sugar, margarine salt, eggs, and flour, mix well. Knead the dough into a large ball, using your hands dusted lightly with flour.
        3. Put in a bowl, cover and let rise in a warm place about 1 hour or until the dough has doubled in size.
        4. Roll the dough out on a lightly floured surface, until it is approx 21 inches long by 16 inches wide. It should be approx 1/4 thick.
        5. To make filling, combine the brown sugar and cinnamon in a bowl.
        6. Spread the softened margarine over the surface of the dough, then sprinkle the brown sugar and cinnamon evenly over the surface. 

             7. Working carefully, from the long edge, roll the dough down to the bottom edge.

             8. Cut the dough into 1 3/4 inch slices, and place in a lightly greased baking pan.
        (At this point, I allowed the rolls to rise a 2nd time, about 30-40 minutes)
            9. Bake in a 400 degree oven for 10 minutes or until light golden brown.
          10. Ice and Enjoy! 


         Cream Cheese Icing for Cinnamon Rolls (I have yet to try this, I used Powdered Sugar Icing)
        • 8 tablespoons margarine
        • 1 1/2 cups powdered sugar 
        • 1/4 cup cream cheese
        • 1/2 teaspoon vanilla 
        • 1/8 teaspoon salt 
        1. Beat well with an electric mixer until fluffy.
        2. When the rolls are done, spread generously with icing.

        Chicken Pot, Chicken Pot, Chicken Pot Pie!

        Brad often cannot believe how many songs I know and how often I often break into song, even if it is just a stanza. I have no idea where that "Chicken Pot Pie" little diddy comes from. I know my mother knows it as well (which isn't a surprise if you know her) and I have this faint inkling that it is connected with David Spade....Hmm....Hey Look! I found it! It's from the old t.v. sitcom Just Shoot Me (with David Spade..though he isn't the one who sang it.)

        Anyway, last night I had an unexpected opportunity to cook dinner! Woo Hoo! A couple months ago, we got together with a couple of friends and as a joint effort, we made chicken pot pie from scratch and it. was. amazing! We had never known that making chicken pot pie would be so easy and so tasty. I had meant to post the recipe previously but for whatever reason never got around to it. However, after making this dish again, I just had to post it!


        A couple notes. This last time that I made the pot pie, I used chicken breasts. However, the first time we made it, I believe we used chicken thighs. Also, both times we made our own pie crusts though you could easily buy pre-made crusts.


        Chicken Pot Pie
        by Robbie Rice

        Ingredients

        • 1 pound skinless, boneless chicken breast halves - cubed
        • 1 cup sliced carrots
        • 1 cup frozen green peas
        • 1/2 cup sliced celery
        • 1/3 cup butter
        • 1/3 cup chopped onion
        • 1/3 cup all-purpose flour
        • 1/2 teaspoon salt
        • 1/4 teaspoon black pepper
        • 1/4 teaspoon celery seed
        • 1 3/4 cups chicken broth
        • 2/3 cup milk
        • 2 (9 inch) unbaked pie crusts

        Directions

        • Preheat oven to 425 degrees F (220 degrees C.)
        • In a saucepan, combine chicken, carrots, peas, and celery. Add water to cover and boil for 15 minutes. Remove from heat, drain and set aside.
        • In the saucepan over medium heat, cook onions in butter until soft and translucent. Stir in flour, salt, pepper, and celery seed. Slowly stir in chicken broth and milk. Simmer over medium-low heat until thick. Remove from heat and set aside.
         
        •  Place the chicken mixture in bottom pie crust.


        Pour hot liquid mixture over.

        Cover with top crust, seal edges, and cut away excess dough.


        Make several small slits in the top to allow steam to escape.

        Bake in the preheated oven for 30 to 35 minutes, or until pastry is golden brown and filling is bubbly. 


        Cool for 10 minutes before serving.