8.21.2010

Congratulations Dave and Nicki!


Yes, it is true. Two of our good friends, David and Nicki, are about to have a little baby girl! Today was Nicki's baby shower and I was fortunate enough to be able to make the cake.

Nicki is your classic and traditional kind of girl who loves chocolate and white (or yellow) cakes and that is exactly what she got!


With the way that the batter turned out, I ended up doing a three layer cake. The bottom layer was a white cake with vanilla frosting, then came chocolate with chocolate, and topped with a white and chocolate.  
Now I have to admit that I began to run out of time because the day before I didn't prep as much as I could have, and possibly even should have so I wasn't 100% completely satisfied but I was content. Lucky for me, everybody at the shower seemed to love it.


One mistake I did make though, I misspelled Sofia's name! Up until three days ago, I could have sworn that Sofia was with an "f", but then I started doubting myself and then convinced myself that no, they had decided on "ph". Hah, yeah, I should have gone with my first instinct. Whoops. Luckily for me, the parents to be told me not to worry, and that they themselves had had that discussion about which letter to use. Just goes to show you, when in doubt, check it out!


8.04.2010

Mango Lassi

During my studies at Biola, I discovered the wonderful world of Indian culture. It first started with the movie, Bend it Like Beckham. I loved the music, the dance, the clothing...and then I was introduced to Bollywood through the movie "Mujhse Dosti Karoge" ("Let's be friends!"). My interest was peaked! Singing and Dancing throughout a movie!? Awesome!

Anyway, I ended up researching Indian Culture even more so that I could showcase it during our Missions Conference where students are challenged to think globally.  During this time, my friends and I made a trip to Artesia, otherwise known as "Little India", to try out the food so that we could possible recreate it for the entire student body.
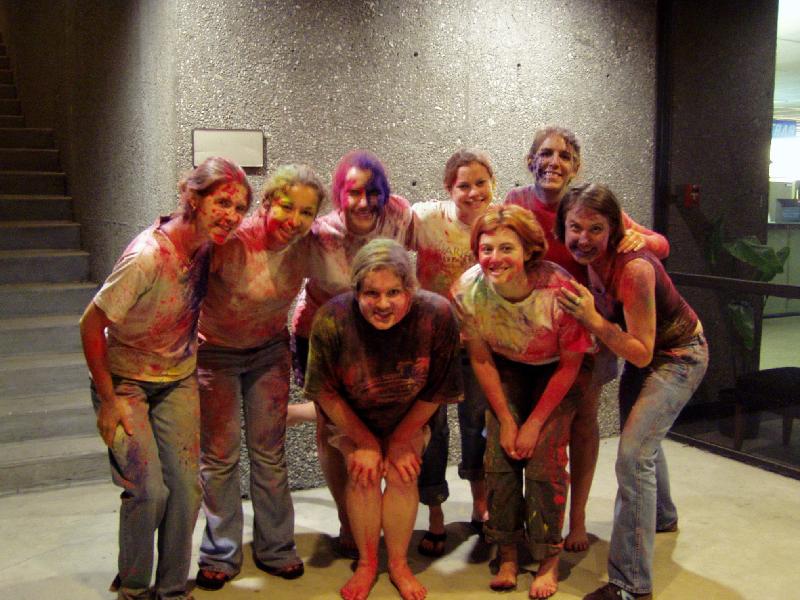
A couple of my friends and myself celebrating the Indian holiday of Holi

During one of these trips, I tried my first taste of mango (to my knowledge) in a sweet, cold, beverage called a "Lassi" A Lassi is a traditional South Asian yogurt based drink; similar to an American smoothie but much smoother. It was delicious and a couple weeks ago, while looking at the low prices of mangoes, that I was attempting to rack my brain with something "new". It was also quite hot and I was craving a sweet cool beverage...that's it! Mango lassis! Perfect!

I came across a blog then called "My Dhaba", a blog by a "Chef de Cuisine" bouting traditional Indian cuisine. Upon looking at the recipe, I realized how simple and easy it was to make. I made some for our friends a couple days later and then a week later, when staying my in laws I saw a couple of mangoes just calling out. Knowing my sister in law also loves mangoes, I decided to whip us up a batch of lassis the following day. So far, everyone has enjoyed them, and I hope you do too!

Mango Lassi
by My Dhaba (with comments by myself)

Ingredients:
Curd/Yogurt - 1 cup (I used plain yogurt the first time, vanilla flavored the next. Brad and I agree that plain is best but vanilla wasn't bad.)
Mango pulp - fresh preferred, 1/2 cup (I cut our mango into cubes)
Sugar - 3 tablespoons
Ice - crushed, 1/2 cup
Water - 1/2 cup or as required (Now if you have never had a lassi before, the thickness would be obviously be personal preference)

Method: Blend all and serve chilled.

8.03.2010

Blueberry Buckle

Last week, about this time, Brad sent me an e-mail asking if I could bake him something to take to the barbecue that his work was hosting on Friday. I quickly said yes but then, I have to admit, kind of placed it in the back of my mind due to work. Fast forward to Thursday night, sitting with my co-workers, writing up Medicaid notes when Brad sent me a message. "Did you happen to make a dessert for my barbecue tomorrow?" D-oh!

He offered to stop by Dominick's. I insisted that I would make something as soon as I got home. I flipped through my rolodex of new dessert options when my mind floated to the now 15 lbs of blueberries in our fridge (Boy, I love blueberry picking!). I then recalled a recipe that I have been wanting to try that my mother-in-law had given to me. My tastebuds were getting excited by the minute.

My generous and loving mother-in-law holding her great nephew 
(not my picture but it's one of my favorites!)

 I unfortunately didn't get home until after 11pm but hey, I was committed. As I was reading the recipe, I realized that it called for an 8x8 pan. Since I only have a 9x9 plus Brad was taking this dish to work so I decided to double it to ensure that he had enough. With that said, I am going to post the original recipe, but just know that doubling works well. Because I doubled the recipe, not all of the batter fit in the pan so I used two of my small ramekins to capture and bake up the "overflow". Though the recipe is pretty easy to put together, by the time I got home and settled enough to start throwing things in the mixer, waited for it to bake (which watching my newest documentary on New Kids on the Block-loved it!), and then burning myself pretty fiercely while taking it out of the oven, it was almost 2 am before I went to bed.

So what was the consensus? Was my late night escapade and burn worth it? Brad said that many people loved it. I know I enjoyed the bursts of blueberries between bites of cake, topped with a sweet cinnamon sugar crunch. In fact, some of you who enjoyed this blueberry dessert may even be reading this now, and it is all thanks to my dearest mother-in-law. I too, thought it was pretty delicious. Though I didn't get a taste (or picture) of the larger portion, I did make sure to enjoy the ramekins the following day. :o)


Blueberry Buckle

from my mother-in-law's kitchen


3/4 cup sugar
1/4 cup margarine or butter
1 egg
1/2 cup milk
2 cups flour
2 tsp baking powder
1/2 tsp salt
  • Mix sugar, butter, and egg. Stir in milk.


  • Blend and sift dry ingredients.


  • Blend 2 cups blueberries (by hand or low speed).

  • Grease pan/put some flour in bottom of 8x8 pan. Pour batter into pan.


Topping:
1/2 cup sugar
1/3 cup flour
1/2 tsp cinnamon
1/4 cup butter or margarine
  • Crumble over top of blueberry batter.


  • Bake 40-50 minutes at 375 degrees.

8.02.2010

Sopes!

During the month of July, our small group decided to take a break from our studies and have more "social" nights. Julia and Jeremiah offered to host one of these nights and declared it a Tapas Party. Well I thought that idea was perfect, not because it just sounds like a lot of fun but because I was eyeing some sopes the other day and thought this would be a perfect opportunity to try my hand at making them.


In my previous search in finding a recipe, I came across What can I pass you's blog where she was showcasing her own experiences with Sopes. According to What can I..., this recipe makes about 8 sopes. However, because we were going to a tapas party, i made ours into more bite size pieces so we ended up getting about 24 sopitos (little sopes). I thought that these were pretty easy to put together. Of course Brad and I were running late from opening a new bank account and I was rushing the beans so they didn't turn out at smooth and creamy as they should be. But other than that little hiccup, I think they turned out pretty well and the people at the party loved them.  We topped ours with beans, taco meat, shredded lettuce, and diced tomatoes, and had some queso fresco on the side for those who wanted some cheese. Like I said, they turned out great, but a word of warning...they do not reheat well. So enjoy them while they are hot and fresh.

Sopes
dough recipes from What Can I Pass You...

• 2 cups masa harina
• 1 3/4 cups of water
• pinch of salt
• 1 teaspoon of baking powder
• vegetable oil for frying (if you want to be strictly traditional, use lard)

Mix together all dough ingredients, except oil or lard. Knead until thoroughly combined.


Cut dough in half, divide each half into 4 portions. Form each piece into small balls.

Flatten each ball into a 3 inch circle using a rolling pin, the bottom of a plate or a tortilla press between 2 pieces of plastic wrap.


Fold sides up about 3/4 an inch. They don't have to be perfect! Prick the bottom of each sope lightly with a fork.

Heat about 1/4 of an inch of oil in a cast iron skillet to about 350 degrees. Fry sopes about 1 minute on each side, or until lightly crispy and slightly golden.


Remove from oil and drain on paper towels.

Top with your favorite Mexican food elements. Serve immediately.

8.01.2010

Just a little sneak peak...

About a year ago, I discovered that pizzas could be made on the grill! I suggested this novel idea and got vetoed due to its unorthodoxness (is that even a word?). Anyway, a little over a week ago, Briant and Harmony, and little Nathan too, came over to hang out and have dinner and I decided I had waiting long enough. We were going to grill pizzas :o)

This time around, Brad thought it was a great idea, as did our friends, so grill we did. I tried a new recipe but wasn't too impressed (hence why I am not sharing it). It was also our first try so some of the crust got a little burnt on the bottom but hey, it was an overall great experience. We will definitely try it out again very soon and when I find a recipe that works, you bet I will share it with you. However, I did happen to find a new pizza sauce recipe that I am loving (as does everyone else). I have made it twice so far and it has been a hit both times. The only "qualm" I have about the recipe though is that it doesn't make a whole lot, so don't be afraid to double it..or even triple depending on your sauce amount preferences and how many pizzas you are making. I doubled it and we didn't really have enough for all four of our personal pizzas.

By Larry Flax and Rick Rosenfield

1 tablespoon olive oil
2 teaspoons minced garlic
2 large (1/2 pound) Roma tomatoes
1 teaspoon chopped fresh oregano, or 1/2 teaspoon dried oregano
1 teaspoon chopped fresh basil, or 1/2 teaspoon dried basil
1/2 teaspoon kosher salt
pinch of ground black pepper
1 tablespoon tomato paste

1. Heat the olive oil in a small nonstick frying pan over medium heat.  Do not allow it to smoke.  Add the garlic and cook, stirring constantly, until it just begins to turn light brown, 1 to 2 minutes.  Do not allow the garlic to burn, as it will make the sauce bitter.

2.
Add the remaining sauce ingredients except the tomato paste, and stir well.  Reduce the heat and simmer the sauce until all the liquid evaporates, about 10 minutes.  Stir int he tomato paste and cook for an additional 2 minutes.  Remove from the heat and cool completely before using.  Store covered in the refrigerator for up to 1 week.

Variation: Spicy Marinara Sauce
Double the amount of garlic and add 1/4 teaspoon crushed red pepper flakes along with it.  roughly chop 2 fresh basil leaves and stir into the sauce after adding the tomato paste.


Now that you have a new pizza sauce recipe, take a look at our pizza grilling adventures.


Briant in the midst of tossing his dough like a pro

Veggies and fresh basil for topping


Saucing it up


I believe this is Harmony's Pizza

Time to eat!


Mmm...Pepperoni..Don't mind the burnt crust


I agree Harmony, your pizza does look better :op

7.16.2010

Chicken Tacos

Located in the neighborhood of Pilsen in Chicago, there is a deliciously wonderful Mexican restaurant called Nuevo Leon. And now that I am writing this, I am realizing that out of all the times that we have been there, I have yet to take a single picture! Anyway, one of the things that makes Nuevo Leon so fabulous is that before you even order or get your food, you get unlimited chips and salsa and a "platito" of whatever they are featuring that night...think of it as a little, free "appetizer" that is made with the same loving care and delectable flavors as their entrees.

Anyway, the reason why I am telling you this is because the first time that we went to Nuevo Leon, we had no idea about the chips, salsa, and platitos..and what was on the platito that night was some of the best Mexican chicken we (Brad, my Tia Rosie, my Abuelita, and myself) have ever had. Weeks later I was still craving it so I decided to see if I could find a recipe that I could recreate it at home. And though it isn't a perfect match, it does come pretty close. I introduce to you "Michael Chiarello Chicken Taco Filling" a la food network.


Now  this recipe calls for diced chicken so I didn't take the time to slow cook the chicken to shred it like Nuevo Leon had it but I thought it still turned out well. Also, the recipe calls for both sweet and smoked paprika..so I'm sure you can guess what I did...I just used that jar that is simply labeled "paprika" in my spice cabinet for both. Now if you go to the linked website, Michael will go on to give a recipe for "toppings" and what not but we just ate these plain. I also made our own corn tortillas but store bought tortillas would obviously be okay.


Michael Chiarello Chicken Taco Filling
Easy Entertaining with Michael Chiarello

  • 1/2 cup extra-virgin olive oil
  • 10 garlic cloves, minced
  • 5 yellow onions minced
  • 4 pounds boneless, skinless chicken breast, diced into 1/2-inch chunks
  • Salt and freshly ground black pepper
  • 1/4 cup all-purpose flour
  • 2 serrano chiles, sliced thin
  • 2 tablespoons sweet paprika
  • 2 tablespoons smoked paprika
  • 2 tablespoons cumin seeds, toasted
  • 2 tablespoons dried oregano
  • 4 to 5 cups chicken stock or water

Directions

  1. Heat a large saute pan over medium heat and pour in enough olive oil to coat the bottom of the pan. Add the garlic and onions and cook until soft and nicely caramelized, about 10 to 12 minutes.
  2. In the meantime, season the chicken with salt and pepper. Sprinkle the flour over the chicken and toss to coat. Heat another large saute pan over medium-high heat and add 3 tablespoons of olive oil. Cook the chicken until it is lightly browned, about 6 to 8 minutes.
  3. Once the onion mixture is caramelized and softened, add the serranos, paprikas, cumin, and oregano.
    When the chicken is done, transfer it to the pan with the onions. Pour in the broth or water and bring to a boil. Reduce the heat and simmer until the sauce is thick and delicious, approximately 20 minutes. Adjust seasoning with salt and pepper.

7.14.2010

Stargazer Pie

About a week or two ago, Brad and I had the opportunity to host our beloved small group at our apartment. Well little did we know that we would also have severe thunderstorms and tornado warnings that night. Anyway, when I had gotten home from work, I had plenty of time to throw together this little diddy...'bout Jack and Di-a-nne...just kidding ;o) Anyway, I had plenty of time to bake up a couple of goodies and set up the rest of the snacks before people started to show up. And everything was going so smoothly went the Severe Weather Alert came on the radio..and the we turned on the T.V. and saw Tom Skilling and my friend Mark Suppelsa along with his co-anchor (sorry I don't remember your name!) looking somewhat concerned and serious...and then the air raid sirens went off. So we grabbed our keys, flashlights and a couple of folding chairs and headed down to the basement with our weather radio.
(this is NOT my picture, but rather Scott Strazzante, Chicago Tribune / June 23, 2010. I just wanted to include this picture to show you some of the intense clouds since U.S. Cellular is literally blocks from our apartment)
 
Well fortunately nothing ever came of the storm in our neck of the woods..er, city...besides some pretty intense lightening, high winds, and flooding...however it did eat into my prep time. So by the time everything started to calm down, we only had a few moments before people started to show. Luckily, we have some pretty awesome people in our group that totally understood (and who braved the weather to make it out to our place!) and helped me finish setting up. But I am telling you all of this not only because it ended up being a crazy night but rather that in all of the commotion, corners were cut and a slight mistake was made. Okay, enough of the weather talk.

I'm not even sure when or how I came across this but my goodness am I sure glad I did (as are the others who got to taste this treat!). Dozen Flours, in a time crunch, came up with this fairly easy recipe for a delicious and delectable dessert, Stargazer Pie. What compromises did I have to make? Well the truffle layer wasn't able to set for the given time due to the whole tornado siren episode (nor did I cream the butter and cream cheese entirely...I had some tiny lumps). Also, in my running around trying to make sure everything was get for snacks, I did the unforgivable and stepped away from the mixer..while I was making whipped cream. So yeah, the peaks came and almost went before I realized my error. Whoops. So needless to say, the rest of the items that I was supposed to mix into the whipped cream didn't get mixed in when they were supposed to but hey, it still worked. How do I know this? Because everyone said they loved it! Yes, it was rich but oh so delicious. Just next time, I'm going to need to watch that mixer a little more closely. ;o) BTW. I have removed some of the detailed instructions just to pare down the reading but you can still have success without the added details.

Stargazer Pie
created by Dozen Flours

Crust
1 16.5 oz tube of refrigerated chocolate chip cookie dough, softened

Brownie Layer
1 box of Brownie Mix
1/2 cup of cocoa powder, sifted
3 tablespoons of lukewarm water
1/2 cup of vegetable oil
2 eggs, at room temperature
1 teaspoon of almond extract or vanilla

Cream Cheese Truffle Layer
1 cup of milk semisweet chips
4 oz of cream cheese, softened
1/2 stick of unsalted butter

Whipped Cream Layer
2 cups of whipping cream
1 teaspoon of vanilla extract
1/4 cup of powdered sugar, sifted
1/3 cup (give or take) of chocolate curls or other garnish, optional

  • Preheat oven to 350F. Grease a 9 or 9 1/2 inch springform pan with butter.
  • Spread the cookie dough into the bottom of the pan, making one big even cookie. It may be a little on the thin side. Stick it in the freezer.
  • Mix the brownie mix and the cocoa powder together in big bowl with a whisk or large fork. Add the water, oil, eggs, and extract and mix together just until the dry ingredients are absorbed. Be careful not to over mix! The batter will be somewhat lumpy. 
  • Remove the springform pan from the freezer and add the brownie batter right over the top. Bake for 34-38 minutes or until a toothpick inserted into the center of the brownie comes out *almost* clean. You basically want it to where it's not raw in the center and doesn't jiggle when you shake the pan a bit, a tad bit less baked than you would a normal brownie.
  • Remove it from the oven and promptly sprinkle about a 1/3 cup of chocolate chips (from the 1 cup of chips listed above) over the top. Let it sit for a minute or two and once the chocolate chips are soft, evenly spread them over the top of brownie's surface. Allow it to cool on the counter. 

forgive the bluriness of the photo..there was a lot going on that night as you can imagine and apparently I didn't take the time to pay attention as to whether or not I was actually getting "good" pictures 
  • While the pie is cooling, microwave the remaining chocolate chips on low power on 30 second intervals until the chips are melted, stirring well each time. Set aside. Cream the butter, and cream cheese together for 1 minute. Add the vanilla and stir again. Add the melted chocolate, one big teaspoonful at a time until it's incorporated into the cream cheese. Spread the cream cheese mixture over the top of the pie and store it uncovered in the refrigerator for an hour.

  • About an hour or two before you're ready to serve the pie, whisk the whipping cream on high speed until soft peaks form. Add the vanilla and the powdered sugar and mix again until combined. Spread evenly over the top of the pie. Grate chocolate directly over the top, sprinkle chocolate curls, or embellish with chocolate sprinkles. Cover and put it back in the refrigerator for at least 1/2 an hour.
  • When you're ready to serve, Gently remove the ring and serve let it come to room temperature at least a half an hour before serving.