Showing posts with label frosting. Show all posts
4.08.2010
German Chocolate Cake
About a month ago I was watching America's Test Kitchen (surprise, surprise) and they decided to deconstruct the German Chocolate Cake. Let me tell you, I was hooked. The chocolate, the frosting, the coconut...I knew immediately that I had to make it for my dad's birthday, though I wasn't sure how since we weren't planning on going to Michigan at the time. Anyway, lucky for me (and my dad), my father decided to come up for the day on the weekend before his birthday so I got to planning.
Hah, planning...right. So just when I thought I had figured everything out (i.e. when to bake it with my crazy work schedule, how I would surprise my dad with it, etc) I come to realize while putting the batter together at 9 o'clock at night that I didn't have everything. And not just little things that I could easily substitute but rather things like sour cream, Eggs, Evaporated Milk, PECANS, COCONUT! All things necessary to make German Chocolate Cake..and all things I apparently thought I had. Grr...so off to the store I went. I was determined to make this cake, not only for my dad but also for Brad to take for his last day of clinicals (Graduation here we come!). So about an hour later I was back and ready to get started.
Anyway, despite my roadblocks, I had a lot of fun putting this cake together. I thought it was quite easy to make even with needing to cook the frosting. I know, the directions look intense but I honestly never got the feeling of being "overwhelmed". And the batter, just look at the batter
It looks almost like a mousse doesn't it? So light and airy..and delicious...But what about the end product? Everyone loved it. I loved it and look forward to making it again...but without that whole 9:30pm trip to the grocery store ;o)
German Chocolate Cake with Coconut Pecan Frosting
from America's Test Kitchen
When you assemble the cake, the filling should be cool or cold. To be time-efficient, first make the filling, then use the refrigeration time to prepare, bake, and cool the cakes. Toast the pecans on a baking sheet in a 350°F (175°C) oven until fragrant and browned, about 8 minutes.—the Editors of Cook’s Illustrated
For the filling
4 large egg yolks
One 12-ounce can evaporated milk
1 cup granulated sugar
1/4 cup packed light brown sugar
6 tablespoons unsalted butter, cut into 6 pieces
1/8 teaspoon salt
2 teaspoons vanilla extract
2 1/3 cups sweetened shredded coconut
1 1/2 cups finely chopped pecans, toasted
For the cake
4 ounces semisweet or bittersweet chocolate, chopped fine
1/4 cup Dutch-processed cocoa, sifted
1/2 cup boiling water
2 cups unbleached all-purpose flour plus more for dusting the pans
3/4 teaspoon baking soda
12 tablespoons unsalted butter, softened but still cool
1 cup granulated sugar
2/3 cup packed light brown sugar
3/4 teaspoon table salt
4 large eggs, room temperature
1 teaspoon vanilla extract
3/4 cup sour cream, at room temperature
Method
Make the filling
1. Whisk the yolks in a medium saucepan; gradually whisk in the evaporated milk. Add the sugars, butter, and salt and cook over medium-high heat, whisking constantly, until the mixture is boiling, frothy, and slightly thickened, about 6 minutes.
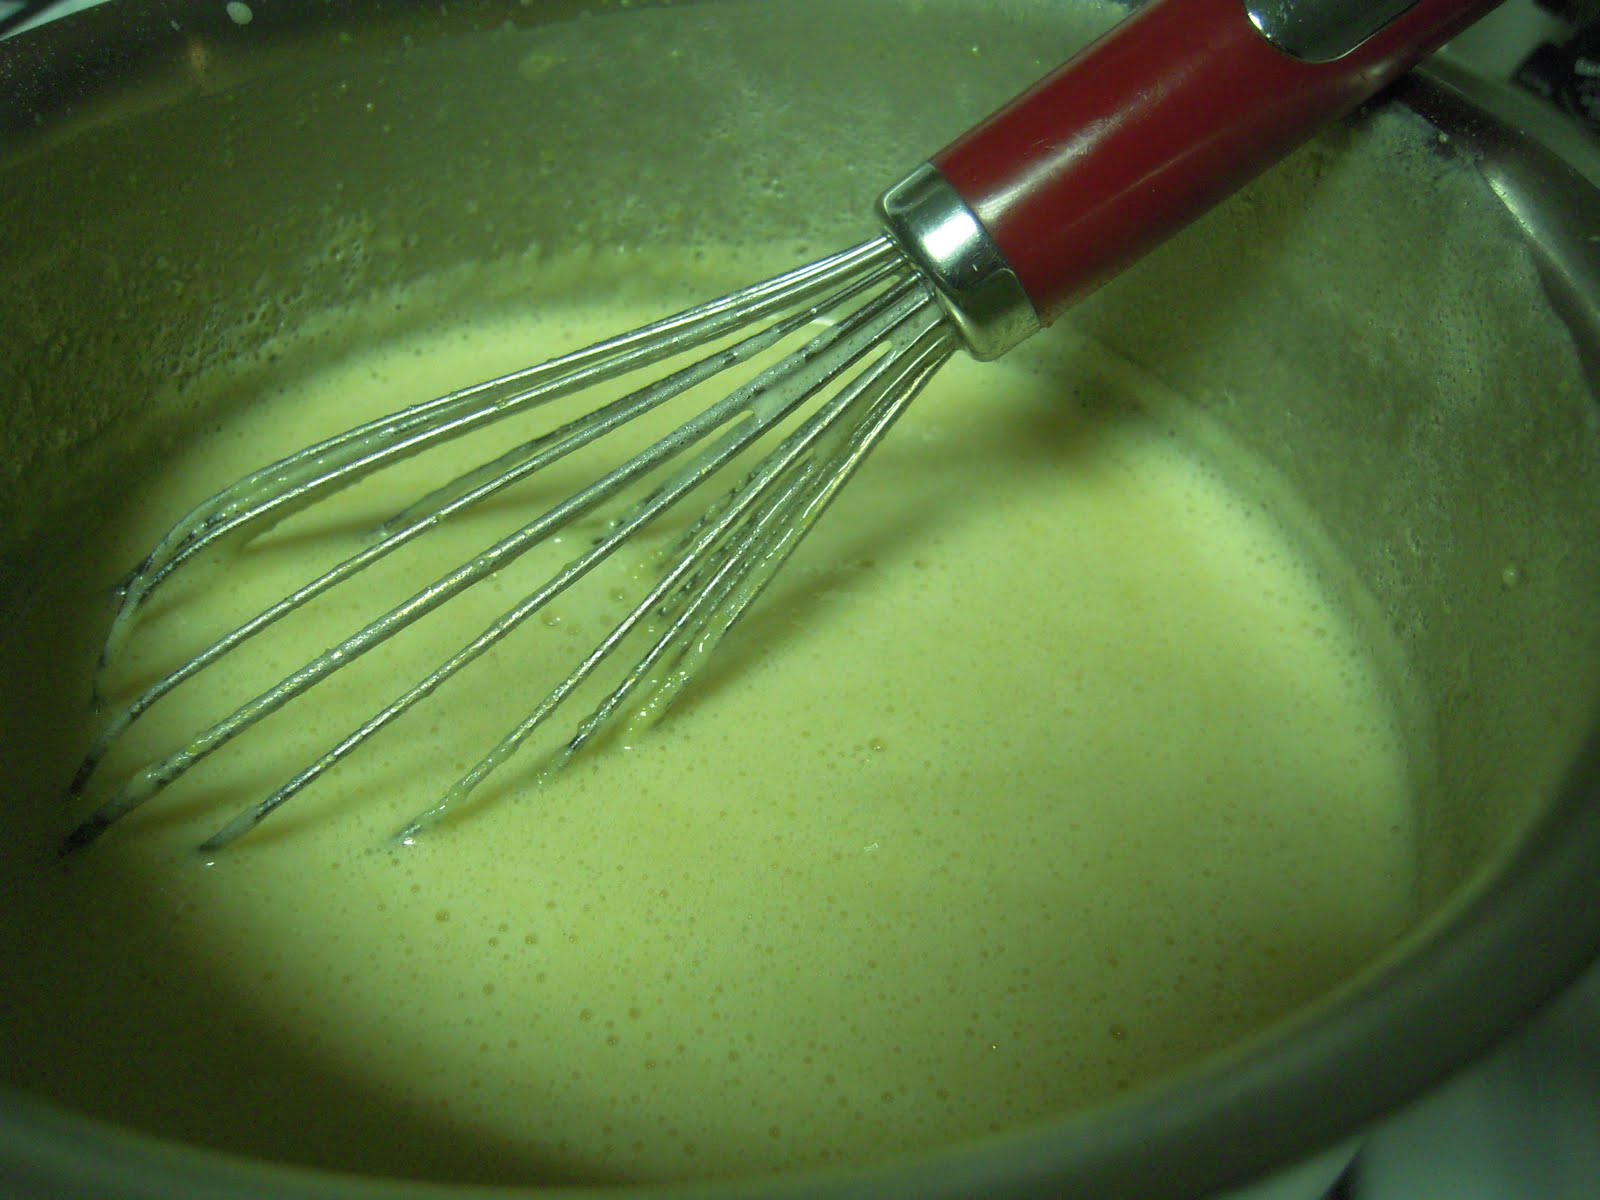
2. Transfer the mixture to a bowl, whisk in the vanilla, then stir in the coconut. Cool until just warm, cover with plastic wrap, and refrigerate until cool or cold, at least 2 hours or up to 3 days. (The pecans are stirred in just before cake assembly.) (Or in my case forgotten about completely forgotten about until the last minute despite having gone to the store to buy some and therefore just sprinkling them on top)
Make the cake
1. Adjust an oven rack to the lower-middle position; heat the oven to 350°F (175°C). Combine the chocolate and cocoa in a small bowl; pour the boiling water over and let stand to melt the chocolate, about 2 minutes. Whisk until smooth; set aside until cooled to room temperature.
2. Meanwhile, spray two 9-inch-round by 2-inch-high straight-sided cake pans with nonstick cooking spray; line the bottoms with parchment or waxed paper rounds. Spray the paper rounds, dust the pans with flour, and knock out the excess. Sift the flour and baking soda into a medium bowl or onto a sheet of parchment or waxed paper.
3. In the bowl of a standing mixer, beat the butter, sugars, and salt at medium-low speed until the sugar is moistened, about 30 seconds. Increase the speed to medium-high and beat until the mixture is light and fluffy, about 4 minutes, scraping down the bowl with a rubber spatula halfway through. With the mixer running at medium speed, add the eggs one at a time, beating well after each addition and scraping down the bowl halfway through. Beat in the vanilla; increase the speed to medium-high and beat until light and fluffy, about 45 seconds.
With the mixer running at low speed, add the chocolate, then increase the speed to medium and beat until combined, about 30 seconds, scraping down the bowl once (the batter may appear broken). With the mixer running at low speed, add the dry ingredients in 3 additions, alternating with the sour cream (in 2 additions), beginning and ending with the dry ingredients, and beating in each addition until barely combined. After the final flour addition, beat on low until just combined, then stir the batter by hand with a rubber spatula, scraping the bottom and sides of the bowl, to ensure that the batter is homogenous (the batter will be thick).
Divide the batter evenly between the prepared cake pans; spread the batter to the edges of the pans with the rubber spatula and smooth the surfaces.
4. Bake the cakes until a toothpick inserted into the center of the cakes comes out clean, about 30 minutes. Cool in the pans 10 minutes, then invert the cakes onto a greased wire rack; peel off and discard the paper rounds. Cool the cakes to room temperature before filling, about 1 hour. (The cooled cakes can be wrapped in plastic wrap and stored at room temperature for up to 1 day.)
To assemble
1. Stir the toasted pecans into the chilled filling. Set one cake on a serving platter or cardboard round cut slightly smaller than the cake, and the second cake on a work surface (or leave it on the wire rack). With a serrated knife held so that the blade is parallel with the work surface, use a sawing motion to cut each cake into two even layers. Starting with the first cake, carefully lift off the top layer and set aside.
2. Using an icing spatula, distribute about 1 cup filling evenly on the cake, spreading the filling to the very edge of the cake and leveling the surface. Carefully place the upper cake layer on top of the filling; repeat using the remaining filling and cake layers. If necessary, dust the crumbs off the platter; serve.
Note: The cake may be refrigerated, covered loosely with foil, up to 4 hours (if refrigerated longer than 2 hours, let the cake stand at room temperature 15 to 20 minutes before serving).
2.25.2010
Valentine's Day Cookies
I found this recipe a couple years ago on An American Housewife. They are more of a crispy cookie, though I always try to roll them out a bit thicker for Brad since he prefers the softer types. Anyway, I have made this recipe a couple of times and I tend to like the results. Last year I used this recipe (with a flower cookie cutter), stuck in some skewers and had my kindergarteners use them to make edible bouquets after decorating them themselves. They then stuck them in a flower pot they had painted along with floral foam and "moss". The mothers loved them and I stuck the idea in the back of my mind to make a cookie bouquet myself at some other time down the road.
Well, since we were going to Michigan over Valentine's Day this year, I decided at the last minute to whip up some bouquets to give as gifts. In the whirlwind of activities, I forgot to take pictures of all of the different bouquets but I think they turned out alright. Though Royal Icing is nice to pipe with, I think perhaps next year I will try to make a softer frosting for the cookies that will still harden somewhat. I will have to say though, another plus about the Royal Icing was that in the car, the cookies could rub against each other and their designs were will intact.
An American Housewife's Sugar Cookies
by An American Housewife
Beat 6 minutes on high
(add more or less water depending on stiff it is and how stiff you want it).
Well, since we were going to Michigan over Valentine's Day this year, I decided at the last minute to whip up some bouquets to give as gifts. In the whirlwind of activities, I forgot to take pictures of all of the different bouquets but I think they turned out alright. Though Royal Icing is nice to pipe with, I think perhaps next year I will try to make a softer frosting for the cookies that will still harden somewhat. I will have to say though, another plus about the Royal Icing was that in the car, the cookies could rub against each other and their designs were will intact.
An American Housewife's Sugar Cookies
by An American Housewife
- 3/4 c sugar
- 6 T butter
- 1/3 c shortening
- 1 large egg
- 1 T milk
- 1 t vanilla
- 2 c flour
- 1 1/2 t baking powder
- Dash of salt
- Cream the sugar, butter and shortening.
- Add the egg, milk and vanilla.
- Add the flour, baking powder and salt then mix just to blend.
- Chill dough for at least 2 hours.
- Roll about 1/4 inch thick on a lightly floured surface and cut into shapes.
- Bake on parchment lined cookie sheets for approximately 8 minutes at 370 degrees.
- Cool.
- 4 c confectioners' sugar
- 3 large egg whites
- 1/2 t cream of tartar
- 1/2 t vanilla
- 1 T water
Beat 6 minutes on high
(add more or less water depending on stiff it is and how stiff you want it).
2.11.2010
Chocolate Graham Cracker Cupcakes with Toasted Marshmallow Frosting
I don't even remember how I came across this recipe a couple weeks ago but I have been admiring it ever since. It was created by Jennifer Shea, owner of Trophy Cupcakes out in Seattle. Martha Stewart apparently had Jennifer on her show back in 2008, sharing this recipe with the world. And here I am, almost two years later just finding out about this glorious treat. And today I finally got the opportunity to try it out!
making graham cracker crumbs with my food processor ^_^
By the way, you should take a look at both Trophy's website and also Martha Stewart's and just look at Jennifer's creations because there is no way that I am at that level of perfection (though I hope to someday make it up there). When Brad and I finally make it out to Washington, this bakery is a must stop for me. I am dying to try their Chocolate Hazelnut (Nutella Buttercream....Yummmm), Chocolate Chip Mint, Chocolate Peanut Butter, Triple Coconut, Snowball, Chocolate Macaroon...must...go...to...Seattle...now!
Anyway, these turned out fantastic! It is of course reminiscent of a S'More and therefore uberdelicious. Plus it gave me a reason to go out and buy a hand held torch ;o). The only "problem" I found was once we started eating the cupcakes. The bottom graham cracker crust on a couple of the cupcakes tended to stick to the bottom of the liner and thus separate from the cake. My friend Erin suggested that next time to try spraying the inside of the liners with cooking spray and that should allow the crumb crust to release much easier. So simple, yet so brilliant. Thanks Erin! So yes, needless to say, these cupcakes were a hit to everywhere I took them. Oh, and I know that the recipe said it makes 24 cupcakes...but I ended up making 24 cupcakes and a small 9 inch cake. Just as a heads up. Commence daydreaming....now.
Chocolate Graham Cracker Cupcakes
by Jennifer Shea of Trophy Cupcakes, originally posted at Martha Stewart
- 2 1/4 cups plus 2 tablespoons sugar
- 1 3/4 cups all-purpose flour
- 3/4 cup plus 1 tablespoon cocoa powder (not Dutch-processed)
- 1 1/2 teaspoons baking powder
- 1 1/2 teaspoons baking soda
- 1 teaspoon salt
- 2 large eggs
- 1 cup whole milk
- 1/2 cup vegetable oil
- 2 teaspoons pure vanilla extract
- 1 cup boiling water
- 1 1/2 cups graham cracker crumbs (from about 20 squares)
- 1/3 cup unsalted butter, melted
- 9 ounces bittersweet chocolate, finely chopped
- Marshmallow Frosting
- Preheat oven to 350 degrees. Line 2 standard muffin tins with cupcake liners; set aside.
- Sift 2 cups plus 2 tablespoons sugar, flour, cocoa powder, baking powder, baking soda, and salt together into the bowl of an electric mixer. Using the paddle attachment, mix ingredients together on low speed.
- In a large bowl, mix together eggs, milk, oil, and vanilla. Add to flour mixture and beat on medium speed for 30 seconds. Scrape down sides of bowl and continue mixing on medium speed for 2 minutes. Add boiling water and stir to combine; set cake batter aside.
- Place graham cracker crumbs, remaining 1/4 cup sugar, and melted butter in a large bowl; stir until well combined.
- Place 1 tablespoon graham cracker mixture into the bottom of each prepared muffin cup. Use the bottom of a small glass to pack crumbs into the bottom of each cupcake liner. Reserve remaining graham cracker mixture for topping.
- Place 2 teaspoons chocolate in each muffin cup.
- Transfer muffin tins to oven and bake until the edges of the graham cracker mixture is golden, about 5 minutes. Remove from oven and fill each muffin cup three-quarters full with cake batter. Sprinkle each with remaining chocolate and graham cracker mixture. Return to oven and bake, rotating pans halfway through baking, until tops are firm and a cake tester inserted in the center comes out clean, 18 to 20 minutes. Transfer muffin tins to a wire rack and let cupcakes cool in pan for 10 minutes. Remove cupcakes from pan and let cool completely.
- Transfer frosting to a large pastry bag fitted with a large plain round or French tip (such as Ateco #867 or Ateco #809). Pipe frosting in a spiral motion on each cupcake.
- Transfer cupcakes to a baking sheet. Using a kitchen torch, lightly brown the frosting, taking care not to burn the cupcake liners. Serve immediately or store in an airtight container, up to 2 days.
Marshmallow Frosting
most likely developed by Jennifer Shea, originally posted at MarthaStewart.com
- 8 large egg whites
- 2 cups sugar
- 1/2 teaspoon cream of tartar
- 2 teaspoons pure vanilla extract
- Place egg whites, sugar, and cream of tartar in the heatproof bowl of an electric mixer. Set over a saucepan with simmering water. Whisk constantly until sugar is dissolved and whites are warm to the touch, 3 to 4 minutes.
- Transfer bowl to electric mixer fitted with the whisk attachment, and beat, starting on low speed, gradually increasing to high, until stiff, glossy peaks form, 5 to 7 minutes. Add vanilla, and mix until combined. Use immediately.
1.13.2010
Homemade Chocolate Cake
Yesterday was one of my co-workers last day at HCA. About a year ago, she received her Master's Degree in Social Work and is now off to bigger and better things. Okay, well maybe not "better" per se but I am little biased to our 10 kiddos up in the Residence. Anyway, we normally have good bye parties for both staff and kids when it is time for them to transition out of HCA complete with presents and a cake. I had been looking for an excuse to try out a recipe before next week's baby shower for a friend so I jumped at the opportunity and volunteered to make it myself.
Lucky for me, Jana was a fan of Chocolate Cake and Chocolate Frosting, which is just what I needed. I scoured the internet and my cookbooks to find a recipe. I finally settled on a recipe from Hershey's after reading all of the good reviews as well as noticing that some people use it for their tier cakes (which is my task for next week). Next it was to find a recipe for Chocolate Frosting. I ended up with using my America's Test Kitchen recipe for Quick and Rich Vanilla Frosting but used their suggested adaptations to make it into a Chocolate Frosting. While I followed the recipe step by step for the cake, I had to kind of improvise for the frosting which I can explain a little later.The resulting cake was delicious and very rich. Definitely a good match with a glass of milk.
I didn't get a really good picture of the cake once it was cut because I was at work. But you will notice that there is a white, oreo-like filling. Well, though others claimed it was good, I wasn't a huge fan. I could taste a hint of cream cheese and when you aren't a fan of cream cheese in the first place, I didn't absolutely love it. So with that said, I'm not going to post that recipe until I can perfect it a bit more.
2. Stir together sugar, flour, cocoa, baking powder, baking soda and salt in large bowl. Add eggs, milk, oil and vanilla; beat on medium speed of mixer 2 minutes. Stir in boiling water (batter will be thin). Pour batter into prepared pans.
3. Bake 30 to 35 minutes or until wooden pick inserted in center comes out clean. Cool 10 minutes; remove from pans to wire racks. Cool completely. 10 to 12 servings.
CUPCAKES: Line muffin cups (2-1/2 inches in diameter) with paper bake cups. Heat oven to 350°F. Fill cups 2/3 full with batter. Bake 22 to 25 minutes. Cool completely. Frost. About 30 cupcakes.
************************************************************************************
Alright, so about the frosting. I don't have an actual "recipe" for you of what I did because of a couple reasons. When you use their Dark Chocolate variation to their frosting, they have you substitute chocolate for cream, reduce the amount of sugar, etc. However, if you were making a three layer cake (as I was doing), they had you increase the cream, butter, and sugar. I tried my best to convert the variation with the increase but then at the end was just throwing this and that in (such as extra cocoa powder, powder sugar, and a touch of cream) to make it the taste and consistency I was looking for. The good thing about America's Test Kitchen is that even though they know that they have found the "best" recipe, they realize that their readers will put their own twist on it. So the easiest thing for me to do, is just give you the Vanilla Frosting recipe, the Dark Chocolate Variation, and well as their note about increasing the amount of frosting for 3 layer cakes and then let you do the rest ;o)
Quick and Rich Vanilla Frosting
by America's Test Kitchen Family Cookbook
Makes: 3 cups
Start to Finish: 10 minutes
This makes enough frosting for a two layer 8 or 9 inch cake or a 9x13 inch sheet cake. For a three layer cake, increase the heavy cream to 3 Tablespoons, the butter to 3 sticks, and the confectioners' sugar to 3 cups. Be sure to use unsalted butter here or your frosting will taste salty.
To Make Ahead: The frosting can be made up to 2 days ahead and refrigerated, wrapped tightly in plastic wrap. Before using, let stand at room temperature to soften, then whisk briefly to re-fluff.
Dark Chocolate Variation: Substitute 8 ounces melted semisweet or bittersweet chocolate for the heavy cream and reduce the confectioners' sugar to 2 cups. Beat 2 Tablespoons cocoa powder into the butter and sugar mixture.
Lucky for me, Jana was a fan of Chocolate Cake and Chocolate Frosting, which is just what I needed. I scoured the internet and my cookbooks to find a recipe. I finally settled on a recipe from Hershey's after reading all of the good reviews as well as noticing that some people use it for their tier cakes (which is my task for next week). Next it was to find a recipe for Chocolate Frosting. I ended up with using my America's Test Kitchen recipe for Quick and Rich Vanilla Frosting but used their suggested adaptations to make it into a Chocolate Frosting. While I followed the recipe step by step for the cake, I had to kind of improvise for the frosting which I can explain a little later.The resulting cake was delicious and very rich. Definitely a good match with a glass of milk.
Hershey's "Perfectly Chocolate" Chocolate Cake
recipe by Hershey'sIngredients:
- 2 cups sugar
- 1-3/4 cups all-purpose flour
- 3/4 cup HERSHEY'S Cocoa
- 1-1/2 teaspoons baking powder
- 1-1/2 teaspoons baking soda
- 1 teaspoon salt
- 2 eggs
- 1 cup milk
- 1/2 cup vegetable oil
- 2 teaspoons vanilla extract
- 1 cup boiling water
Directions:
1. Heat oven to 350°F. Grease and flour two 9-inch round baking pans.2. Stir together sugar, flour, cocoa, baking powder, baking soda and salt in large bowl. Add eggs, milk, oil and vanilla; beat on medium speed of mixer 2 minutes. Stir in boiling water (batter will be thin). Pour batter into prepared pans.
3. Bake 30 to 35 minutes or until wooden pick inserted in center comes out clean. Cool 10 minutes; remove from pans to wire racks. Cool completely. 10 to 12 servings.
CUPCAKES: Line muffin cups (2-1/2 inches in diameter) with paper bake cups. Heat oven to 350°F. Fill cups 2/3 full with batter. Bake 22 to 25 minutes. Cool completely. Frost. About 30 cupcakes.
************************************************************************************
Quick and Rich Vanilla Frosting
by America's Test Kitchen Family Cookbook
Makes: 3 cups
Start to Finish: 10 minutes
This makes enough frosting for a two layer 8 or 9 inch cake or a 9x13 inch sheet cake. For a three layer cake, increase the heavy cream to 3 Tablespoons, the butter to 3 sticks, and the confectioners' sugar to 3 cups. Be sure to use unsalted butter here or your frosting will taste salty.
- 2 Tablespoons Heavy Cream
- 1 teaspoon vanilla extract
- Pinch salt
- 2 1/2 sticks unsalted butter, softened
- 2 1/2 cups confectioners' sugar
To Make Ahead: The frosting can be made up to 2 days ahead and refrigerated, wrapped tightly in plastic wrap. Before using, let stand at room temperature to soften, then whisk briefly to re-fluff.
Dark Chocolate Variation: Substitute 8 ounces melted semisweet or bittersweet chocolate for the heavy cream and reduce the confectioners' sugar to 2 cups. Beat 2 Tablespoons cocoa powder into the butter and sugar mixture.
Subscribe to:
Posts (Atom)