Showing posts with label america's test kitchen. Show all posts

7.07.2011

Strawberry Shortcakes

I think that I say this every year but it really is true. Strawberries are a definite sign of summer. Over Memorial Day Angela and I whipped up this strawberry shortcake. We thought we had perhaps done something wrong because the dough was not coming out correctly, and sure enough...we did. I misread the directions (i.e. didn't really read them before hand) and got a really sticky goey mess. I tried to fix it, which worked for the most part but because of the good, didn't take pictures because I didn't think it would turn out.
Boy was I wrong. They still did despite our mess up...okay, okay, my mess up. Of course, then I was slightly bummed that I didn't take the time to take pictures before they were gobbled up.
 
Soon enough though, Brad's clinic held a potluck and he asked if I could make the shortcakes again. I quickly jumped at the chance because 1) they were oh so tasty the first time and 2) we had an over abundance of strawberries from our garden; two and a half colanders to be exact.
So I went to work on night making the cakes, and then together Brad and I hulled, cut, and crushed the berries. This time, the dough came together much better and everyone at his work enjoyed them. Another "ace" for America's Test Kitchen.

Strawberry Shortcakes
by America's Test Kitchen

Preparing the fruit first gives it a chance to become truly juicy-just what you want on fresh-made biscuits. The recipe will yield six biscuits and the scraps can be gathered and patted out to yield another biscuit or to; these, though, will not be as tender as the first.

Fruit
2 qts strawberries, hulled
6 Tablespoons sugar

Shortcakes 
2 cups all-purpose flour, plus extra for the counter
5 tablespoons sugar
1 tablespoon baking powder
1/2 teaspoon salt
8 tablespoons (1 stick) unsalted butter, cut into 1/2-inch cubes and chilled
2/3 cup half-and-half
1 large egg, lightly beaten
1 large egg white, lightly beaten

  • For the fruit: Crush 3 cups of the strawberries with a potato masher. Slice the remaining 5 cups of berries and stir into the crushed berries along with the sugar. Let sit at room temperature until the sugar has dissolved and the berries are juicy, about 30 minutes.
  • For the shortcakes: While the berries macerate, adjust an oven rack to the lower-middle position and heat oven to 425 degrees.
  • Pulse together the flour, 3 tablespoons of the sugar, the baking powder and salt in a food processor until combined.  Scatter the butter pieces over the top and process until the mixture resembles coarse cornmeal, about 15 pulses. Transfer to a bowl.
  • Blend the half-and-half with the beaten egg and pour into the bowl with the flour mixture. Stir with a rubber spatula until large clumps form. Turn the mixture onto a lightly floured counter and knead lightly until the dough comes together.
  • Use your fingertips to pat the dough into a 9-by-6-inch rectangle about 1-inch thick. Cut out 6 dough rounds using a floured 2 3/4-inch biscuit cutter. Reform the remaining dough and cut 2 more rounds. Place the rounds 1 inch apart on a parchment-lined baking sheet, brush the tops with the beaten egg white, and sprinkle with remaining 2 tablespoons granulated sugar.
  • Bake the shortcakes until golden brown, about 12 to 14 minutes. Let the shortcakes cool on the baking sheet for at least 10 minutes.
  • To assemble, split each biscuit in half, laying the biscuit bottoms on individual plates.  Spoon a portion of the fruit over each bottom, then top with a dollop of the whipped cream. Cap with the biscuit tops.

1.07.2011

Chewy Sugar Cookies

Because of my love for cooking and my love for America's Test Kitchen, I signed up with ATK to be one of their home "test cooks". Some of the recipes that I get sent to try don't sound all too appealing so I pass them up, but every once in a while I get something that I can't wait to try. Rewind to March of this year.

I received an email from ATK asking me (and I'm sure hundreds of others of course) to try out a new recipe for Sugar Cookies. Their goal was to create "A simple, traditional sugar cookie with a balanced flavor, crisp edges, chewy center, and an attractively crackled top." Lucky for me, we were going to be heading over to a friend's for dinner within the testing range so I decided to whip up a batch.

And they were a hit, time after time, whenever I made them, compliments to the recipe/taste always ensued. And it was confirmed that Cook's Illustrated achieved their goal 100%. So why is it that it is taking me so long to share the wealth with you? Part of being a "test cook" is to agree to not publish the recipe online, in forums, any other types of media, or pass it along to others until the recipe has been finalized and essentially deemed worthy to obtain the Cooks Illustrated/ATK name. Well this past November, that time came and they published the final product in Cooks Illustrated magazine.
Quick pic of the cookies as we were rushing out the door! I can't seem to find my pics from before....
I was happy to see that the version of the recipe that was sent to me was exactly the same as the published recipe sans the amount of oil being lessened slightly. I think this greatly helps the one problem that I had with the original recipe, dough that was way to sticky. The final recipe still achieves the crisp edge, chewy center, and crackled top that has become such a hit among our friends and family.

Okay, okay, enough babbling already!


Chewy Sugar Cookies
Cook's Illustrated Nov 2010


Makes 2 dozen cookies
The final dough will be slightly softer than most cookie dough. For the best results, handle the dough as briefly and gently as possible when shaping the cookies. Overworking the dough will result in flatter cookies.

Ingredients
  • 2 1/4 cups (11 1/4 ounces) unbleached all-purpose flour
  • 1/2 teaspoon baking soda
  • 1 teaspoon baking powder
  • 1/2 teaspoon table salt
  • 1 1/2 cups (10 1/2 ounces) sugar , plus 1/3 cup for rolling
  • 2 ounces cream cheese , cut into 8 pieces
  • 6 tablespoons (3/4 stick) unsalted butter , melted and still warm
  • 1/3 cup vegetable oil
  • 1 large egg
  • 1 tablespoon milk
  • 2 teaspoons vanilla extract
Instructions
1. Adjust oven rack to middle position and heat oven to 350 degrees. Line 2 large rimmed baking sheets with parchment paper. Whisk flour, baking soda, baking powder, and salt together in medium bowl. Set aside.

2. Place 1½ cups sugar and cream cheese in large bowl. Place remaining 1/3 cup sugar in shallow baking dish or pie plate and set aside. Pour warm butter over sugar and cream cheese and whisk to combine (some small lumps of cream cheese will remain but will smooth out later). Whisk in oil until incorporated.  
Add egg, milk, and vanilla; continue to whisk until smooth. Add flour mixture and mix with rubber spatula until soft homogeneous dough forms.

3. Divide dough into 24 equal pieces, about 2 tablespoons each (or use #40 portion scoop). Using hands, roll dough into balls. Working in batches, roll balls in reserved sugar to coat and evenly space on prepared baking sheet, 12 dough balls per sheet. Using bottom of drinking glass, flatten dough balls until 2 inches in diameter. Sprinkle tops evenly with 4 teaspoons of sugar remaining in shallow dish (2 teaspoons per tray), discarding any remaining sugar.
4. Bake, 1 tray at a time, until edges are set and just beginning to brown, 11 to 13 minutes, rotating tray after 7 minutes. Cool cookies on baking sheets 5 minutes. Using wide metal spatula, transfer cookies to wire rack and cool to room temperature.


10.26.2010

Perfect Chocolate Chip Cookies

A couple weeks ago, Brad and I started to watch a very yummilicious episode of America's Test Kitchen and how to make some delicious cookies. One that really caught our eye were the "Perfect Chocolate Chip Cookies" because they sounded oh so tasty while describing the baking process on t.v. and looked even better.
 
A moist, chewy cookie with toffee flavors and crisp edges? Yes, your mouth can start drooling now.

So I bought the Ghiradelli chips (they had done a taste test in the same episode and described the dark chocolate flavor with layers of chocolate rather than sporadic chips) but for this reason and that wasn't able to make a batch. That was until this past weekend. We were getting ready to go on a 6 hour road trip to Clare, MI for an old GLMers wedding  (Congrats again Wave and Ginger!)  and I knew we were going to need something to snack on. So, at 9 pm at night I began to construct the "perfect cookie".
Problems? Only one, I have having trouble getting my butter to that rich, warm, brown color however that may have something to do with the fact that I was using margarine rather than real butter. Though the dough offered toffee flavors, the end result only had a hint. One the other hand, So. Many. Compliments! Etch got addicted to them over the weekend and Jumpin' Jack continued to fixate on them for moments after eating one, thinking of how they would taste in a variety of different scenarios and situations. We all decided that these were very close to the best, if not, THE best chocolate chip cookie. Soft, chewy, thick, delicious...I can't wait until I make them again, and I know a large number of people who feel the exact same way.
 
As I mentioned, I did use the recommended chips, Ghiradelli 60% cacao as well as only baked one tray at a time. Perfection!


Perfect Chocolate Chip Cookies:
by America's Test Kitchen

Rich and buttery, with their soft cores and crispy edges, chocolate chip cookies are the American cookie-jar standard. We wanted to refine this recipe to create a moist and chewy chocolate chip cookie with crisp edges and deep notes of toffee and butterscotch to balance its sweetness—in short, a more sophisticated cookie than the standard bake sale offering.

Melting a generous amount of butter before combining it with other ingredients gave us the chewy texture we wanted. Since we were melting butter, we browned a portion of it to add nutty flavor. Using a bit more brown sugar than white sugar enhanced chewiness, while a combination of one egg and one egg yolk gave us supremely moist cookies. For the crisp edges and deep toffee flavor, we allowed the sugar to dissolve and rest in the melted butter. We baked the cookies until golden brown and just set, but still soft in the center. The resulting cookies were crisp and chewy and gooey with chocolate, and boasted a complex medley of sweet, buttery, caramel, and toffee flavors.


Makes 16 cookies

Avoid using a nonstick skillet to brown the butter; the dark color of the nonstick coating makes it difficult to gauge when the butter is browned. Use fresh, moist brown sugar instead of hardened brown sugar, which will make the cookies dry. This recipe works with light brown sugar, but the cookies will be less full-flavored. For our winning brand of chocolate chips, see related tasting.
Ingredients
  • 1 3/4 cups unbleached all-purpose flour (8 3/4 ounces)
  • 1/2 teaspoon baking soda
  • 14 tablespoons unsalted butter (1 3/4 sticks)
  • 1/2 cup granulated sugar (3 1/2 ounces)
  • 3/4 cups packed dark brown sugar (5 1/4 ounces) (see note)
  • 1 teaspoon table salt
  • 2 teaspoons vanilla extract
  • 1 large egg
  • 1 large egg yolk
  • 1 1/4 cups semisweet chocolate chips or chunks (see note)
  • 3/4 cup chopped pecans or walnuts, toasted (optional)
Instructions
1. Adjust oven rack to middle position and heat oven to 375 degrees. Line 2 large (18- by 12-inch) baking sheets with parchment paper. Whisk flour and baking soda together in medium bowl; set aside.
2. Heat 10 tablespoons butter in 10-inch skillet over medium-high heat until melted, about 2 minutes.
Continue cooking, swirling pan constantly until butter is dark golden brown and has nutty aroma, 1 to 3 minutes. Remove skillet from heat and, using heatproof spatula, transfer browned butter to large heatproof bowl. Stir remaining 4 tablespoons butter into hot butter until completely melted.

3. Add both sugars, salt, and vanilla to bowl with butter and whisk until fully incorporated. Add egg and yolk and whisk until mixture is smooth with no sugar lumps remaining, about 30 seconds. 
 
Let mixture stand 3 minutes, then whisk for 30 seconds. Repeat process of resting and whisking 2 more times until mixture is thick, smooth, and shiny.
 
Using rubber spatula or wooden spoon, stir in flour mixture until just combined, about 1 minute.
 
Stir in chocolate chips and nuts (if using), giving dough final stir to ensure no flour pockets remain.
4. Divide dough into 16 portions, each about 3 tablespoons (or use #24 cookie scoop). Arrange 2 inches apart on prepared baking sheets, 8 dough balls per sheet. (Smaller baking sheets can be used, but will require 3 batches.)
5. Bake cookies 1 tray at a time until cookies are golden brown and still puffy, and edges have begun to set but centers are still soft, 10 to 14 minutes, rotating baking sheet halfway through baking. Transfer baking sheet to wire rack; cool cookies completely before serving.
 

7.13.2010

Grilled Corn

Summer and grilling go hand in hand..which includes corn on the cob! I had tried grilling corn last summer and it turned out okay, but nothing extraordinary. But then Cook's Country (America's Test Kitchen's country version) featured a "recipe" or rather method of grilling perfectly sweet and juicy corn. Cook's Country stated, "If your corn isn't as sweet as you'd like, stir 1/2 cup of sugar into the water along with the salt. Avoid soaking the corn for more than 8 hours, or it will become overly salty."

What's the best way to tell if your corn is sweet enough? Well taste it of course (uncooked that is)! This is something that I had always seen my Abuelita do whenever I would go shopping with her. She also "taught" me to always open the corn before buying it to make sure the kernels were still good, plump and not dried out. I have to admit though, since moving to Chicago, it is rare that I see someone open up the cobs to check out the kernels (in fact, the only other time that I have seen someone join me in the good corn hunt was at a Mexican grocery store and it was a "little old lady" as my abuelita to say, someone else's abuelita). But this hasn't stopped me from doing so. I would much rather look "picky" at the grocery store then come home and be greeted with wilted and sickly looking corn.

(now this is some good looking corn if I say so myself)
Anyway, back to the recipe/method. I saw this episode and decided to try it out that week. Without telling Brad what I was doing, I followed the directions and then handed it off to Brad later on that evening to stick it on the grill to compliment our meal for that evening. When it came time to eat, both Brad and Jacob said it was some of the juiciest and sweetest corn they had ever tasted. I then shared with them my little secret and decided that this will now be our go to method for cooking corn when we have the time/foresight.

Grilled Corn on the Cob
from Cook's Country (America's Test Kitchen)

"If your corn isn't as sweet as you'd like, stir 1/2 cup of sugar into the water along with the salt. Avoid soaking the corn for more than 8 hours, or it will become overly salty."

Ingredients

Salt and pepper
8 ears corn , husks and silks removed
8 tablespoons unsalted butter , softened, or 1 recipe flavored butter (see related recipes)

Instructions

1. In large pot, stir 1/2 cup salt into 4 quarts cold water until dissolved. Add corn and let soak for at least 30 minutes or up to 8 hours.
2. Grill corn over hot fire, turning every 2 to 3 minutes, until kernels are lightly charred all over, 10 to 14 minutes.
Remove corn from grill, brush with softened butter, and season with salt and pepper. Serve.

3.01.2010

Mandarin Chicken Bake

A couple months ago Brad surprised me with cooking dinner. Well I should clarify that the surprise wasn't the cooking part as he will do that from time to time but rather that he pulled out a cookbook to find a recipe! You see, Brad is more of those "a little of this, and a little of that" and doesn't like anything that requires too much effort, time, and more importantly dishes.

Anyway, Brad found a recipe for Pineapple Chicken Bake in my America's Test Kitchen Family Cookbook. And guess what, we didn't have pineapple in our pantry for whatever reason so he thought, why not mandarin oranges? Also, I have yet to buy curry powder since Brad isn't a big fan so we decided that chili powder would be an acceptable substitute and we chopped whole almonds in our food processor rather than going out to buy sliced ones. 30 minutes later, we had a deliciously spicy yet sweet chicken with the wonderful crunch of almonds. This has in fact becomes Brad's Signature Dish. Quick, easy, delicious, and not too many dishes. One last mention, we made this recipe again last night only to find that we didn't have soy sauce, so we used teriyaki and it still turned out great. Plus, we use one of our corningware dishes that fits right inside of our Toaster Oven which Brad loves...you know, less energy used therefore cheaper ;o)

Mandarin Chicken Bake
adapted from America's Test Kitchen's Pineapple Chicken Bake

  • 4 boneless, skinless chicken breasts (6 to 8 ounces each), trimmed
  • Salt and Pepper
  • 2 cans (11 ounces each) Mandarin Chicken in juice
  • 1/4 cup honey
  • 1 Tablespoon Cider Vinegar
  • 1 Tablespoon Soy Sauce
  • 2 teaspoons Chili Powder
  • 1 teaspoon Tabasco
  • 1 teaspoon Cornstarch
  • 1 Tablespoon water
  • 1/3 cup chopped almonds
 
Adjust an oven rack to the upper position and heat the oven to 450 degrees. Pat the chicken dry with paper towels, then season with salt and pepper. Lay the chicken in a 9 x 13 inch baking dish coasted lightly with vegetable oil spray.
Drain the mandarin oranges, reserving 1/2 cup of the juice (about the amount of one can). Whisk the mandarin juice, honey, vinegar, soy sauce, chili powder, and Tabasco together in a medium saucepan over medium-high heat. Simmer, whisking often, until the mixture has thickened, about 8 minutes.
Quickly dissolve the cornstarch in the water, then whisk into the honey mixture. Stir in the mandarin oranges.
Pour the mandarin sauce over the chicken, then sprinkle with the almonds.
 Bake until the chicken registers 160 degrees on an instant-read thermometer, 15 to 18 minutes.

1.13.2010

Homemade Chocolate Cake

Yesterday was one of my co-workers last day at HCA. About a year ago, she received her Master's Degree in Social Work and is now off to bigger and better things. Okay, well maybe not "better" per se but I am little biased to our 10 kiddos up in the Residence. Anyway, we normally have good bye parties for both staff and kids when it is time for them to transition out of HCA complete with presents and a cake. I had been looking for an excuse to try out a recipe before next week's baby shower for a friend so I jumped at the opportunity and volunteered to make it myself.

Lucky for me, Jana was a fan of Chocolate Cake and Chocolate Frosting, which is just what I needed. I scoured the internet and my cookbooks to find a recipe. I finally settled on a recipe from Hershey's after reading all of the good reviews as well as noticing that some people use it for their tier cakes (which is my task for next week). Next it was to find a recipe for Chocolate Frosting. I ended up with using my America's Test Kitchen recipe for Quick and Rich Vanilla Frosting but used their suggested adaptations to make it into a Chocolate Frosting. While I followed the recipe step by step for the cake, I had to kind of improvise for the frosting which I can explain a little later.
The resulting cake was delicious and very rich. Definitely a good match with a glass of milk.
I didn't get a really good picture of the cake once it was cut because I was at work. But you will notice that there is a white, oreo-like filling. Well, though others claimed it was good, I wasn't a huge fan. I could taste a hint of cream cheese and when you aren't a fan of cream cheese in the first place, I didn't absolutely love it. So with that said, I'm not going to post that recipe until I can perfect it a bit more.

Hershey's "Perfectly Chocolate" Chocolate Cake

recipe by Hershey's

Ingredients:

  • 2 cups sugar
  • 1-3/4 cups all-purpose flour
  • 3/4 cup HERSHEY'S Cocoa
  • 1-1/2 teaspoons baking powder
  • 1-1/2 teaspoons baking soda
  • 1 teaspoon salt
  • 2 eggs
  • 1 cup milk
  • 1/2 cup vegetable oil
  • 2 teaspoons vanilla extract
  • 1 cup boiling water

Directions:

1. Heat oven to 350°F. Grease and flour two 9-inch round baking pans.

2. Stir together sugar, flour, cocoa, baking powder, baking soda and salt in large bowl. Add eggs, milk, oil and vanilla; beat on medium speed of mixer 2 minutes. Stir in boiling water (batter will be thin). Pour batter into prepared pans.

3. Bake 30 to 35 minutes or until wooden pick inserted in center comes out clean. Cool 10 minutes; remove from pans to wire racks. Cool completely. 10 to 12 servings.


CUPCAKES: Line muffin cups (2-1/2 inches in diameter) with paper bake cups. Heat oven to 350°F. Fill cups 2/3 full with batter. Bake 22 to 25 minutes. Cool completely. Frost. About 30 cupcakes.
************************************************************************************
Alright, so about the frosting. I don't have an actual "recipe" for you of what I did because of a couple reasons. When you use their Dark Chocolate variation to their frosting, they have you substitute chocolate for cream, reduce the amount of sugar, etc. However, if you were making a three layer cake (as I was doing), they had you increase the cream, butter, and sugar. I tried my best to convert the variation with the increase but then at the end was just throwing this and that in (such as extra cocoa powder, powder sugar, and a touch of cream) to make it the taste and consistency I was looking for. The good thing about America's Test Kitchen is that even though they know that they have found the "best" recipe, they realize that their readers will put their own twist on it. So the easiest thing for me to do, is just give you the Vanilla Frosting recipe, the Dark Chocolate Variation, and well as their note about increasing the amount of frosting for 3 layer cakes and then let you do the rest ;o)

Quick and Rich Vanilla Frosting
by America's Test Kitchen Family Cookbook

Makes: 3 cups
Start to Finish: 10 minutes

This makes enough frosting for a two layer 8 or 9 inch cake or a 9x13 inch sheet cake. For a three layer cake, increase the heavy cream to 3 Tablespoons, the butter to 3 sticks, and the confectioners' sugar to 3 cups. Be sure to use unsalted butter here or your frosting will taste salty.

  • 2 Tablespoons Heavy Cream
  • 1 teaspoon vanilla extract
  • Pinch salt
  • 2 1/2 sticks unsalted butter, softened
  • 2 1/2 cups confectioners' sugar
Stir the cream, vanilla, and salt together in a small bowl until the salt dissolves. Beat the butter with an electric mixer on medium high speed until smooth, 30 to 60 seconds. Reduce the speed to medium low, slowly add the confectioners' sugar, and beat until smooth, 2 to 5 minutes. Beat in the cream mixture. Increase the speed to medium-high and beat until the mixture is light and fluffy, 4 to 8 minutes.

To Make Ahead: The frosting can be made up to 2 days ahead and refrigerated, wrapped tightly in plastic wrap. Before using, let stand at room temperature to soften, then whisk briefly to re-fluff.
Dark Chocolate Variation: Substitute 8 ounces melted semisweet or bittersweet chocolate for the heavy cream and reduce the confectioners' sugar to 2 cups. Beat 2 Tablespoons cocoa powder into the butter and sugar mixture.

1.07.2010

Garlicky Shrimp (or Chicken) Pasta

You know when you go out to an Italian restaurant..and there is that one pasta dish with either chicken or shrimp with a white garlic butter sauce? If I don't get a pasta with marinara sauce, I will normally go for some sort of white garlic sauce and I am always very happy with my choice. However, with all of the successful "garlic chicken pastas" that I have had, I never really thought of making it at home past the restaurant doors.

In thinking about what to make for dinner tonight, I turned to a new cookbook that I recieved for Christmas called The Best of America's Test Kitchen 2010 (I know 2010 just started so I'm not quite sure why it's labeled that way). I knew I wanted to try something a little different and while flipping through the pages, I came across a recipe for Garlicky Shrimp Pasta. However, since we didn't have shrimp in the house (not a problem for me as I'm not a fan, but unfortunate for Brad), I decided to try it out with chicken and oh my goodness, I am so glad that I did!

I feel like this dish turned out exactly the way it would if it was ordered in a restaurant. Which really shouldn't surprise me. I mean, it's America's Test Kitchen right? ;o) Anyway, besides substituting the shrimp with chicken, I made a couple of other changes only because of lack of ingredients..mainly chicken broth for the white wine and clam juice and dried parsley instead of the fresh. But again, very good! Brad's only "complaints" (if you would even call it that) would be that it wasn't a very thick sauce..and because I used a lot of chicken broth, rather than the white wine and clam juice, he felt it could have been more flavorful. Even so, the next time I will tweak what I can but it is definitely worthy for a return appearance or even a special occasion dish. Happy Day!


Garlicky Shrimp (Or Chicken!) Pasta
Best of America's Test Kitchen 2010

Marinate the shrimp while you prepare the remaining ingredients

  • 5 garlic cloves, minced (about 5 teaspoons)
  • 4 garlic cloves, smashed
  • 1 pound large shrimp (21 to 25 per pound), peeled and deveined, each shrimp cut into 3 pieces)
  • 3 Tablespoons olive oil
  • salt
  • 1 pound short tubular pasta such as mezze rigatoni, fusilli, or campanelle
  • 1/4 - 1/2 teaspoon red pepper flakes
  • 2 teaspoons unbleached all-purpose flour
  • 1/2 cup dry vermouth or white wine
  • 3/4 cup clam juice (or you can use chicken broth as I did if using chicken instead of shrimp)
  • 1/2 cup chopped fresh parsley
  • 3 Tablespoons unsalted butter
  • 1 teaspoon fresh lemon juice plus 1 lemon, cut into wedges for serving
  • Pepper

  1. Toss 2 teaspoons of the minced garlic, shrimp, 1 Tablespoon of the oil, and 1/4 teaspoon salt in a medium bowl. Let the shrimp marinate at room temperature for 20 minutes.
  2. Heat the smashed garlic cloves and remaining 2 Tablespoons oil in a 12 inch skillet over medium-low heat, stirring occasionally, until the garlic is light golden brown, 4 to 7 minutes. Remove the skillet from the heat and use a slotted spoon to remove the garlic from the skillet; discard the garlic. Set the skillet aside.
  3. Bring 4 quarts water to a boil in a large Dutch oven over high heat. Add 1 Tablespoon salt and the pasta. cook, stirring often, until just al dente. Drain the pasta, reserving 1/4 cup of the cooking water, and transfer the pasta back to the Dutch oven.
  4. Meanwhile, return the skillet with the oil to medium heat; add the shrimp with the marinade to the skillet in a single layer. Cook the shrimp, undisturbed, until the oil starts to bubble gently, 1 to 2 minutes. Stir the shrimp and continue to cook until almost cooked through, about 1 minute longer. Using a slotted spoon, transfer the shrimp to a medium bowl.
  5. Add the remaining 3 teaspoons minced garlic and the red pepper flakes to the skillet and cook until fragrant, about 1 minute. Add the flour and cook, stirring constantly for 1 minute; stir in the vermouth and cook for 1 minute. Add the clam juice (or broth) and parsley; cook until the mixture starts to thicken, 1 to 2 minutes. Off the heat, whisk in the butter and lemon juice. Add the shrimp and sauce to the pasta, adjusting the consistency with up to 1/4 cup reserved pasta cooking water. Season with pepper to taste. Serve, passing the lemon wedges separately.

12.03.2009

Candied Sweet Potato Casserole with Toasted Marshmallow Topping

Ah, yes...I just love this time of year: family, friends, food, love, cozy blankets and fireplaces, and a large cup of hot chocolate with marshmallows. And it all starts with Thanksgiving.
This year we spent the holiday with Brad's family. We started the day bright and early with warm, goey monkey bread and the Chicago Holiday Parade on T.V. (Hi Scarlett!) And then, it was time to cook. My father in law did the majority of the cooking because, well..., he's just that good. :o)
I was lucky enough to be put in charge of the sweet potatoes and rolls. Brad absolutely loves sweet potatoes and I had made this recipe last year at my Mima's house and it appeared to go over very well. Why do I say "appeared"? Well that's because I don't particularly like sweet potatoes so I really do have to go off of what everyone says. So yes, if they said they loved it, I have to take them for their word.
Anyway, this year I had the same problem as last. While cooking the sweet potatoes on the stove top, some of the potato chunks cooked a lot faster than others. I think it's quite possible that I just didn't stire the pot often enough causing the ones of the bottom to cook much faster than the others. Or maybe it's just because I don't cut as even of chunks as I think I do ;o) Either way, I ended up "fishing out" pieces that were already done and placed them in the casserole dish while waiting for the rest to finish up. Other than that, this recipe really has nothing to it and creates a yummy dish.

Candied Sweet Potato Casserole with Toasted Marshmallow Topping
from America's Test Kitchen Family Cookbook

Serves: 10-12
Prep Time: 15 min
Total Time: 1 hour 40 minutes

  • 8 Tbsp unsalted butter, cut into 1 inch chunks
  • 5 lbs sweet potatoes (7 medium), peeled and cut into 1 inch chunks
  • 1 cup packed light brown sugar
  • 1/2 cup water
  • 1 1/2 tsp salt
  • 1/2 tsp pepper
  • 4 cups mini marshmallows

  1. Melt the butter in a large Dutch oven over medium-high heat. Add the sweet potatoes, brown sugar, water, salt, and pepper. Bring to a simmer, then cover and reduce the heat to medium-low. Cook, stirring often, until the sweet potatoes are tender (a paring knife can be slipped into and out of the center with very little resistance), 45-60 minutes.
  1. When the sweet potatoes are tender, remove the lid and bring the sauce to a rapid simmer over medium0high heat. Continue to simmer until the brown sugar mixture had reduced to a glaze, about 8 minutes.
  2. Adjust an oven rack to the middle position and heat the oven to 450 degrees. Pour the potato mixture into a 9x13 inch baking dish. Spread the marshmallows over the potatoes. Bake until the marshmallows are crisp and golden, about 5 minutes.

8.25.2009

Blueberry Streusel Muffins

Have I told you lately that I love blueberries? ^_^ They are by far the best fruit that God created.

Brad and I went blueberry picking again for my birthday this year and unfortunately, I wasn't able to control myself as well this year and ate a good majority of them before we ended up freezing them. Whoops! ::looks innocently:: By the way, what is the best way to freeze blueberries? Well let me tell you. Place your fresh blueberries on a cookie sheet or shallow pan in a single layer. Set berries in the freezer until frozen (this will take an hour or so). Once frozen, pour into a freezer bag and viola! Individually frozen blueberries that are much easier to remove and use in a recipe. Love it!

Anyway, I had wanted to make some fresh blueberry muffins and I didn't want my precious fruit to go to waste on some bland recipe so I went straight to Cook's Illustrated/America's Test Kitchen. I have never been disappointed with any of the recipes that I have gotten from them and I had remembered seeing blueberry muffins being featured on the cover. However, of course I couldn't find my CI magazine. I did find a recipe on their website though but it called for jam, which I didn't want to do. So I did some more searching and what I found was a recipe from Cook's Country, another branch of America's Test Kitchen. I liked what I saw so I decided to give it a go.

Guess what? Another winner! I have to admit there were some muffins that had more berries than others, as well as some where the blueberries were more towards the bottom but I honestly think that was my mistake. Either way, I'm keeping this recipe around.


Blueberry Streusel Muffins
from Cook's Country

Makes 12

To prevent a streaky batter, leave the blueberries in the freezer until the last possible moment. Wyman's brand frozen wild blueberries are our first choice, but an equal amount of fresh blueberries may be substituted.


Streusel
1 1/4 cups all-purpose flour
1/3 cup packed dark brown sugar
1/3 cup granulated sugar
1/2 teaspoon ground cinnamon

Pinch salt
7 tablespoons unsalted butter , melted

Muffins
4 tablespoons unsalted butter , melted and cooled slightly, plus extra for preparing muffin tin
2 cups all-purpose flour , plus extra for preparing muffin tin
1 large egg
1 teaspoon vanilla extract
1 cup granulated sugar
1 teaspoon grated lemon zest
1/2 cup buttermilk
1 tablespoon baking powder
1/2 teaspoon salt
1 1/2 cups frozen blueberries

1. For the streusel: Combine flour, sugars, cinnamon, and salt in bowl. Drizzle with melted butter and toss with fork until evenly moistened and mixture forms large chunks with some pea-sized pieces throughout.

2. For the muffins: Adjust oven rack to middle position and heat oven to 375 degrees. Grease and flour 12-cup muffin tin. Whisk egg in medium bowl until pale and evenly combined, about 30 seconds. Add vanilla, sugar, and zest and whisk vigorously until thick, about 30 seconds. Slowly whisk in melted butter; add buttermilk and whisk until combined.

3. Reserve 1 tablespoon flour. Whisk remaining flour, baking powder, and salt in large bowl. Fold in egg mixture until nearly combined. Toss blueberries with reserved flour and fold into batter until just combined.

4. Divide batter in muffin tin and top with streusel. Bake until light golden brown and toothpick inserted into center of muffin comes out with few dry crumbs attached, 23 to 27 minutes. Cool muffins in tin for 20 minutes, then carefully transfer muffins to rack to cool completely. (Muffins can be stored in airtight container at room temperature for 3 days.)

5.26.2009

Blueberry Buttermilk Pancakes


This past Saturday I used the very last of our blueberries stash. It was a very sad day for me but I'm excited for what's to come. Only about a month and a half until peak blueberry season! I'm convinced that one of the reasons why I love blueberries so much has to do with the fact that they peak right around my birthday, which makes for a very easy/fairly inexpensive birthday gift and/or a way to celebrate! Last summer I took Brad blueberry picking for the first time. We both both got caught up in how much fun we were having that before we knew it, we had picked around 11 lbs of blueberries. I was in blueberry heaven for the next couple of weeks after that. Since we had picked so many, I also made sure to freeze a bunch of them to use during the off season months. (Quick note: Blueberries are super easy to freeze. Lay blueberries flat on a cookies sheet and place in the freezer until frozen. Pour frozen berries into ziploc bag and viola! Frozen blueberries that #1 still look like blueberries right off the bush and #2 easy to scoop out as many as needed)

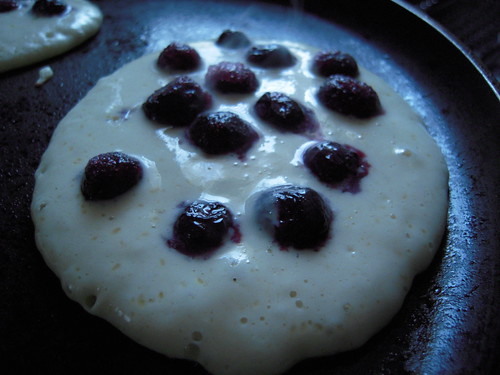
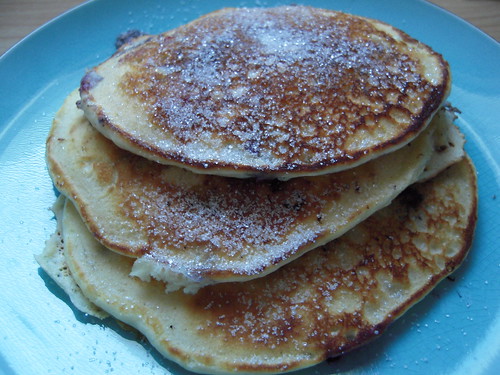
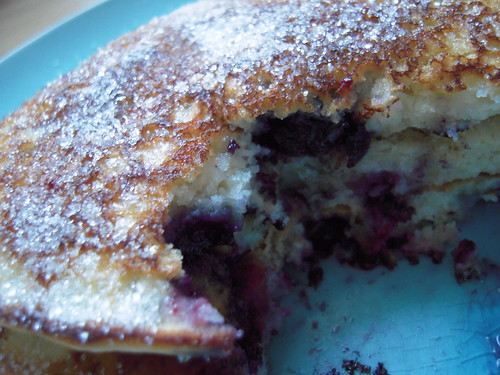
Anywho, this past Saturday, I decided to use the last of the berries to make some "made from scratch" blueberry pancakes. I currently have a subscription to Cook's Illustrated and a couple months back they featured a recipe for Blueberry Pancakes. Well of course it is just my luck to not be able to find that particular issue so I scoured the internet instead. Lucky for me, someone had copied an ATK Blueberry Buttermilk Pancake recipe over on cooking. com. So I whipped up a batch and they were quite delightful. I plan on using this recipe again once we have some more blueberries as well as comparing it to the one that was in my magazine....whenever I find it. I do want to mention though that the original recipe calls for 1 Tbsp lemon juice for it's 2 cups of milk and then goes on the mention that if you have buttermilk on hand, use that instead of the milk + lemon juice mixture. That confused me slightly since the common substitution for buttermilk is 1 Tbsp lemon juice (or vinegar) to 1 cup water. So I did in fact up the lemon juice to 2 Tbsp for the 2 cups milk. But it is ultimately up to you.

Blueberry Buttermilk Pancakes

America's Test Kitchen

RECIPE INGREDIENTS
  • 1/2 teaspoon table salt
DIRECTIONS
  • Whisk lemon juice and milk in medium bowl or large measuring cup; set aside to thicken while preparing other ingredients. Whisk flour, sugar, baking powder, baking soda, and salt in medium bowl to combine.
  • Whisk egg and melted butter into milk until combined. Make well in center of dry ingredients in bowl; pour in milk mixture and whisk very gently until just combined (a few lumps should remain). Do not over mix.
  • Heat 12-inch nonstick skillet over medium heat for 3 to 5 minutes; add 1 teaspoon oil and brush to coat skillet bottom evenly. Pour 1/4 cup batter onto 3 spots on skillet; sprinkle 1 tablespoon blueberries over each pancake. Cook pancakes until large bubbles begin to appear, 1 1/2 to 2 minutes. Using thin, wide spatula, flip pancakes and cook until golden brown on second side, 1 to 1 1/2 minutes longer. Serve immediately, and repeat with remaining batter, using remaining vegetable oil only if necessary.

5.02.2009

Chicken Teriyaki


Chicken Teriyaki is one of Brad's favorites when it comes to "Chinese" food ("Chinese" because we both have doubts on it's authenticity to true Chinese food). So far I have made this twice, despite not having all of the ingredients the recipe calls for, nor will I have them for tonight's version either. The reason? I'm not a huge fan of ginger therefore I tend to skip it when a recipe calls for it. Also, neither Brad or I really drink so we never have wine in the house, nor do we buy cooking wine because for us, because it's just not practical. Why spend extra money on an ingredient when chicken broth is an acceptable substitution. And finally, we always have boneless, skinless chicken breasts in our freeze because they are so much more versatile for us and therefore, use boneless breasts for this recipe as well, and just cut it up into chunks so it's more like a topping over white rice. The reason why I didn't change the recipe below is because, as good as it turns out even with all of my substitutions, I am aware that it's entirely possible for the teriyaki to come out even better when the recipe is followed to a T.

Enjoy...

Chicken Teriyaki
from The America's Test Kitchen Family Cookbook

  • 8 bone-in, skin-on chicken thighs (6-8 oz each), trimmed
  • Pepper
  • 2 teaspoons vegetable oil
  • 1/2 soy sauce
  • 1/2 cup sugar
  • 2 Tablespoons mirin, sweet sherry, or dry white wine
  • 2 teaspoons grated ginger
  • 1 garlic clove, minced
  • 1/2 teaspoon cornstarch
  • 1/8 teaspoon red pepper flakes
1. Pat the chicken dry with paper towels, then season with pepper. Heat the oil in a 12 inch non-stick skillet over medium-high heat until just smoking. Add the chicken, skin-side down.

2. To crisp up the skin, set a heavy pot (such as a heavy dutch oven) on top of the chicken thighs as they cook. Cook until the skin is a deep mahogany brown and very crisp, 15-20 minutes. (The chicken should be moderately brown after 10 minutes. If it is very brown, reduce the heat; if it is still pale, increase the heat)

3. Remove the weight and flip the chicken over. Reduce the heat to medium and continue to cook, without the weight, until the second side is brown and the chicken is thoroughly cooked, about 10 minutes.

(remember, I always use boneless breasts and cut my chicken up
and therefore don't get the mahogany brown ATK recommends)

4. Meanwhile, which the soy sauce, sugar, mirin, ginger, garlic, cornstarch, and pepper flakes together.
5. Transfer the chicken to a plate. Pour off all of the fat from the skillet. Whisk the soy mixture to recombine, then add to the skillet and return to medium heat. Return the chicken to the skillet, skin-side up, and spoon the sauce over the top. Continue to simmer until the sauce is thick and glossy, about 2 minutes longer.


Let me just add too, that America's Test Kitchen is absolutely amazing. I love how the explain their testing strategies and let you know how they came to the conclusion that they did. I would highly recommend the Family Cookbook, their TV show (check your local listings), or their Cook's Illustrated magazine.