3.03.2012

m. henry

Yes! My dad and Barb finally made it to Chicago for a day trip! My favorite tradition of course is trying out new restaurants and this time we traveled up to the northside to "chow for now" at m. henry.
Jeremiah trying out his menu options...literally
Tony and Angela beat us there and just so happened to walk in at the right now to secure a table for us right away despite the large amount of people who were gathering behind them. And luckily, we were able to get there before they gave the table away.
The decor and storefront was charming, as if the restaurant itself should be in France. But what impressed me more was that the waitress, without asking, brought Jeremiah a small bowl of cut bananas, strawberries, and candied cranberries. Granted, he isn't able to eat finger foods yet but the gesture was much appreciated anyway.
Rustic peasant quiche & mixed field greens
The menu was tempting. I think all of use had at least two menu options that we were debating on up to the last minute. And with the exception of my dad and Brad trading dishes (My dad's eyes lit up at the large amount of fresh mixed greens on the plate and Brad was surprised by the size of the quiche), everyone was very pleased with what they ordered (with Brad and my dad at no exception, both were very pleased with what they ended up with). Another win? The fresh squeezed orange juice. You know, the kind that transports you to a Florida orchard and tastes like you just bit into a freshly picked, ripe orange? Yep, it was that good.
fannie's killer fried egg sandwich
Unfortunately, not all the photos came out but I hope you get the gist. It was delicious and one that we would definitely recommend to others.
raspberry & rhubarb blisscakes with vanilla marscapone cream

2.20.2012

Glazed Julienne Carrots

Since we've been making all of Jeremiah's food, we've definitely had more fresh produce in the house. I was in need of making some more carrots for Jeremiah and I figured, why not make some for us too? I considered just doing honey glazed carrots as I usually do but my mandolin caught my eye. As much as I love that thing, sometimes I steer clear of it just because it's somewhat intimidating with its sharpness. So with new found motivation, I started to julienne the carrots before I even had a recipe in mind :op

Thankfully there's google which led me to Cooking Light. Which is funny because I'm not quite sure what's "Light" about this recipe with the brown sugar and all. Perhaps it's because they call for margarine rather than butter. Because it was a spur of the moment thing, I don't think I had enough carrots because my carrots looked way more glazed then their picture did. But either way, they were delicious. I really need to break out that mandolin more often.

Glazed Julienne Carrots
by Cooking Light, Nov 2006

Ingredients

  • 2 tablespoons reduced-calorie margarine 
  • 1/4 cup firmly packed brown sugar
  • 4 cups (2-inch) julienne-cut carrot 
  • 1/4 teaspoon salt 
  • 1/4 teaspoon pepper
  • 1/4 cup chopped fresh parsley
 Directions
  1. Melt margarine in a large nonstick skillet over medium heat; add sugar, stirring until melted.
  2. Add carrots, salt, and pepper and cook 10 minutes, or until carrots are crisp-tender, stirring occasionally. Remove from heat. Stir in parsley.

2.15.2012

The soft opening of Flirty Cupcake Dessert Garage

This Friday my mom took the train into Chicago to spend the weekend. The night before, I just happened to see on my newsfeed that Flirty's new storefront was getting set to debut the following day as their soft opening. What timing! I knew my mother would be more than willing and would love to go which made the excitement even greater!
We have been frequenting Flirty's vans for almost a year now. Well, perhaps frequent isn't the right term. It's more of whenever we were at the same food truck event as well as whenever they are in Bridgeport. I just love their flavor combos and their creative names for the cupcakes.
Another love? That I can get a cupcake essentially whenever I want now without having to track down the truck and that it's in our old neighborhood (Ah, Little Italy, how we miss you). Yeah, didn't take too many photos though since I was pretty excited about just being there. Whoops!
Flirty warned on their facebook that there might be a couple of hiccups but everything was perfect. The smell of cupcakes baking wafts in the air and their display cases were tantalizing. Everyone was super helpful and quite cheery for it being their first day of business at their garage and there being a steady stream of customers coming in and out.
We tried their limited Valentine's Day edition of "For the Love of Chocolate" which was a Nutella chocolate cupcake and a "It's so new it hasn't been named because it just came out of the oven" coconut cupcake. The Nutella cupcake was nice since it actually had a Nutella center, unlike other cupcake shops and my mom couldn't stop raving about the their coconut concoction.
Ahhh, cupcakes, you have stolen my heart.

1.29.2012

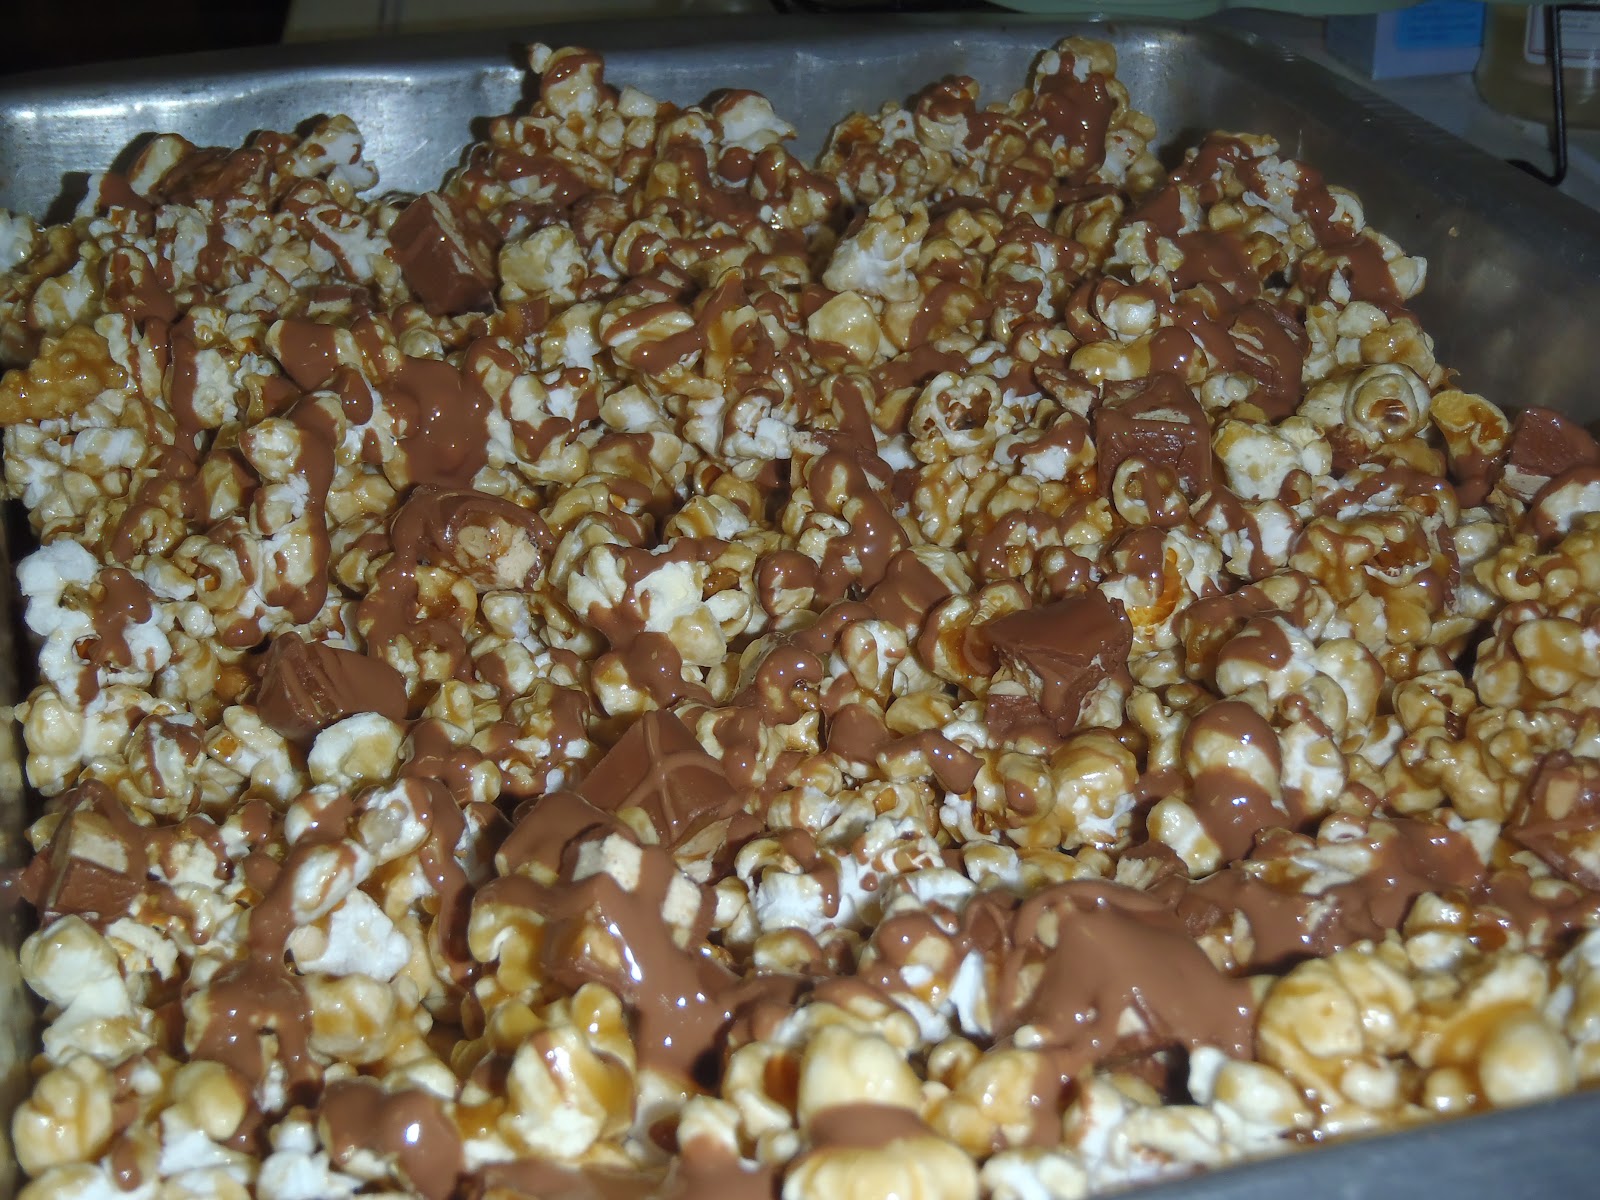
Snickers Caarmel Corn

So one of my new favorite sites to frequent is Pinterest. There are so many great ideas out there and Pinterest makes it easy to find such ideas and even bookmark them for future use. So when I came across this delicious looking snack, I knew I had to "Pin It" for sometime down the road.
Enthused about popcorn! Don't mind Tony,
he's trying to get something he dropped
Then came the day that Angela and Tony came to hang out at our place loaded with popcorn kernals. We were all craving something sweet when I decided to go to one of my boards and take a gander and see if I could find something that we could whip up. And there it was. Something that would use her kernals and satisfy our sweet tooth. And even luckier for us, we had some snickers in our pantry :o)
Shakin' it with all she's got!
So Angela and I set off to try our hand at this chocolatey caramel goodness. Since she's known for her amazing stovetop popcorn, I let her do her thing while I put together the ingredients for the caramel. It eventually lead to a group effort when Tony got involved to do the shaking to coat the popcorn.
And the result? Deeeeliciousness. Man on man I wish I had some right now. The only qualm is that we didn't sort through the popcorn before coating it so every now and then you would have the misfortune of crunching down on a hard kernal. Which was probably good since it made you slow down and not inhale the entire batch ;o) Definitely keeping this one in our files!


Snickers Caramel Corn
pinned from Six Sisters Stuff (Adapted from Cookies and Cups)

4 quarts popped corn (about 1 cup kernels)
1 cup salted butter
2 cups light brown sugar, packed
1 tsp salt
1/2 cup light corn syrup
1 tsp baking soda
1 cup salted peanuts
30 fun size Snickers bars chopped up
3 oz melted choc chips

  • Preheat oven to 200 degrees.
  • Pop your popcorn and put popcorn and peanuts in a big brown paper grocery bag.
  • Over medium heat boil butter, brown sugar, salt and corn syrup for 5 minutes (stirring constantly). Remove from heat and stir in baking soda. 
  • Pour over popcorn in the brown paper bag, roll closed and shake well. ( It blends so much easier than trying to fit it in a big bowl and stir.) After the popcorn is coated well, spread onto a cookie sheet. 
  • Spread chopped Snickers over top of popcorn and put in oven for 5 minutes. Remove from oven and drizzle melted chocolate over top of popcorn. YUM!
*If not eaten immediately...can be stored in an airtight container.

10.18.2011

Apple Muffins

It's been a while...I know, I know. I have been baking and cooking I promise. Sometimes I remember to take pictures, and sometimes I don't...who would have thought that it would be so "difficult" to keep up a blog with a newborn :op

Anywho, the three of us went on our first vacation the other week to New York where we got to lounge around, explore western New York, visit Niagra and...go apple picking! Of course we got a ton of apples and I couldn't wait to get them home to bake something! Now, last year I had tried to make apple cinnamon muffins and they turned out pretty horrific. And this year, I vowed to try again.
So glad that I did because the recipe that I used this time is definitely a winner. LOVED it! I haven't been able to stop eating them and neither has Brad. I made them this past Saturday, and in the past 3-4 days, just the two of us have eaten 19. Yikes. Oh, and my brother ate 1 when he came over this morning.
The recipe was simple enough. I didn't do anything different except kept the peels on the apple only because 1) I didn't read that you were supposed to peel them until after I cut the first one and 2) You never know when the "Big Boy" is going to wake up so I was trying to be as fast as possible and peeling would have just created an extra step. Also, the recipe said it would make 18 but I ended up with the 20. Definitely didn't mind having the extra two! And two of our apples yielded 3 cups, but we picked pretty large apples. Oh, and 24 mins wasn't long enough for me but perhaps that was due to high moisture content of orchard apples? Not sure, just don't be alarmed.
Apple Muffins
found on The Girl Who Ate Everything (recipe by Marissa Pinon)

 
2 cups sugar 
2 eggs
1 cup oil
1 Tablespoon vanilla
3 cups flour
1 teaspoon salt
1 teaspoon baking soda
1 teaspoon cinnamon
3 cups peeled, cored, diced apples (around 3 apples)
Brown sugar for topping (around 1/2 cup)

Directions
  • Preheat oven to 350 degrees and line muffin pan with paper liners.
  • Cream together sugar, eggs, oil, and vanilla. 
  • Sift flour, baking soda, salt, and ground cinnamon.
  • Add dry ingredients to creamed mixture and mix until combined. The batter will be very thick. Add the diced apples.
  • Fill paper liners almost to the top, about 3/4 of the way full. Sprinkle with brown sugar.
  • Bake at 350 degrees for 20-24 minutes. Makes 18 muffins. 

9.26.2011

Flat Pasta with Creamy Corn

Every once in a while, I'll catch an episode of Rachael Ray. There are times when I think her "That's what is for dinner tonight" dishes are a little too crazy for me, that and they incorporate something that I'm not a fan of.

Well for whatever reason, this one caught my eye. And I knew I definitely wanted to make it.

I have made this a couple of times now...Each time perhaps a little different than the first. I have used both corn on the cob and frozen corn (when not in season), peas, edamame, or a combination of both. Also, the flat pasta is a bit too costly for my preference so I usually use something along the same lines. The night I took these pictures it was bowtie pasta but I have also used egg noodles. Oh, and I haven't been able to find a Fresno chili so I usually get Anaheim. I figure, "Hey, they are both California cities [that I've been to], so they work right?"

But no matter what I do, it has always been delicious! This is absolutely one of my favorite "quick" meals that I feel like I'm actually eating somewhat healthfully since it has so many veggies in it. Though perhaps with the bacon...and the butter... ;o)

Flat Pasta with Creamy Corn
by Rachael Ray

Ingredients

  • 6 ears corn on the cob, husked
  • 2 tablespoons extra virgin olive oil (EVOO)
  • 1/4 pound pancetta or lean, center-cut bacon, finely chopped
  • 1 Fresno chili pepper, seeded and finely chopped or 1/2 small sweet red bell pepper, finely chopped
  • 2 tablespoons thyme, chopped
  • 1 small red onion, very finely chopped
  • 3-4 cloves garlic, finely chopped
  • 1 cup shelled fava beans (when available – remove from pod, parboil 5 minutes in shell) or defrosted shelled edamame or lima beans
  • 1/2 cup dry white wine or chicken stock
  • 3 tablespoons butter
  • 1 pound egg tagliatelle, such as Del Verde brand, or other wide-cut pasta
  • 1/2 cup flat leaf parsley, finely chopped
  • Grated Parmigiano Reggiano or Pecorino Romano cheese, for topping

Preparation

Into a large bowl, scrape the corn off the cobs, as well as the cobs themselves, for their sweet, starchy juices.

Heat a large skillet over medium heat and bring a large pot of water to a boil for the pasta.

Add the EVOO to the hot skillet and add the pancetta or bacon. Cook to render the fat and crisp, 3-4 minutes.
Add the corn and juices and stir to combine. Season with salt and pepper and cook the corn for 3-4 minutes. Add the peppers, onions and garlic; stir for 5 minutes more. Add the fava beans, edamame or lima beans and deglaze the pan with wine or stock. Stir in the butter and reduce the heat to low.

Salt the boiling water and cook the pasta to al dente. Add 1 cup of the starchy cooking water to the creamy corn succotash. Drain the pasta, then toss with the corn and parsley and top with cheese.
 

8.26.2011

Round Tip Roast

Yesterday was my first day back in the kitchen since Jeremiah has been born. I had bought the Round Tip Roast because it was on sale the day before thinking that perhaps it was a tougher cut of meat and I would just throw it in the Crock-Pot..that should be easy enough.

Before when I have tried to make things, I have had one of my wonderful family members in the kitchen with me or at least near by to tend to the little one if he starts to fuss or is awake. And the times when I was alone and trying to do something as simple as a frozen pizza...something always happened where I couldn't actually do what I set out to do or the results were a little less than desirable. Hence the pot roast...or so I thought.

During one of this naps, I took the meat out of the fridge to get to room temp and then did a quick search online just to double check my ideas...except that I couldn't find anything for a Round Tip Roast. I continued to change my search terms, added and took away quotations, rearranged words and finally came across "The New Wife of an Elegant Eater" Apparently she had run into the same problems as I had and was unable to find a recipe for Round Tip Roast so what did she do? She called her mother-in-law of course.

The recipe she gave seemed simple enough...apparently I hadn't bought a pot roast after all. Knowing that Jeremiah's mood/needs can be inconsistent, I prepped the roast rather than doing it right before it went into the oven and set it on a cooling rack above a cutting board and covered loosely with saran wrap.

Once I figured it was time to put the roast in so that it would be ready when Brad got here, I took it out of the fridge and seared it in the dutch oven on the stove. I just love the crust searing normally gives and my dad always taught me how it "locks in the flavor/juices" so of course I was going to do it this time. I then stuck our thermometer in the meat and stuck it in the oven.

When it reached the temp I was looking for, I took it out, transferred it to a cutting board and tented it with foil to let it rest. It looked tasty and I was excited. But I have to admit, once I cut into it, I realized that I may have left it in the oven a little too long as it was a bit more on the "well done" scale than I had wanted (though as I was finishing carving it to put away the left overs, I found some pinker slicers.) Despite the lack of pink in the slices we did have, we both enjoyed it and it was pretty good. Makes me want to buy the Round Tip Roast more often.


Round Tip Roast
adapted from The New Wife of an Elegant Eater

1-3.5 to 4 lb. round tip roast
Olive Oil
2 tsp Kosher Salt
1 1/2 tsp Pepper
3 cloves chopped Garlic
  1. Mix Salt, Pepper, and garlic together and rub the mixture all around the roast. 
  2. Cover the roast and put it in the refrigerator. Heat the oven to 325. Leave the roast in the fridge until the oven is ready.
  3. Sear roast in a dutch oven with olive oil. 2-3 mins per side (meat should release itself and should obtain a nice crust)
  4. Transfer dutch oven, uncovered to the pre-heated oven. Cook for 15-20 minutes per lb. until you have reached your desired temperature (Think Medium Rare-Medium)
  5. Take out the roast and allow to rest on a cutting board for 15 mins, tenting with foil (Remember, as it rests, the roast will continue to cook)