5.26.2009

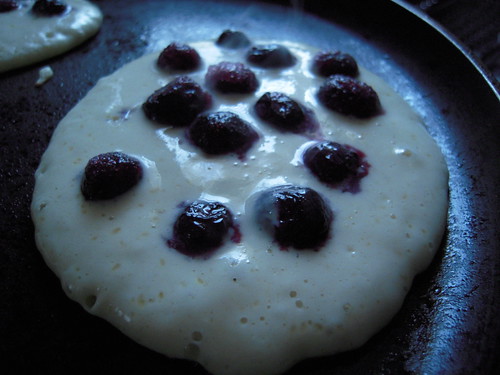
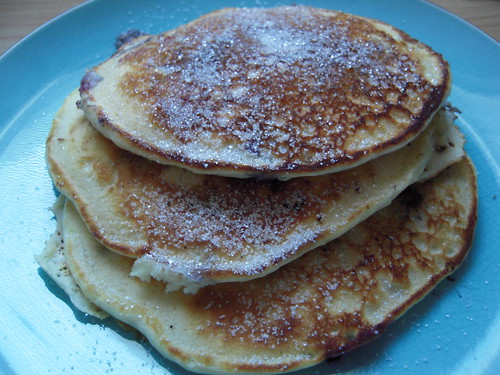
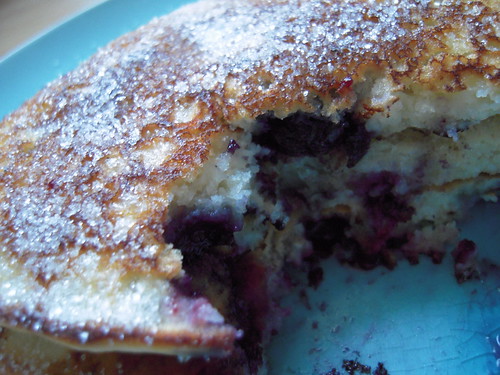
Blueberry Buttermilk Pancakes


This past Saturday I used the very last of our blueberries stash. It was a very sad day for me but I'm excited for what's to come. Only about a month and a half until peak blueberry season! I'm convinced that one of the reasons why I love blueberries so much has to do with the fact that they peak right around my birthday, which makes for a very easy/fairly inexpensive birthday gift and/or a way to celebrate! Last summer I took Brad blueberry picking for the first time. We both both got caught up in how much fun we were having that before we knew it, we had picked around 11 lbs of blueberries. I was in blueberry heaven for the next couple of weeks after that. Since we had picked so many, I also made sure to freeze a bunch of them to use during the off season months. (Quick note: Blueberries are super easy to freeze. Lay blueberries flat on a cookies sheet and place in the freezer until frozen. Pour frozen berries into ziploc bag and viola! Frozen blueberries that #1 still look like blueberries right off the bush and #2 easy to scoop out as many as needed)

Anywho, this past Saturday, I decided to use the last of the berries to make some "made from scratch" blueberry pancakes. I currently have a subscription to Cook's Illustrated and a couple months back they featured a recipe for Blueberry Pancakes. Well of course it is just my luck to not be able to find that particular issue so I scoured the internet instead. Lucky for me, someone had copied an ATK Blueberry Buttermilk Pancake recipe over on cooking. com. So I whipped up a batch and they were quite delightful. I plan on using this recipe again once we have some more blueberries as well as comparing it to the one that was in my magazine....whenever I find it. I do want to mention though that the original recipe calls for 1 Tbsp lemon juice for it's 2 cups of milk and then goes on the mention that if you have buttermilk on hand, use that instead of the milk + lemon juice mixture. That confused me slightly since the common substitution for buttermilk is 1 Tbsp lemon juice (or vinegar) to 1 cup water. So I did in fact up the lemon juice to 2 Tbsp for the 2 cups milk. But it is ultimately up to you.

Blueberry Buttermilk Pancakes

America's Test Kitchen

RECIPE INGREDIENTS
  • 1/2 teaspoon table salt
DIRECTIONS
  • Whisk lemon juice and milk in medium bowl or large measuring cup; set aside to thicken while preparing other ingredients. Whisk flour, sugar, baking powder, baking soda, and salt in medium bowl to combine.
  • Whisk egg and melted butter into milk until combined. Make well in center of dry ingredients in bowl; pour in milk mixture and whisk very gently until just combined (a few lumps should remain). Do not over mix.
  • Heat 12-inch nonstick skillet over medium heat for 3 to 5 minutes; add 1 teaspoon oil and brush to coat skillet bottom evenly. Pour 1/4 cup batter onto 3 spots on skillet; sprinkle 1 tablespoon blueberries over each pancake. Cook pancakes until large bubbles begin to appear, 1 1/2 to 2 minutes. Using thin, wide spatula, flip pancakes and cook until golden brown on second side, 1 to 1 1/2 minutes longer. Serve immediately, and repeat with remaining batter, using remaining vegetable oil only if necessary.

5.10.2009

French Bread Rolls


When we first moved into our new apartment, I was more than ready to start cooking. Especially since cooking is my favorite stress reliever. Unfortunately, our "new" kitchen did not cater to this need of mine. You see, even though the oven looked brand new, whenever I turned it on to start cooking/baking, it would smoke...and then an awful smell would fill the kitchen. I cleaned it, I scrubbed it, I tried to let it burn out but no...nothing worked. So after about a week or two, we finally called our landlord to see if he had any suggestions/wanted to buy us a new stove. And guess what? An additional week and a half later, viola! New stove! Granted, it's not some high class, fancy pants stove but it's the nicest one that I have ever had in my life, though it would still be considered "basic". Needless to say, I'm stoked!

Anyway, the reason I'm telling you all this is because it was during this depressing 3 or 4 weeks without an oven that I kept coming across a bunch of new recipes that I desperately wanted to try to cook my stress away (from moving, unpacking, job searching etc) but couldn't. It was during this time that I came across a recipe for Garlic Knots on My Kitchen Cafe. I could not wait to try them. I found that the recipe was pretty easy, but unfortunately our rolls did not turn out all buttery and garlicy as expected. You see, I mixed my butter and garlic as directed and let it set on our oven to stay melted while the rolls finished rising and then baking. Well when I went to go brush on the butter, I looked and the garlic had turned a bluish-green color. Not wanting to come down with a case of botulism, I decided to forgo the garlic butter and just brush with regular butter. Since then though, I looked online to see what was up with my blue garlic and turns out it would have been okay to eat. Something about the garlic reacting to an acid..yada yada yada. However, before I try that mixture again, I think I'm goign to do a little more research. I would hate to get anyone sick...

Anyway, the rolls by themselves were pretty good. I think I would have liked them a bit sweeter. Perhaps with a honey butter? I'm not sure. Also, I used my Kitchen Aid and let the dough hook do some of the kneading work for a while before I kneaded it myself a few times. I also found that I had to add an additional 1/2 cup of flour or so to make it dough not so sticky. I'll probably play around with the recipe at some later day but for now, here ya go!

French Bread Rolls
by My Kitchen Cafe-adapted from allrecipes.com

1 1/2 cups warm water (110 degrees F/45 degrees C)
1 tablespoon active dry yeast
2 tablespoons white sugar
2 tablespoons vegetable oil
1 teaspoon salt
4 cups all-purpose flour

In a large bowl, stir together warm water, yeast, and sugar. Let stand until creamy, about 10 minutes.

To the yeast mixture, add the oil, salt, and 2 cups flour. Stir in the remaining flour, 1/2 cup at a time, until the dough has pulled away from the sides of the bowl. Turn out onto a lightly floured surface, and knead until smooth and elastic, about 8 minutes. Lightly oil a large bowl, place the dough in the bowl, and turn to coat. Cover with a damp cloth, and let rise in a warm place until doubled in volume, about 1 hour.

Deflate the dough, and turn it out onto a lightly floured surface. Divide the dough into 12-14 equal pieces, and form into round balls. Place on lightly greased baking sheets at least 2 inches apart. Cover the rolls with a damp cloth (or greased saran wrap), and let rise until doubled in volume, about 40 minutes. Meanwhile, preheat oven to 400 degrees F (200 degrees C).

Bake for 12-13 minutes in the preheated oven, or until golden brown.
5.09.2009

Pork Loin

A couple weeks ago, Pork Loin was on sale at our local Dominick's. So in effort to "mix things up a bit", I bought a nice 2.5 lb loin. (Though pork really hasn't been my "thing" these past couple of years, I was desperate for something different. On the other hand, pulled pork sandwiches, bacon, chicharones, delish!) Unfortunately, it was also right around the time that we were moving and therefore it got put in the freezer for a later date. Well that later date turned out to be today. I have to admit, I have never made a Pork Loin by myself, only assisting my father so today was a bit intimidating, knowing that no one would be here to give me the "thumbs up" while checking on it in the oven. Good thing my father is only a phone call away and I have been watching plenty of America's Test Kitchen episodes with cooking pointers. One such pointer that both my father and ATK gave was to take the loin out of the oven when it reached about 130. And then allow it to sit under a foil tent to cook completely. This ensures that the meat wont dry out and stay nice and moist. The pork turned out pretty well (remember, pork loin/chops, not my favorite lately) but Brad thought it was delicious.


Rosemary Pork Loin
Ingredients
Pork Loin (mine was about 2.6 lbs)
2 Tbsp Olive Oil
1 Tbsp Kosher Salt
1 tsp Pepper
2 cloves Garlic, minced or pressed
Tbsp (or so) fresh Rosemary

Directions
  1. Mix olive oil, salt, pepper, garlic, and rosemary together in a small bowl. Spread mixture all over pork loin and let sit for 1 hr at room temperature.
  2. In a foil lined baking dish, place pork loin in the oven, preheated to 325 degrees.
  3. Cook until internal temperature is 130 degrees.
  4. Remove from oven and tent with foil and let "rest" for about 20 minutes. The pork will continue to cook.

5.02.2009

Chicken Teriyaki


Chicken Teriyaki is one of Brad's favorites when it comes to "Chinese" food ("Chinese" because we both have doubts on it's authenticity to true Chinese food). So far I have made this twice, despite not having all of the ingredients the recipe calls for, nor will I have them for tonight's version either. The reason? I'm not a huge fan of ginger therefore I tend to skip it when a recipe calls for it. Also, neither Brad or I really drink so we never have wine in the house, nor do we buy cooking wine because for us, because it's just not practical. Why spend extra money on an ingredient when chicken broth is an acceptable substitution. And finally, we always have boneless, skinless chicken breasts in our freeze because they are so much more versatile for us and therefore, use boneless breasts for this recipe as well, and just cut it up into chunks so it's more like a topping over white rice. The reason why I didn't change the recipe below is because, as good as it turns out even with all of my substitutions, I am aware that it's entirely possible for the teriyaki to come out even better when the recipe is followed to a T.

Enjoy...

Chicken Teriyaki
from The America's Test Kitchen Family Cookbook

  • 8 bone-in, skin-on chicken thighs (6-8 oz each), trimmed
  • Pepper
  • 2 teaspoons vegetable oil
  • 1/2 soy sauce
  • 1/2 cup sugar
  • 2 Tablespoons mirin, sweet sherry, or dry white wine
  • 2 teaspoons grated ginger
  • 1 garlic clove, minced
  • 1/2 teaspoon cornstarch
  • 1/8 teaspoon red pepper flakes
1. Pat the chicken dry with paper towels, then season with pepper. Heat the oil in a 12 inch non-stick skillet over medium-high heat until just smoking. Add the chicken, skin-side down.

2. To crisp up the skin, set a heavy pot (such as a heavy dutch oven) on top of the chicken thighs as they cook. Cook until the skin is a deep mahogany brown and very crisp, 15-20 minutes. (The chicken should be moderately brown after 10 minutes. If it is very brown, reduce the heat; if it is still pale, increase the heat)

3. Remove the weight and flip the chicken over. Reduce the heat to medium and continue to cook, without the weight, until the second side is brown and the chicken is thoroughly cooked, about 10 minutes.

(remember, I always use boneless breasts and cut my chicken up
and therefore don't get the mahogany brown ATK recommends)

4. Meanwhile, which the soy sauce, sugar, mirin, ginger, garlic, cornstarch, and pepper flakes together.
5. Transfer the chicken to a plate. Pour off all of the fat from the skillet. Whisk the soy mixture to recombine, then add to the skillet and return to medium heat. Return the chicken to the skillet, skin-side up, and spoon the sauce over the top. Continue to simmer until the sauce is thick and glossy, about 2 minutes longer.


Let me just add too, that America's Test Kitchen is absolutely amazing. I love how the explain their testing strategies and let you know how they came to the conclusion that they did. I would highly recommend the Family Cookbook, their TV show (check your local listings), or their Cook's Illustrated magazine.

Nutella with Strawberry Crepes


My love affair with Nutella with Strawberry Crepes began at La Creperie here in Chicago. After seeing the restaurant featured on Check, Please! Brad and I decided to take a trip down to Clark Street to try it out for ourselves (I will post more about the restaurant on a later date). As much as I loved the crepes there, when it comes down to it, we just can't afford to go out and eat crepes whenever we feel like it. Lucky for me, The America's Test Kitchen Family Cookbook has a great crepe recipe that I have used ever since I discovered it. I have had no complaints about it whatsoever so I have never tried any other recipes. But hey, if it's not broke, why fix it? A few "disclaimers" so to speak before we begin. ATK says "Don't worry if the first two or three crepes aren't perfect; it takes a few to get the heat of the pan just right". I tend to agree with that statement. And just because they aren't as pretty, doesn't mean they still can't be eatten :o)

first crepe of the night, just to reiterate the point :o)

Also, there is a 2 hour resting time involved so this is a recipe that you definately need to plan ahead for. And finally, though the recipe calls for an 8" non-stick, ATK also says you can swap and use a 10" non-stick with about 3/4 cup batter- though I just eyeball it, just remember, they are supposed to be thin.

Crepes
from The America's Test Kitchen Family Cookbook

  • 1 cup whole milk (though I have used 2% every time, since that is what we drink)
  • 1 cup all-purpose flour
  • 2 large eggs
  • 6 Tablespoons water
  • 3 Tablespoons unsalted butter, melted, plus extra for the pan
  • 1/2 teaspoon salt
1. Blend all of the ingredients together in a food processor or blender until smooth, about 4 seconds. Transfer to a covered container (or if you are me, just use the blender jar w/ lid) and refrigerate the batter for 2 hours or up to 2 days.

2. Gently stir the batter to combine if it appears separated. Heat an 8 in nonstick skillet (or crepe pan) over medium heat for about 3 minutes. Brush the pan bottom and sides very lightly with butter (it should sizzle when it hits the pan). When the butter stops sizzling, remove the pan from the heat, tilt the pan slightly, and pour 2 1/2 tablespoons of the batter (you can fill a 1/4 cup measuring cup a little past the halfway mark) into the pan. As the batter is poured, rotate the pan to swirl the batter evenly over the face of the pan before returning it to the heat. Cook until the first side is spotty golden brown, 30 to 60 seconds. Use a thin spatula to flip the crepe and continue to cook until the seond side is spotty golden brown, about 30 seconds longer. Transfer the crepe to a paper-towel-lined plate and let cool (you can stack crepes on top of each other). Repeat with the remaining crepe batter, brushing the pan with butter as needed after cooking several crepes.
To Mix Crepe Batter by Hand
Sift the flour and salt together in a medium bowl. In a separate bowl, whisk together the milk, eggs, water, and melted butter, then gradually whisk into the flour. Pass the batter through a fine-mesh strainer or sieve.

To Make Ahead
Crepes can be double-wrapped in plastic wrap and refrigerated for up to 3 days or frozed for up to 2 months. To defrost, thaw the crepes in the refrigerator for a day before filling and rolling.

Crepe Filling and Folding
ATK recommends everything from a Lemon-Ricotta filling, fresh fruits (such as sauteed apples with caramel sauce), to softened ice cream for sweet crepes. For savory crepes, use soft cheeses and fresh herbs, deli meats, or sauteed vegetables to name a few. For other ideas, you can look on Le Creperie's website or use your own imagination. My personal favorite, as I have mentioned is Nutella with Strawberries (which is done by spreading Nutella on the crepe and the top with strawberries before folding).


As far as folding is concerned, you can either fold the crepe like a burrito or into quarters.

4.05.2009

yummy homemade french fries

the past couple of times that brad and i have made burgers for dinner, we haven't had any fries in the freezer to make which would completely bum me out. and though we had been grocery shopping twice this weekend, i did not remember that we still needed french fries 'til i got home from my second (and very frustrating) trip. grrr...lucky for us, we had some potatoes we had to use up (both idaho and sweet) and i had the time, i decided to mix up a couple batches of homemade fries.

it was my second time making french fries (the first being almost two years ago at the beginning of our marriage) and my first attempt at sweet potato fries. i have to admit, the sweet potato fries were not what i expected. brad said they were good (he's the sweet potato fan) though he would probably like them more if they were crispy..which was what i was going for. since they turned out kind of mushy, i'm not going to post the recipe until i have it perfected. the french fries, on the other hand, yummy.

Homemade Crispy Seasoned French Fries

by Cassie over at allrecipes


INGREDIENTS

  • 2 1/2 pounds russet potatoes, peeled
  • 1 cup all-purpose flour
  • 1 teaspoon garlic salt
  • 1 teaspoon onion salt
  • 1 teaspoon salt
  • 1 teaspoon paprika
  • 1/2 cup water, or as needed
  • 1 cup vegetable oil for frying

DIRECTIONS

  1. Slice potatoes into French fries, and place into cold water so they won't turn brown while you prepare the oil.
  2. Heat oil in a large skillet over medium-high heat. While the oil is heating, sift the flour, garlic salt, onion salt, (regular) salt, and paprika into a large bowl. Gradually stir in enough water so that the mixture can be drizzled from a spoon.
  3. Dip potato slices into the batter one at a time, and place in the hot oil so they are not touching at first. The fries must be placed into the skillet one at a time, or they will clump together. Fry until golden brown and crispy. Remove and drain on paper towels.

from l to r (plain fries w/ seasoning salt-aka i ran out of batter, crispy seasoned fries, sweet potato fries)

3.08.2009

Coconut Blueberry Banana Bread

I have to admit, the first time I saw this recipe, it didn't really catch my eye all that much. I'm thinking I was preoccupied at the moment because I found it while searching for Valentine's Day dinner/treat ideas. However, last Friday I was really craving something sweet (I've given up sweets for our church's fasting season during lent) and wanted to find something that I could make without "cheating". It was then that I came across this recipe once again, and this time I could not stop thinking about it! Unfortunately, I did not have time to whip up a batch before work and then Brad and I left for Michigan right when I got out. And then every house we visited there was a bunch of bananas sitting on the counters, slowly aging, begging to be made into bread. But I refrained. The day we were leaving, my mom called to let me know that she had left her bananas on her counter for us to take so we could make our bread. Rejoice! Well when I stopped by her apt, my cute little mother had left me a surprise on our bananas...

loved it! Anyway, the banana bread was pretty good and would have probably been better if I hadn't been stingy with the blueberries (my stash from last year's picking was running very very low), I ran out of coconut and had just under enough vanilla.

A couple notes before I start.
  1. I did not use walnuts because 1) we didn't have any and 2) Brad and I both prefer our breads without them.
  2. Also, I did not have any buttermilk on hand (I know, by now you're probably thinking why I even tried since I was running out of everything..but I'm telling you, it was tempting me that much). However, I don't really find it necessary to buy buttermilk all the time for baking since I most likely wouldn't use it all before it expired. Instead, I also make my own so to speak. For every one cup of milk, add 1 Tbsp of white vanilla and let stand for about 5 minutes. It has never let me down.
  3. Lastly, I did not have two small bread pans as Leslie suggested. So I had to use one large one. And sure enough, this lengthened the cooking time. Just be prepared for that. I don't remember how long it took all together, I just know I hit 5-10 mins longer quite a bit. Thankfully it didn't burn.
Either way, I would definitely consider this a repeat recipe for later on this summer when I have another fridge and freezer full of blueberries.

Coconut Blueberry Banana Bread (with toasted walnuts)
from The Hungry Housewife

Ingredients
  • 1/2 cup softened butter
  • 1 cup sugar
  • 2 cups all purpose flour
  • 1 tsp salt
  • 2 tsp baking powder
  • 1/2 tsp baking soda
  • 2 eggs
  • 4 large nasty looking ripe bananas. smooshed up real good
  • 1/3 cup buttermilk
  • 3/4 to 1 cup toasted walnuts
  • 1 Tbsp vanilla
  • 1 cup coconut
  • 1 cup blueberries + a handful for sprinkling on top
Directions
  1. Preheat oven to 350 and use middle rack
  2. Cream together butter and sugar with hand mixer or stand mixer. Add egg one at a time, mixing well in between each addition.
  3. In a separate bowl whisk together flour, salt, baking pwdr and baking soda.
  4. Slowly add the dry ingredients to the butter mixture, alternating with the buttermilk..(always start and end with the flour..why? I don't know, just cause that's what my mom told me to do!)
  5. Add bananas, vanilla, nuts and coconut and stir until combined. Fold in blueberries.
  6. Lightly grease TWO 8in x 3 3/4in x 2 1/2in pans( I use the Hefty EZ elegance pans)
  7. Pour the batter into both pans evenly. Sprinkle some blueberries on top for a garnish.
  8. Bake for 45-55 minutes or until toothpick comes out of the center with only slight crumbs on it.
  9. Try to let it cool before cutting into it..but I can never wait that long before digging in and slathering some butter on it!

Tips***
To toast the walnuts, just place in large skillet over medium heat and cook until fragrant and lightly browned, stirring occasionally. Usually around 5 to 8 minutes.
I use the two smaller pans because I found that if you make one large loaf the bottom tends to burn before the middle is done. And besides 2 loafs is better than one.