8.27.2009

Nutella Swirl Ring


Alright, I love Nutella...Nutella in my crepes, Nutella on Ritz, Nutella on pretzels, Nutella in my ice cream (i am forever greatful for icream for that)...it's all lovely. Well the other day I saw a small jar of a Nutella knock off at the Dollar Store. I figured, it's only a dollar and generic brands are most of the time just as good as the brand names so I bought it. The following day I sat down with some pretzels and opened the jar with mediocre hopes. Yeah, not so much. It was grainy and just not the same as the rich chocolately hazelnut spread that I love. I wasn't going to be wasteful and just through the jar away so I had to come up with a way to use it where you wouldn't be able to taste it's graininess.

I had actually come up with a couple different ideas (including making a stuffed nutella cookie-I figured mixing powdered sugar with the Nugati or whatever it was called would disguise some of it's original taste.) When looking up basic recipes I ended up finding this delicious looking chocolate stuffed peanut butter cookie and decided that I just had to use our Dark Chocolate Peanut Butter for the filling instead of the Nutella wannabe. So what was I to do with the Nutella knock off? I decided to use the new SuperCook website to look up recipes. By the way, this may be one of my new favorite recipe sites. You tell it what you have in your kitchen and it will search all the major recipe sites and tell you what you can make. You should go check it out :o) Anyway, I used the site, told it that I wanted to highlight nutella and it suggested this Nutella Swirl Ring.

As I read the directions, I thought that this would be perfect. I could melt some extra chocolate to make the Nugati a little creamier and it just looked like it would be good to eat. The recipe turned out to be really simple to make in my opinion. The only "problem" I ran into was that my dough didn't exactly "double in size" as the recipe suggests. When I noticed that, I made the oven into a proof box by heating it to 200 degrees, shutting it off right away and sticking my dough in there for a couple minutes. It worked perfectly.

So the Nutella ring? Good stuff. Definately something I will be making again and it was another hit at our small group. I love it when recipes work out!

Nutella Swirl Ring

I'm not sure who originated it, but it can be found here.

Ingredients :

  • 1/2 cup warm water
  • 1 package active dry yeast
  • 4 tablespoons granulated sugar, divided
  • 1/2 teaspoon salt, divided
  • 3 cups all-purpose flour, divided
  • 3/4 cup unsalted butter, softened
  • 1 cup NUTELLA®, warmed slightly
  • (see instructions)
  • 2 tablespoons water (for brushing)
  • non-stick cooking spray

To make NUTELLA® Swirl Ring:

  1. In a large bowl using an electric mixer, stir together 1/2 cup warm water, yeast, 2 tablespoons sugar and 1/4 teaspoon salt.
  2. Add 1 cup flour and the butter and mix on medium speed for 4 minutes.
  3. Add the remaining 2 cups flour and mix for an additional 2 minutes.
  4. Grease a large bowl with non-stick spray or butter and place the dough on it, turning it once. Cover with plastic wrap, and let stand for 1 hour in a warm place until double in volume.
  5. Preheat the oven to 375 degrees. Line a baking sheet with aluminum foil or parchment paper.
  6. When the dough has fully risen, punch it down, and transfer to a floured surface.
  7. Roll the dough out to a 12-by-16-inch rectangle and spread evenly with the warmed NUTELLA®, leaving a 1-inch band around the edge bare.
  8. Beginning at the long end, tightly roll up the dough like a newspaper, forming a 16-inch-long log. Brush the ends with a little water, and bring them together, pinching to form a ring.
  9. Transfer the ring to the prepared baking sheet. Using a sharp knife sprayed with non-stick cooking spray or oil, slice the ring into 12 individual buns – being sure not to cut all the way through so that the buns are still connected and allowing 1 inch between each slice.
  10. Gently separate them, so they rest against one another like dominos. Brush the ring with 2 tablespoons water and sprinkle with remaining 2 tablespoons sugar.
  11. Bake for 35 to 45 minutes until golden brown. Let cool slightly before serving.

To warm NUTELLA®:

In the microwave, heat on high in a microwaveable bowl for 5 seconds.
Or, for the stovetop, heat on low heat in a pot until mixture becomes creamy.

8.26.2009

Chocolate Peanut Butter goodness

So this week Brad and I had snack duty for our small group. For some people they may not think twice about this opportunity but for me, it gives me an excused to come up with something that I may not ordinarily make (since I am able to feed 8+ people instead of just 2). Anyway, I was trying to come up with something with some knock off Nutella that I bought (more about that later) and ended up coming up with the idea of stuffing a cookie somehow with this "Nutella". Perhaps even a chocolate cookie?

I started looking around the internet to see if I could come up with a basic stuffed cookie recipe and I came across this "Magic in the Middles" recipe from RecipeGirl. Now, to me, chocolate and peanut butter are always a winning combination but I had something even better in our pantry. I had Dark Chocolate Peanut Butter. That's right, chocolate flavored peanut butter. Needless to say, I decided to save my "Nutella" for something else and get to crackin' on making these cookies using my Dark Chocolate Peanut Butter because as much as I love that combination, this jar was just sitting on our shelves practically untouched.

Let me say, de-lish! Especially a couple minutes after coming out of the oven. They were soft with just the right balance of chocolate and peanut butter. I couldn't wait to take them to group. And guess what, they liked them! I know, I know. Big surprise ;o)

Alright, so do I have any side notes? The biggest thing I changed about this recipe was of course the type of peanut butter I used. Other than that, I pretty much stuck to what RecipeGirl had to say. Any other comments I can think of I'll post between some yellow parentheses as they come to me. Sound like a plan? Cool...Oh, and I apologize about the photos...My hands were sticky from the dough and I was in somewhat of a hurry.

Magic in the Middles
from RecipeGirl

DOUGH:
1½ cups (6¼ ounces) unbleached all-purpose flour
½ cup (1½ ounces) unsweetened cocoa powder
½ tsp baking soda
¼ tsp salt
½ cup (3½ ounces) granulated sugar (plus extra for dipping)
½ cup (4 ounces) brown sugar, packed
½ cup (4 ounces or 1 stick) unsalted butter
¼ cup (2 3/8 ounces) smooth peanut butter (I suggest you try Dark Chocolate Peanut Butter)
1 tsp vanilla extract
1 large egg

FILLING:
¾ cup (7 1/8 ounces) smooth peanut butter (again, Dark Chocolate Peanut Butter)
¾ cup (3 ounces) powdered sugar

1. Preheat oven to 375°F. Lightly grease (or line with parchment) two baking sheets.

2. Prepare dough: In a medium bowl, whisk together flour, cocoa, baking soda and salt. In another medium bowl, beat together sugars, butter, and peanut butter until light and fluffy. Add vanilla and egg, beating to combine, then stir in dry ingredients, blending well.

3. Prepare filling: In a small bowl, stir together peanut butter and powdered sugar until smooth. (I actually decided to do this with the Kitchen Aid because me trying to mix it together myself just wasn't cutting it. Not only was it fast but the sugar incorporated with the peanut butter much better) With floured hands, roll the filling into 26 one-inch balls (When making chocolate cake/cookies, mix a bit of cocoa powder into your flour so that it blends in well with your baked goods. You wouldn't want streaks of white to mess up your presentation would you?).

4. Shape cookies: Break off about 1 Tbsp. of the dough, make an indentation in the center with your finger (I just flattened it like a pancake almost), and press one of the peanut butter balls into the indentation. Bring the dough up and over the filling, pressing it closed; roll the cookie in the palms of your hand to smooth it out. Repeat with remaining dough and filling. (I did use my Tablespoon to measure the dough out and let me tell you, I had just enough dough for all 26 of my peanut butter balls. RecipeGirl was spot on!)

5. Dip the top of each cookie in granulated sugar and place on prepared baking sheets about 2 inches apart. Grease the bottom of a drinking glass and use it to flatten each cookie to about ½-inch-thick.

6. Bake cookies for 7 to 9 minutes, until they’re set (They will come out quite soft but they will set up once they are cooled. You want to be very careful when making chocolate cookies since it is harder to tell if they are burning or not). Remove them from the oven and cool on a rack.

Yield: About 26 cookies

8.25.2009

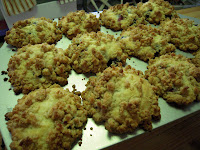
Blueberry Streusel Muffins

Have I told you lately that I love blueberries? ^_^ They are by far the best fruit that God created.

Brad and I went blueberry picking again for my birthday this year and unfortunately, I wasn't able to control myself as well this year and ate a good majority of them before we ended up freezing them. Whoops! ::looks innocently:: By the way, what is the best way to freeze blueberries? Well let me tell you. Place your fresh blueberries on a cookie sheet or shallow pan in a single layer. Set berries in the freezer until frozen (this will take an hour or so). Once frozen, pour into a freezer bag and viola! Individually frozen blueberries that are much easier to remove and use in a recipe. Love it!

Anyway, I had wanted to make some fresh blueberry muffins and I didn't want my precious fruit to go to waste on some bland recipe so I went straight to Cook's Illustrated/America's Test Kitchen. I have never been disappointed with any of the recipes that I have gotten from them and I had remembered seeing blueberry muffins being featured on the cover. However, of course I couldn't find my CI magazine. I did find a recipe on their website though but it called for jam, which I didn't want to do. So I did some more searching and what I found was a recipe from Cook's Country, another branch of America's Test Kitchen. I liked what I saw so I decided to give it a go.

Guess what? Another winner! I have to admit there were some muffins that had more berries than others, as well as some where the blueberries were more towards the bottom but I honestly think that was my mistake. Either way, I'm keeping this recipe around.


Blueberry Streusel Muffins
from Cook's Country

Makes 12

To prevent a streaky batter, leave the blueberries in the freezer until the last possible moment. Wyman's brand frozen wild blueberries are our first choice, but an equal amount of fresh blueberries may be substituted.


Streusel
1 1/4 cups all-purpose flour
1/3 cup packed dark brown sugar
1/3 cup granulated sugar
1/2 teaspoon ground cinnamon

Pinch salt
7 tablespoons unsalted butter , melted

Muffins
4 tablespoons unsalted butter , melted and cooled slightly, plus extra for preparing muffin tin
2 cups all-purpose flour , plus extra for preparing muffin tin
1 large egg
1 teaspoon vanilla extract
1 cup granulated sugar
1 teaspoon grated lemon zest
1/2 cup buttermilk
1 tablespoon baking powder
1/2 teaspoon salt
1 1/2 cups frozen blueberries

1. For the streusel: Combine flour, sugars, cinnamon, and salt in bowl. Drizzle with melted butter and toss with fork until evenly moistened and mixture forms large chunks with some pea-sized pieces throughout.

2. For the muffins: Adjust oven rack to middle position and heat oven to 375 degrees. Grease and flour 12-cup muffin tin. Whisk egg in medium bowl until pale and evenly combined, about 30 seconds. Add vanilla, sugar, and zest and whisk vigorously until thick, about 30 seconds. Slowly whisk in melted butter; add buttermilk and whisk until combined.

3. Reserve 1 tablespoon flour. Whisk remaining flour, baking powder, and salt in large bowl. Fold in egg mixture until nearly combined. Toss blueberries with reserved flour and fold into batter until just combined.

4. Divide batter in muffin tin and top with streusel. Bake until light golden brown and toothpick inserted into center of muffin comes out with few dry crumbs attached, 23 to 27 minutes. Cool muffins in tin for 20 minutes, then carefully transfer muffins to rack to cool completely. (Muffins can be stored in airtight container at room temperature for 3 days.)

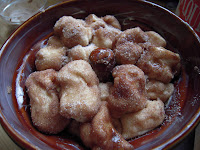
mmmm....Monkey Bread

Do you want to know just one of the great things about having the in-laws that I do? On the morning of a major holiday (i.e. Christmas, Thanksgiving...), my father-in-law gets up a little earlier and makes some deliciously sweet Monkey Bread. It's one of my new favorite holiday traditions.

For my birthday this year (back in July) Brad bought me a Monkey Bread Ceramic Mold from Williams Sonoma. I was quite excited, especially when I found a recipe on the reverse side of the cardboard sleeve. So when my in-laws came to visit a couple weeks ago, I thought it would be a perfect time to try out my new "toy".

So what do I have to say about the experience? Well I love making anything I can from scratch so that was great and not to mention that the final product turned out fabulous. However, as a word of warning, the whole process from pantry to plate is quite long...as in 4 hours or so. With that said, if you are planning on making this, read the whole recipe and budget your time well. If you don't want to devote that much time to the process (though I think the wait is worth it), you can do one of two things. 1. You could go to your local Williams Sonoma store and purchase the Monkey Bread mix or 2. You could buy refrigerated biscuit dough or perhaps a frozen bread dough (though I forget at the moment which one my in-laws suggested I try) and skip a few time consuming steps.

Also, one last comment: Perhaps I am just that bad at counting but the past couple of times that I have made this dough, it has turned out extremely wet. Like there is no way it would become bread dough unless I put almost a cup more of flour. Like I said, maybe I mess up my flour count somewhere down the line but I just add a little flour at a time until it resembles a soft bread dough and it has turned out great. Of course, soft bread dough means sticky hands so be sure to cover your hands with flour before handling lightly. Okay, maybe one more comment. Do you need a special monkey bread pan? No, any baking dish would probably do (my father-in-law uses a small ceramic casserole dish) but the Monkey Bread pan does allow for fewer doughy pieces. Either method you use, it turns out delicious.

Monkey Bread
by Williams Sonoma (slightly adapted by me)

2 Tbsp unsalted butter, softened

For the Dough:

3/4 c warm milk (about 110 degrees F)
1/2 c warm water (about 110 degrees F)
2 Tbsp unsalted butter, melted
1/4 c granulated sugar
1 egg, lightly beaten
1 package rapid-rise yeast
3 1/4 c all purpose flour, plus more for dusting
2 tsp salt.

For Sugar Coating

1 c firmly packed light brown sugar (or granulated sugar)
2 tsp ground cinnamon
8 Tbsp unsalted butter, melted

For the Glaze (which I think is optional) 4 Tbsp unsalted butter
1/2 c firmly packed light brown sugar
1/4 c maple syrup
1 tsp ground cinnamon
1 Tbsp water

  1. Have all the ingredients at room temperature. Butter the monkey bread baking mold with the softened butter. (I found this easier to do when using a pastry brush to spread the butter)
  2. To make the dough, in a bowl, whisk together the milk, water, melted butter, granulated sugar, egg, and yeast.
  3. In the bowl of an electric mixer fitted with the dough hook, combine the flour and salt and beat on low speed just until combined. Slowly add the milk mixture and beat until the dough comes together, 1 to 2 minutes. Increase the speed to medium and beat until the dough is shiny and smooth, 5 to 6 minutes.
  4. Turn the dough out onto a lightly floured surface and knead until smooth, about 1 minutes. Form the dough into a ball. Coat the inside of a large bowl with nonstick cooking spray, place the dough in the bowl and coat the surface of the dough with cooking spray. Cover the bowl with plastic wrap and let stand in a warm place until doubled in bulk, about 1 hour.
  5. Meanwhile, prepare the sugar coating: In a bowl, stir together the sugar and cinnamon. Put the melted butter in another bowl. Set aside.
  6. Turn the dough out onto a floured surface and shape into an 8 inch square. (Using a pizza cutter) Cut the dough into 6 equal strips, then cut each piece crosswise into 8 pieces to form a total of 48 pieces. Roll each piece into a ball, dip into the melted butter and roll in the sugar-cinnamon mixture, coasting well. Stack the balls in the prepared pan. Cover with plastic wrap and let rise in a warm place for 30 to 45 minutes. Do not let the dough rise over the top of the pan.
  7. Position a rack in the lower third of an oven. Place a piece of aluminum foil on the rack to catch any drips during baking. Preheat oven to 350 degrees F.
  8. Remove the plastic wrap from the pan, set the pan on the foil and bake, uncovered, for 20 minutes. Cover the pan loosely with aluminum foil and continue baking until the top is golden brown and the center edge of the bread, next to the tube, springs back when touched, 25 to 35 minutes more.
  9. Meanwhile, make the glaze: In a saucepan over medium heat, combine the butter, brown sugar, maple syrup, cinnamon and water. Heat, whisking, until the ingredients are dissolved. Bring to a boil and boil for 1 minutes. Remove the pan from the heat and cover to keep warm.
  10. Transfer the bread pan to a wire rack and let cool for 5 minutes. Turn the bread out onto a plate and let cool for 10 minutes. Using a spoon, drizzle the warm glaze over the top and sides of the bread. let the glaze set for about 10 minutes. Serve the bread warm.

8.24.2009

Ice Cream Cake- Happy Birthday Abuelita!


About 5 years ago, my mother bought me a Coldstone Ice Cream cake that was absolutely fabulous. I remember that it had the most amazing ganache frosting and the whole thing just melted in your mouth. De-licious. They are a bit on the expensive side (at least for my family) and therefore we have only really gotten one other Coldstone Cake since then.

This past July was my grandma's "38th" birthday (read 83...and yes, I'm posting this late) and I wanted to do something special for her since we don't get to see her as often as I would like. So instead of doing an everyday cake out of a box, I decided I wanted to kick it up a notch and create an ice cream cake with the same rich ganache frosting that I had fallen in love with before. It wasn't long until I started brainstorming different ways I could bake, freeze, assemble, etc and with a little help from my in-laws I decided to use a 10" spring form pan. This way I could easily take the cake in and out of the pan plus it would allow me to have a thinner cake thus giving me room for the layer of ice cream and not having to dirty another pan.

So how did it turn out? Everyone loved it! I normally don't like to "toot my own horn" per se but I was quite impressed that it turned out as well as it did. I had decided upon a white cake with strawberry ice cream (my abuelita's favorite)


A few notes about Ganache from The Professional Chef:
Ganache should be intensely flavored, with the chocolate flavor enriched and smoothed by the addition of cream. The texture should be completely smooth and dense. The more chocolate in the ganache, the thicker the texture will be...It should not be so thin as to run off the cake completely.

So here's what I did:

Ice Cream Cake

Ingredients
  • 1 box cake mix (your choice of flavor) plus ingredients
  • 1 qt ice cream, softened (your choice of flavor)
  • 1 can frosting
  • 1 lb high quality chocolate (for ganache icing)
  • 8 fl oz heavy cream (for ganache icing)
Directions:
  1. Prepare cake as directed on box in a spring form pan lined with parchment paper (if available, otherwise oil and flour generously). Bake until toothpick comes out clean in the center. Cool on a wire rack.
  2. Remove cake from pan and carefully cut in half so you have two thin layers.
  3. Gently place one layer of cake back in pan.
  4. Spread softened ice cream over cake. Place the second layer of cake on top. Wrap the pan in plastic and place in freezer
  5. Once ice cream is firm, prepare ganache icing.
  6. While icing cools slightly, remove cake from pan, keeping the cake on the pan bottom or transfer to a cardboard round and place on wire rack. Frost cake with canned frosting to create a "crumb coat".
To Make Ganache:
  1. Place chocolate in a heat proof bowl.
  2. Bring the cream just to a simmer. Pour the hot cream over the chocolate, allow it to stand for 1 minute, and stir until the chocolate is thoroughly melted.
  3. Allow ganache to cool so it doesn't melt the crumb coat or ice cream. Pour ganache icing over cake, quickly smoothing out any roughness before it sets. Once cake is covered, place back into freezer on plate/platter/etc until set.
  4. Decorate as desired.
  5. A couple minutes before serving, pull out of the freezer to allow the cake to be cut easier

8.09.2009

homemade hamburger buns


I was starting to think that it wasn't possible. I mean, homemade hamburger buns that have similar taste but most of all texture of store bought buns? and without a bread maker? I had tried various recipes before but then decided I would try it one more time for a barbecue that we were having with some friends. We didn't have time to stop at Aldi and I wasn't ready to spend extra money on buns from a higher end grocery store. So the night before I searched blogs and recipe sites and finally decided on two recipes. Thankfully we were going to have enough friends over to warrant making two different batches. And let me tell you, I was very much impressed as were our guests. However, in all of our "excitement" of just hanging out and having fun I didn't get too many pictures in. Nor did I do a thorough taste test. So one of these days I will have to do it "right". In the mean time, feel free to try it for yourself.

Please note that both recipes make a soft dough which means that they can be and are sticky. Try to refrain yourself from adding too much flour else it will become heavy and not as airy. When it comes time to form the buns, I just cover my hands in flour and work quickly with "light" hands.


King Arthur's Flour Hamburger Buns
adapted by Rosa @ Rosa's Yummy Yums
(note from Jessica: For those of you who do not know what Castor Sugar is, it is a more refined type of sugar with smaller crystals thus making it easier/faster to disolve in liquids. I, of course, do not always like to buy too many specialized ingredients as it costs extra money. Let me assure you though that regular granulated sugar will work just fine. I also used dry active yeast rather than instant and the final product was still pretty much amazing)

Ingredients:
  • 1 Cup (240g/ml - 250g/ml) Water, lukewarm
  • 2 Tbs (30g) Unsalted butter, at room temperature and creamed
  • 1 Egg (~63g)
  • 3 1/4 Cups (433g) Plain white flour
  • 1/4 Cup (53g) Castor sugar
  • 1 Tsp Salt
  • 1 Tbs Instant yeast
Egg wash for buns
  • 1 Egg yolk (+ 1 Tsp water)
  • Sesame seeds

Method:
1. Sprinkle the yeast into the water and leave for 5 to 10 minutes, until frothy. Stir to dissolve.

2. In a big bowl, combine all the ingredients and mix well.

3. Turn the dough out on to a lightly floured working surface and knead for about 10 minutes until you've made a soft, smooth dough.

4. Place the dough in a clean and lightly greased bowl.

5. Cover it with a towel and let rise for about 1 (or1-1/2) hour, until doubled in size.

6. Divide the dough into 8 pieces and shape each piece into a flattened ball.
7. Place the buns on greased baking sheets, cover with a towel and let rise 30 to 40 minutes, until they're quite puffy and doubled in size.

8. Preheat the oven to 190°C (375°F).

9, Glaze the buns with the egg yolk and water mixture, then sprinkle with sesame seeds.

10. Bake the buns for 12 to 15 minutes, until they are golden brown.

11. Remove them from the oven and cool them on a wire rack.


40 Minute Hamburger Buns

from Taste of Home
(note from Jessica: To give it that nice shiny glaze on top, I covered these with an egg wash made of one egg and a splash of milk. Feel free to do the same)

Ingredients:

  • 2 tablespoons active dry yeast
  • 1 cup plus 2 tablespoons warm water (110° to 115°)
  • 1/3 cup vegetable oil
  • 1/4 cup sugar
  • 1 egg
  • 1 teaspoon salt
  • 3 to 3-1/2 cups all-purpose flour

Directions:

  • In a large bowl, dissolve yeast in warm water. Add oil and sugar; let stand for 5 minutes.
  • Add the egg, salt and enough flour to form a soft dough.
  • Turn onto a floured surface; knead until smooth and elastic, about 3-5 minutes. Do not let rise. Divide into 12 pieces; shape each into a ball. Place 3 in. apart on greased baking sheets.
  • Cover and let rest for 10 minutes.
  • Bake at 425° for 8-12 minutes or until golden brown.
  • Remove from pans to wire racks to cool. Yield: 1 dozen.