12.03.2009

Candied Sweet Potato Casserole with Toasted Marshmallow Topping

Ah, yes...I just love this time of year: family, friends, food, love, cozy blankets and fireplaces, and a large cup of hot chocolate with marshmallows. And it all starts with Thanksgiving.
This year we spent the holiday with Brad's family. We started the day bright and early with warm, goey monkey bread and the Chicago Holiday Parade on T.V. (Hi Scarlett!) And then, it was time to cook. My father in law did the majority of the cooking because, well..., he's just that good. :o)
I was lucky enough to be put in charge of the sweet potatoes and rolls. Brad absolutely loves sweet potatoes and I had made this recipe last year at my Mima's house and it appeared to go over very well. Why do I say "appeared"? Well that's because I don't particularly like sweet potatoes so I really do have to go off of what everyone says. So yes, if they said they loved it, I have to take them for their word.
Anyway, this year I had the same problem as last. While cooking the sweet potatoes on the stove top, some of the potato chunks cooked a lot faster than others. I think it's quite possible that I just didn't stire the pot often enough causing the ones of the bottom to cook much faster than the others. Or maybe it's just because I don't cut as even of chunks as I think I do ;o) Either way, I ended up "fishing out" pieces that were already done and placed them in the casserole dish while waiting for the rest to finish up. Other than that, this recipe really has nothing to it and creates a yummy dish.

Candied Sweet Potato Casserole with Toasted Marshmallow Topping
from America's Test Kitchen Family Cookbook

Serves: 10-12
Prep Time: 15 min
Total Time: 1 hour 40 minutes

  • 8 Tbsp unsalted butter, cut into 1 inch chunks
  • 5 lbs sweet potatoes (7 medium), peeled and cut into 1 inch chunks
  • 1 cup packed light brown sugar
  • 1/2 cup water
  • 1 1/2 tsp salt
  • 1/2 tsp pepper
  • 4 cups mini marshmallows

  1. Melt the butter in a large Dutch oven over medium-high heat. Add the sweet potatoes, brown sugar, water, salt, and pepper. Bring to a simmer, then cover and reduce the heat to medium-low. Cook, stirring often, until the sweet potatoes are tender (a paring knife can be slipped into and out of the center with very little resistance), 45-60 minutes.
  1. When the sweet potatoes are tender, remove the lid and bring the sauce to a rapid simmer over medium0high heat. Continue to simmer until the brown sugar mixture had reduced to a glaze, about 8 minutes.
  2. Adjust an oven rack to the middle position and heat the oven to 450 degrees. Pour the potato mixture into a 9x13 inch baking dish. Spread the marshmallows over the potatoes. Bake until the marshmallows are crisp and golden, about 5 minutes.

11.17.2009

Volleyball Tournaments and a Birthday.


My sister-in-law, Catie, attends Hope where she is on the volleyball team. This past weekend we were lucky enough to be able to travel up to MI with my in-laws to watch her team compete and eventually win the NCAA Division III Regional Championship! So now they are off to Ohio as one of the Elite 8 in hopes of becoming the next National Champions. Unfortunately, Brad and I won't be able to make it down there however we are planning on watching online. Let's Go Hope!

During the tournament, it was also Catie's birthday and I wanted to make her a birthday cake. I'm not sure where exactly I got the idea, but somewhere down the line I decided that I wanted to make her a Volleyball birthday cake since volleyball has been such a big part of her life, especially the last couple of years. I then discovered that Wilton makes a sports ball pan set and immediately set out to buy it. On Thursday, the day before her birthday, I baked two boxes of cake; one for the ball, and one for the rectangular base. Brad and I then debated whether to leave late that night when I got out of work for Michigan and finish the cake on Fri or wait until Fri morning to leave for MI and finish the cake here in Chicago Thurs night/Fri morning. We finally decided to leave Thursday night so that we didn't have to worry about me not finishing the cake in time before our 3 hour drive or risk us being late to her games.

Let me tell you, I am sooo happy that we decided to leave Thursday night because let me tell you, it took for-ev-er. I got up Fri morning around 8:30 to begin working and did so until around 3:00 I think. Yeah, crazy long, I know. The main culprit was that I kept running out of icing so I had to stop and make more and then at one point even had to leave to go to Meijer's to buy more butter. I also took a quick lunch break because by 1pm, I hadn't eaten anything that day but frosting and pieces of cake :op


Anyway, it didn't turn out exactly the way I had wanted (the ball ended up looking a bit bumpy rather than smooth- but hey, it's my first cake) however I still had a lot of fun making it and we all had fun eating as well (funfetti cake, homemade butter cream frosting, strawberry butter cream filling...I don't mean to toot my own horn but doesn't that just sound delicious?). But the best part?
Is that Catie LOVED it.


*cake pictures courtesy of my father-in-law

11.05.2009

"Chivalry isn't dead yet"

So, did you hear about the time that Brad and I met Alton Brown? No? Well let me tell you ;o)

A couple weeks ago I got my weekly Border's e-mail and it said "Meet Alton Brown! Details Inside!" And sure enough, Mr. Brown was going to be at the Border's bookstore on Michigan Ave. signing autographs of his new book Good Eats: The Early Years (the first in a trilogy). I looked at my calendar and saw that I wasn't working (Yay!) though Brad and I had already scheduled our weekly get together with one of our good friends. So I called Jacob and asked if we could take a rain check because let's face it, meeting Alton Brown or any Food Network star is pretty much a once in a lifetime experience. Well needless to say, Jacob understood and now we were just counting down the days until we could meet the man that creates Good Eats. Okay, so maybe it was more like just me counting down ;o)

Anyway, Alton was supposed to give a little speech at 7pm and then start signing autographs shortly after. I thought, let's leave as soon as Brad gets home and we'll get there a little over an hour before it starts. So we get there, buy a couple books for him to sign and then head up to the third floor to get our "good seats". Hah, yeah, that's funny Jessica. You think you can get there an hour in advance and get good seats? Try right when Borders opened up that morning. Yes, you heard me right. By the time we got there, we were in the third group, with each group holding 100 people...and we couldn't see anything but a sea of eager foodies.


We were okay though. It was the experience of it all, plus we were guaranteed to at least see him when he autographed our book even if we couldn't hear him talk. So we waited...and waited....hey look! There he is walking up to the front! (It was more like his back and a bunch of Borders Employees and bodyguard)...and waited...and waited...oo! lines moving! oh, more waiting....Alright, we are finally up in the front portion. We can see him! More waiting...Oh, Um, Hi!

Suddenly there he was, Mr. Alton Brown him self right in front of me, pushing his way through the crowd, past me, and right to a little girl who was behind me in our zigzaging line. You see, he had caught wind that there were little kids waiting in line to see him, and it was already 10pm.
"Are your parental units here?"
Girl stares at him...she has no idea what "parental units" are
"We're right here!"
"Do you have a book for me to sign? It's late and there is no reason for you to be up past your bedtime"
And just like that, Alton signed her book, took some photos, then proceeded through the rest of the crowd signing all of the other people who had elementary children with them so the kids could go to bed "where they belong" at such a late hour".

After a while, he made his way back up to the front and eventually we had made our way to be next in line. And then it hit me. After all of that time waiting, Brad and I hadn't even thought of what we were going to say when we got to him. Brad then asks me, "Do you think he's going to introduce himself?" I say no, that it would be kind of funny since we all know who he is. Hey, it's our turn.

"Hi! I'm Alton"
"Hi, I'm Jessica" (shoot, I lost)
"Hi! I'm Alton"
"I'm Brad"

He began signing our books and I asked him if he was tired ("I'm built for endurance") and how jealous we were that he got to go to Seattle next ("Yeah, but it's not like I really get to see the city"). I also told him that he looked great- He has trimmed down a lot since his Feasting on Asphalt Show ("Thank you...*pause*...Thank you very much") I think I said a couple more really silly things but they escape me at this moment. Anyway, then it was time for our picture and I went to pick up our books for Brad and I too leave. "No, no, let him carry them...Chivalry isn't dead yet"
So that was our experience, though short, with AB...He's a great guy who knows how to make great food. If you get the chance, I would recommend picking up his Good Eats: The Early Years book if not for the recipes at least to read the interview he performed on his self. Funny Stuff.

10.28.2009

Hawaiian Chicken Skewers


One day this past summer Brad had a hankerin' for some kabobs. I had wanted to do something different than the chicken sate that I normally revert to and so I hit the internet. Not too far into my search I came across Stacie's recipe for Hawaiian Chicken Kabobs over at Kat's Kitchen. She herself had found it from another blogger who in turn recalls possibly finding it over at all recipes. Gotta make sure you give credit where credit is due right?

Anyway, I went to work putting the marinade together while our skewers were soaking in some water (which helps prevent them from scorching when on the grill). It was all very easy and in the end very tasty. As far as the recipe goes, we didn't have Sherry on hand so I believed I substituted some chicken broth...or perhaps we had some leftovers of another white wine from when we had company. I don't remember but either substitute will do :o) Also, I know that many people will put their meats and veggies on the same skewer however it isn't the suggested/proper way to cook kabobs. By keeping the meats and veggies separate you cut down the chances of cross contamination as well as solves the whole issue of different cooking times between the two. I know it goes against everything that we were taught/shown but hey, how can you argue with Alton Brown, America's Test Kitchen, and other top chefs? And now, to the main event...


Hawaiian Chicken Kabobs
slightly adapted by me :o)

  • 4 boneless, skinless chicken breasts, cut into chunks
  • 3 Tbsp soy sauce
  • 3 Tbsp brown sugar
  • 2 Tbsp cooking sherry (or any white wine/chicken stock)
  • 1 Tbsp olive oil
  • 1/4 tsp ground ginger (I actually omitted this and did not miss it)
  • 1/2 tsp garlic powder
  • salt and pepper to taste
  • 1 can chunked pineapple, plus 2 Tbsp reserved juice
  • your favorite veggies, cut into chunks
  1. In a small bowl combine soy sauce, brown sugar, sherry, olive oil, garlic powder, salt, pepper and pineapple juice. Whisk to incorporate. Pour into a large Ziploc bag or leave in a container and add chicken chunks. Make sure chicken is coated completely. Cover and marinate for at least two hours.
  2. At least 30 mins prior to grilling, begin soaking wooden skewers in water to prevent burning.
  3. Preheat grill to medium heat. Thread chicken onto soaked skewers. Next, alternate pineapple and vegetables onto different skewers .
  4. Grill for 10 to 15 minutes or until chicken is done, turning occasionally

10.19.2009

Hello, Cupcake!


Take a look at this little guy

And all of his friends

Can you tell what this cupcake, oreo, banana runt, and chocolate covered pineapple is?

9.25.2009

Apple Butter, My first attempt

Ah, fall...colored leaves, crisp air, and beautifully juicy apples. A long time ago, there was an apple orchard near my house in the Kalamazoo area called Hillcrest Orchards. And somehow it became a beloved tradition for my Abuelito and Abuelita to take me apple picking. I wish I knew where my chord to my scanner was so that I could post of a picture of a two year old me with my Abuelito, standing next to our basket of apples and me attempting to take a huge bite of an apple, completely oblivious of the camera in front of me..or perhaps just too distracted by the apple. Anyhow, through the years we spent a lot of time there not only picking but buying cider, eating fresh apple cinnamon donuts, and just enjoying the fall weather.

Over the years we continued to visit the orchard with my dad, aunt, and cousins picking apples to our hearts content so that we could make apple pie. It was during one of our last visits, as we were checking out, when we got asked "Would you like to use your employee discount?" My dad and my abuelita looked at the cashier for a minute, confused..and then it clicked...she looked at us, a whole bunch of mexicans wearing our "work" clothes, jammed together in a car...why of course we were migrant workers! My dad graciously declined the "offer"...Unfortunately, we only made it back to Hillcrest a time or two before it was bought out and then closed. But nonetheless I still have many found memories.

Wow, I just rambled on for quite a while didn't I? Anywho, some of our friends from our small group asked Brad and I if we wanted to go apple picking with them and of course I jumped at the chance! However, when we got there is started raining which put a little damper on our escapade (haha...hey look, I made an unintentional pun!) but we still left with about 15lbs of apples, some apple cider, homemade honey, and fresh donuts. We almost left with a jar of apple butter, which Brad thoroughly enjoys but we had already spent more than what we had wanted to. Anyway, Erin then came to our rescue and told me that I could make the apple butter with our newly acquired apples and that it was super easy. So of course, I had to try.

I looked through quite a bit of recipes online and finally came across this recipe on recipezaar since it seemed less involved plus did not require you to send the pulp repeatedly through a "juicer". I didn't change anything in this recipe except that I didn't have any nutmeg, cloves or allspice so I decided to add in some of our cider to hopefully add some of that flavor to the butter. Oh and guess what I learned, there is no butter in apple butter...all these years I had shied away from the stuff thinking that there was some form of butter in it.

Okay, enough babblin'...here's the recipe for your enjoyment. And yes, it passed Brad's taste test :o)


Crock Pot Apple Butter

by Pam-I-Am

Ingredients

Directions

  1. Place apples in slow cooker in thirds, layering sugar between each layer.
  2. Add rest of ingredients on top and pack them down as well as you can.
  3. Cover and cook on high for 1 hour.
  4. Reduce heat to low. Open and give it a stir. Keep covered and cook 8 hours or until thick and dark brown, stirring occasionally. (You can do this overnight and can in the morning).Uncover and cook for the last hour on low.
  5. If a smoother apple butter is desired, you may puree in blender or food mill.
  6. Place in sterile jars with lids and can accordingly

9.16.2009

Pigs in a Blanket

Uh oh. There are hot dogs in the fridge that have a "use by" date that is 8 days away...There are 6 hot dogs left...Man, I don't want to eat only hot dogs for the next couple of days. Sheesh..alright, let's think. Can you freeze hot dogs? Maybe...I think we used to do that at Gull Lake. Yikes, that freezer is full. They will certainly get lost in there. Okay new plan, think, think, think, think...hot dogs in macaroni and cheese? yeah, but Brad just ate that a couple days ago at a friends house...and that would be a quite a bit of macaroni for 6 hot dogs..and then we would be eating that for the next two or three days. Oh well, I'll think of something.
.
.
.
.
Shoot! That "use by" deadline is drawing closer and I still have nothing. Hot dogs...hot dogs in macaroni and cheese...hot dogs and....hey! pigs in a blanket! Perfect! Except that we don't have any crescents rolls....hmmm....maybe I can find one.....

Duh Duh Dah! Recipezaar to the rescue!

Alright, so I copied the recipe straight from the site below...sarcastic comments from the author and all. So please, don't credit me for the parentheses this time ;o). As for me though (and Brad), we thought this turned out quite well. I don't have a pastry cutter so the butter didn't crumble as well as it probably should have, but thankfully my tortilla making skills came in handy as far as blending the two together. Also, I didn't add cheese to the dough because as well all know, I'm not a big fan unless it is on pizza. To make up for it though, I added cheese to the tops of some of them for Brad. And as always, no buttermilk in the house so I used my milk and vinegar substitute. Oh, and did I mention I didn't remember how to roll the hot dogs up properly? Yeah..so they were uniform but eh, it worked.

Pigs in a Blanket (From Scratch)
from MommyMakes

Ingredients

Directions

  1. Heat the over to 400ºF. Grease a large baking sheet.
  2. Sift the dry ingredients (flour through salt) into a mixing bowl (or dump them in one at a time, whatever).
  3. Rub the butter pieces into the dry ingredients until mixture is crumbly. Stir in cheese until evenly distributed.
  4. Make a well in the dry ingredients and add the buttermilk. Stir well with a wooden spoon. Let the dough sit for 3 minutes.
  5. Sprinkle the dough with flour and stir once or twice then turn out onto a well floured counter.
  6. With floured hands, pat the dough into a 15 by 7 inch rectangle, trimming the sides if necessary to get a true rectangle. (Handle the dough as little as possible for tenderness, yeah right).
  7. Using a pizza cutter, slice the rectangle into thirds horizontally then slice each third into thirds vertically, this will give you 9 small rectangles. Slice each rectangle diagonally into two thin triangles.
  8. One at a time, roll up the sausages in the triangles. Place pointy side down on greased cookie sheet.
  9. Bake for 12 to 13 minutes, until golden brown. Cool on the sheet for 3 minutes then tranfer to a wire rack.

Barbecue Country Style Ribs

Brad absolutely LOVES ribs but we have never bought them because 1) we didn't have a grill and 2) they are a little out of our price range. Well, as I have mentioned before, we are now proud owners of a Weber Smokey Joe thanks to my in-laws and just this past week Dominick's had country style ribs on sale for $.99/lb!
True, they are baby back or spare ribs but they were "ribs" nonetheless...and more importantly, they tasted good. The package and Kraft suggested to boil the ribs first, and then finish them off in the grill while America's Test Kitchen said to skip the grill all together (because they aren't on a rack) and cook them in a slow cooker but I decided to take a different route and just slowly cook them on the grill over indirect heat, after all, Better Homes and Garden said I could ;o)

Since I didn't really measure anything, I wouldn't call the following a "recipe". Just a list of ingredients and directions that I used for future reference or for anyone else who is interested so forgive me for the lack of specificity (that's a word right?). Can you guess what's inside?

Barbecue Country Style Ribs

Ingredients


For the Dry Rub:
  • Brown Sugar
  • Chili Powder
  • Paprika
  • Black Pepper
  • Kosher Salt
  • Onion Powder
  • Garlic Powder
Country Style Ribs (obviously :oP )
BBQ sauce

Directions
  1. Prepare dry rub using brown sugar and other spices. Apply to ribs and let marinate for about an hour.
  2. Start grill as normal. Once coals are ready, prepare grill for indirect heat by moving coals to the sides of the grill. Place a drip pan in the cleared out portion.
  3. Place ribs on rack above drip pan. Allow meat to cook for 1 hr, turning once half way through. (Resist the urge to lift up the lid! It allows the heat to escape and thus slows cooking) Add additional coals half way through as needed.
  4. After meat has cooked for an hour, brush bbq sauce on meat and let cook for an additional 30 minutes or until done, turning once.
  5. Remove ribs from grill, and brush additional bbq sauce as desired.

9.05.2009

Hey Look!

Guess what I did the other day....

::snickers to herself::

making these was so much fun! The frosting I made from scratch using fresh strawberries...However, I was in a hurry so I didn't blend it as well as I probably should have nor did I follow the directions either..so at some point I'll try the frosting again before posting.

:o)

9.01.2009

Strawberry Muffins


Summer is in fact one of my favorite seasons...and autumn...and winter...I know, I know, there are only four. But nonetheless, Summer is great because it's full of birthdays (including my own), free events, warm weather, and of course fresh fruit. Blueberries, as you may know, are my favorite but strawberries are pretty great too.

The other day at Aldi, strawberries were on sale for 99 cents and they actually looked decent so I picked up a few packages. We ate some and made strawberry lemonade and I made homemade strawberry frosting. This morning as I was looking in the fridge, I noticed I had just about a cup of strawberries left so I decided to whip up some strawberry muffins. I have made this recipe a couple of times now and I am pretty satisfied with it.

I found this recipe over at all recipes but it looks very similar to some other posts that I found online so I'm not really sure who is the originator of this recipe. I'll just link to the AllRecipes site though just because it is pretty easy to read plus you can see what other people are saying about it and how they tweaked it to fit to their own tastes. The version I am going to post is based off of the original recipe plus some of the suggestions of reviewers as well as my own additions. Feel free to go back and look at the first recipe and perhaps make your own adaptations.

Strawberry Muffins

Original Recipe by Katie Mae, Adaptations made by other reviewers and myself

INGREDIENTS

  • 1/4 cup canola oil
  • 1/2 cup milk
  • 1 egg
  • 1 teaspoon vanilla
  • 2 Tablespoons strawberry jam
  • 1/2 teaspoon salt
  • 1/2 teaspoon cinnamon
  • 2 teaspoons baking powder
  • 1/2 cup white sugar
  • 1/4 cup brown sugar
  • 1 3/4 cups all-purpose flour
  • 1 cup chopped strawberries

DIRECTIONS

  1. Preheat oven to 375 degrees F and line muffin tin with paper liners.
  2. Sprinkle strawberries with a portion of the sugar and let sit. In a small bowl, combine oil, milk, egg, and vanilla. Beat lightly.
  3. In a large bowl, mix salt, cinnamon, baking powder, sugars, and flour.
  4. Gradually add milk mixture into dry ingredients. Once combined, add strawberry jam and chopped strawberries.
  5. Fill muffin cups with batter. Sprinkle muffin tops with sugar. Bake for 25 minutes, or until the tops bounce back from the touch. Cool 10 minutes and remove from pans.

8.27.2009

Nutella Swirl Ring


Alright, I love Nutella...Nutella in my crepes, Nutella on Ritz, Nutella on pretzels, Nutella in my ice cream (i am forever greatful for icream for that)...it's all lovely. Well the other day I saw a small jar of a Nutella knock off at the Dollar Store. I figured, it's only a dollar and generic brands are most of the time just as good as the brand names so I bought it. The following day I sat down with some pretzels and opened the jar with mediocre hopes. Yeah, not so much. It was grainy and just not the same as the rich chocolately hazelnut spread that I love. I wasn't going to be wasteful and just through the jar away so I had to come up with a way to use it where you wouldn't be able to taste it's graininess.

I had actually come up with a couple different ideas (including making a stuffed nutella cookie-I figured mixing powdered sugar with the Nugati or whatever it was called would disguise some of it's original taste.) When looking up basic recipes I ended up finding this delicious looking chocolate stuffed peanut butter cookie and decided that I just had to use our Dark Chocolate Peanut Butter for the filling instead of the Nutella wannabe. So what was I to do with the Nutella knock off? I decided to use the new SuperCook website to look up recipes. By the way, this may be one of my new favorite recipe sites. You tell it what you have in your kitchen and it will search all the major recipe sites and tell you what you can make. You should go check it out :o) Anyway, I used the site, told it that I wanted to highlight nutella and it suggested this Nutella Swirl Ring.

As I read the directions, I thought that this would be perfect. I could melt some extra chocolate to make the Nugati a little creamier and it just looked like it would be good to eat. The recipe turned out to be really simple to make in my opinion. The only "problem" I ran into was that my dough didn't exactly "double in size" as the recipe suggests. When I noticed that, I made the oven into a proof box by heating it to 200 degrees, shutting it off right away and sticking my dough in there for a couple minutes. It worked perfectly.

So the Nutella ring? Good stuff. Definately something I will be making again and it was another hit at our small group. I love it when recipes work out!

Nutella Swirl Ring

I'm not sure who originated it, but it can be found here.

Ingredients :

  • 1/2 cup warm water
  • 1 package active dry yeast
  • 4 tablespoons granulated sugar, divided
  • 1/2 teaspoon salt, divided
  • 3 cups all-purpose flour, divided
  • 3/4 cup unsalted butter, softened
  • 1 cup NUTELLA®, warmed slightly
  • (see instructions)
  • 2 tablespoons water (for brushing)
  • non-stick cooking spray

To make NUTELLA® Swirl Ring:

  1. In a large bowl using an electric mixer, stir together 1/2 cup warm water, yeast, 2 tablespoons sugar and 1/4 teaspoon salt.
  2. Add 1 cup flour and the butter and mix on medium speed for 4 minutes.
  3. Add the remaining 2 cups flour and mix for an additional 2 minutes.
  4. Grease a large bowl with non-stick spray or butter and place the dough on it, turning it once. Cover with plastic wrap, and let stand for 1 hour in a warm place until double in volume.
  5. Preheat the oven to 375 degrees. Line a baking sheet with aluminum foil or parchment paper.
  6. When the dough has fully risen, punch it down, and transfer to a floured surface.
  7. Roll the dough out to a 12-by-16-inch rectangle and spread evenly with the warmed NUTELLA®, leaving a 1-inch band around the edge bare.
  8. Beginning at the long end, tightly roll up the dough like a newspaper, forming a 16-inch-long log. Brush the ends with a little water, and bring them together, pinching to form a ring.
  9. Transfer the ring to the prepared baking sheet. Using a sharp knife sprayed with non-stick cooking spray or oil, slice the ring into 12 individual buns – being sure not to cut all the way through so that the buns are still connected and allowing 1 inch between each slice.
  10. Gently separate them, so they rest against one another like dominos. Brush the ring with 2 tablespoons water and sprinkle with remaining 2 tablespoons sugar.
  11. Bake for 35 to 45 minutes until golden brown. Let cool slightly before serving.

To warm NUTELLA®:

In the microwave, heat on high in a microwaveable bowl for 5 seconds.
Or, for the stovetop, heat on low heat in a pot until mixture becomes creamy.

8.26.2009

Chocolate Peanut Butter goodness

So this week Brad and I had snack duty for our small group. For some people they may not think twice about this opportunity but for me, it gives me an excused to come up with something that I may not ordinarily make (since I am able to feed 8+ people instead of just 2). Anyway, I was trying to come up with something with some knock off Nutella that I bought (more about that later) and ended up coming up with the idea of stuffing a cookie somehow with this "Nutella". Perhaps even a chocolate cookie?

I started looking around the internet to see if I could come up with a basic stuffed cookie recipe and I came across this "Magic in the Middles" recipe from RecipeGirl. Now, to me, chocolate and peanut butter are always a winning combination but I had something even better in our pantry. I had Dark Chocolate Peanut Butter. That's right, chocolate flavored peanut butter. Needless to say, I decided to save my "Nutella" for something else and get to crackin' on making these cookies using my Dark Chocolate Peanut Butter because as much as I love that combination, this jar was just sitting on our shelves practically untouched.

Let me say, de-lish! Especially a couple minutes after coming out of the oven. They were soft with just the right balance of chocolate and peanut butter. I couldn't wait to take them to group. And guess what, they liked them! I know, I know. Big surprise ;o)

Alright, so do I have any side notes? The biggest thing I changed about this recipe was of course the type of peanut butter I used. Other than that, I pretty much stuck to what RecipeGirl had to say. Any other comments I can think of I'll post between some yellow parentheses as they come to me. Sound like a plan? Cool...Oh, and I apologize about the photos...My hands were sticky from the dough and I was in somewhat of a hurry.

Magic in the Middles
from RecipeGirl

DOUGH:
1½ cups (6¼ ounces) unbleached all-purpose flour
½ cup (1½ ounces) unsweetened cocoa powder
½ tsp baking soda
¼ tsp salt
½ cup (3½ ounces) granulated sugar (plus extra for dipping)
½ cup (4 ounces) brown sugar, packed
½ cup (4 ounces or 1 stick) unsalted butter
¼ cup (2 3/8 ounces) smooth peanut butter (I suggest you try Dark Chocolate Peanut Butter)
1 tsp vanilla extract
1 large egg

FILLING:
¾ cup (7 1/8 ounces) smooth peanut butter (again, Dark Chocolate Peanut Butter)
¾ cup (3 ounces) powdered sugar

1. Preheat oven to 375°F. Lightly grease (or line with parchment) two baking sheets.

2. Prepare dough: In a medium bowl, whisk together flour, cocoa, baking soda and salt. In another medium bowl, beat together sugars, butter, and peanut butter until light and fluffy. Add vanilla and egg, beating to combine, then stir in dry ingredients, blending well.

3. Prepare filling: In a small bowl, stir together peanut butter and powdered sugar until smooth. (I actually decided to do this with the Kitchen Aid because me trying to mix it together myself just wasn't cutting it. Not only was it fast but the sugar incorporated with the peanut butter much better) With floured hands, roll the filling into 26 one-inch balls (When making chocolate cake/cookies, mix a bit of cocoa powder into your flour so that it blends in well with your baked goods. You wouldn't want streaks of white to mess up your presentation would you?).

4. Shape cookies: Break off about 1 Tbsp. of the dough, make an indentation in the center with your finger (I just flattened it like a pancake almost), and press one of the peanut butter balls into the indentation. Bring the dough up and over the filling, pressing it closed; roll the cookie in the palms of your hand to smooth it out. Repeat with remaining dough and filling. (I did use my Tablespoon to measure the dough out and let me tell you, I had just enough dough for all 26 of my peanut butter balls. RecipeGirl was spot on!)

5. Dip the top of each cookie in granulated sugar and place on prepared baking sheets about 2 inches apart. Grease the bottom of a drinking glass and use it to flatten each cookie to about ½-inch-thick.

6. Bake cookies for 7 to 9 minutes, until they’re set (They will come out quite soft but they will set up once they are cooled. You want to be very careful when making chocolate cookies since it is harder to tell if they are burning or not). Remove them from the oven and cool on a rack.

Yield: About 26 cookies

8.25.2009

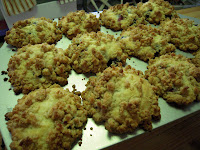
Blueberry Streusel Muffins

Have I told you lately that I love blueberries? ^_^ They are by far the best fruit that God created.

Brad and I went blueberry picking again for my birthday this year and unfortunately, I wasn't able to control myself as well this year and ate a good majority of them before we ended up freezing them. Whoops! ::looks innocently:: By the way, what is the best way to freeze blueberries? Well let me tell you. Place your fresh blueberries on a cookie sheet or shallow pan in a single layer. Set berries in the freezer until frozen (this will take an hour or so). Once frozen, pour into a freezer bag and viola! Individually frozen blueberries that are much easier to remove and use in a recipe. Love it!

Anyway, I had wanted to make some fresh blueberry muffins and I didn't want my precious fruit to go to waste on some bland recipe so I went straight to Cook's Illustrated/America's Test Kitchen. I have never been disappointed with any of the recipes that I have gotten from them and I had remembered seeing blueberry muffins being featured on the cover. However, of course I couldn't find my CI magazine. I did find a recipe on their website though but it called for jam, which I didn't want to do. So I did some more searching and what I found was a recipe from Cook's Country, another branch of America's Test Kitchen. I liked what I saw so I decided to give it a go.

Guess what? Another winner! I have to admit there were some muffins that had more berries than others, as well as some where the blueberries were more towards the bottom but I honestly think that was my mistake. Either way, I'm keeping this recipe around.


Blueberry Streusel Muffins
from Cook's Country

Makes 12

To prevent a streaky batter, leave the blueberries in the freezer until the last possible moment. Wyman's brand frozen wild blueberries are our first choice, but an equal amount of fresh blueberries may be substituted.


Streusel
1 1/4 cups all-purpose flour
1/3 cup packed dark brown sugar
1/3 cup granulated sugar
1/2 teaspoon ground cinnamon

Pinch salt
7 tablespoons unsalted butter , melted

Muffins
4 tablespoons unsalted butter , melted and cooled slightly, plus extra for preparing muffin tin
2 cups all-purpose flour , plus extra for preparing muffin tin
1 large egg
1 teaspoon vanilla extract
1 cup granulated sugar
1 teaspoon grated lemon zest
1/2 cup buttermilk
1 tablespoon baking powder
1/2 teaspoon salt
1 1/2 cups frozen blueberries

1. For the streusel: Combine flour, sugars, cinnamon, and salt in bowl. Drizzle with melted butter and toss with fork until evenly moistened and mixture forms large chunks with some pea-sized pieces throughout.

2. For the muffins: Adjust oven rack to middle position and heat oven to 375 degrees. Grease and flour 12-cup muffin tin. Whisk egg in medium bowl until pale and evenly combined, about 30 seconds. Add vanilla, sugar, and zest and whisk vigorously until thick, about 30 seconds. Slowly whisk in melted butter; add buttermilk and whisk until combined.

3. Reserve 1 tablespoon flour. Whisk remaining flour, baking powder, and salt in large bowl. Fold in egg mixture until nearly combined. Toss blueberries with reserved flour and fold into batter until just combined.

4. Divide batter in muffin tin and top with streusel. Bake until light golden brown and toothpick inserted into center of muffin comes out with few dry crumbs attached, 23 to 27 minutes. Cool muffins in tin for 20 minutes, then carefully transfer muffins to rack to cool completely. (Muffins can be stored in airtight container at room temperature for 3 days.)

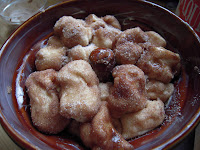
mmmm....Monkey Bread

Do you want to know just one of the great things about having the in-laws that I do? On the morning of a major holiday (i.e. Christmas, Thanksgiving...), my father-in-law gets up a little earlier and makes some deliciously sweet Monkey Bread. It's one of my new favorite holiday traditions.

For my birthday this year (back in July) Brad bought me a Monkey Bread Ceramic Mold from Williams Sonoma. I was quite excited, especially when I found a recipe on the reverse side of the cardboard sleeve. So when my in-laws came to visit a couple weeks ago, I thought it would be a perfect time to try out my new "toy".

So what do I have to say about the experience? Well I love making anything I can from scratch so that was great and not to mention that the final product turned out fabulous. However, as a word of warning, the whole process from pantry to plate is quite long...as in 4 hours or so. With that said, if you are planning on making this, read the whole recipe and budget your time well. If you don't want to devote that much time to the process (though I think the wait is worth it), you can do one of two things. 1. You could go to your local Williams Sonoma store and purchase the Monkey Bread mix or 2. You could buy refrigerated biscuit dough or perhaps a frozen bread dough (though I forget at the moment which one my in-laws suggested I try) and skip a few time consuming steps.

Also, one last comment: Perhaps I am just that bad at counting but the past couple of times that I have made this dough, it has turned out extremely wet. Like there is no way it would become bread dough unless I put almost a cup more of flour. Like I said, maybe I mess up my flour count somewhere down the line but I just add a little flour at a time until it resembles a soft bread dough and it has turned out great. Of course, soft bread dough means sticky hands so be sure to cover your hands with flour before handling lightly. Okay, maybe one more comment. Do you need a special monkey bread pan? No, any baking dish would probably do (my father-in-law uses a small ceramic casserole dish) but the Monkey Bread pan does allow for fewer doughy pieces. Either method you use, it turns out delicious.

Monkey Bread
by Williams Sonoma (slightly adapted by me)

2 Tbsp unsalted butter, softened

For the Dough:

3/4 c warm milk (about 110 degrees F)
1/2 c warm water (about 110 degrees F)
2 Tbsp unsalted butter, melted
1/4 c granulated sugar
1 egg, lightly beaten
1 package rapid-rise yeast
3 1/4 c all purpose flour, plus more for dusting
2 tsp salt.

For Sugar Coating

1 c firmly packed light brown sugar (or granulated sugar)
2 tsp ground cinnamon
8 Tbsp unsalted butter, melted

For the Glaze (which I think is optional) 4 Tbsp unsalted butter
1/2 c firmly packed light brown sugar
1/4 c maple syrup
1 tsp ground cinnamon
1 Tbsp water

  1. Have all the ingredients at room temperature. Butter the monkey bread baking mold with the softened butter. (I found this easier to do when using a pastry brush to spread the butter)
  2. To make the dough, in a bowl, whisk together the milk, water, melted butter, granulated sugar, egg, and yeast.
  3. In the bowl of an electric mixer fitted with the dough hook, combine the flour and salt and beat on low speed just until combined. Slowly add the milk mixture and beat until the dough comes together, 1 to 2 minutes. Increase the speed to medium and beat until the dough is shiny and smooth, 5 to 6 minutes.
  4. Turn the dough out onto a lightly floured surface and knead until smooth, about 1 minutes. Form the dough into a ball. Coat the inside of a large bowl with nonstick cooking spray, place the dough in the bowl and coat the surface of the dough with cooking spray. Cover the bowl with plastic wrap and let stand in a warm place until doubled in bulk, about 1 hour.
  5. Meanwhile, prepare the sugar coating: In a bowl, stir together the sugar and cinnamon. Put the melted butter in another bowl. Set aside.
  6. Turn the dough out onto a floured surface and shape into an 8 inch square. (Using a pizza cutter) Cut the dough into 6 equal strips, then cut each piece crosswise into 8 pieces to form a total of 48 pieces. Roll each piece into a ball, dip into the melted butter and roll in the sugar-cinnamon mixture, coasting well. Stack the balls in the prepared pan. Cover with plastic wrap and let rise in a warm place for 30 to 45 minutes. Do not let the dough rise over the top of the pan.
  7. Position a rack in the lower third of an oven. Place a piece of aluminum foil on the rack to catch any drips during baking. Preheat oven to 350 degrees F.
  8. Remove the plastic wrap from the pan, set the pan on the foil and bake, uncovered, for 20 minutes. Cover the pan loosely with aluminum foil and continue baking until the top is golden brown and the center edge of the bread, next to the tube, springs back when touched, 25 to 35 minutes more.
  9. Meanwhile, make the glaze: In a saucepan over medium heat, combine the butter, brown sugar, maple syrup, cinnamon and water. Heat, whisking, until the ingredients are dissolved. Bring to a boil and boil for 1 minutes. Remove the pan from the heat and cover to keep warm.
  10. Transfer the bread pan to a wire rack and let cool for 5 minutes. Turn the bread out onto a plate and let cool for 10 minutes. Using a spoon, drizzle the warm glaze over the top and sides of the bread. let the glaze set for about 10 minutes. Serve the bread warm.